- Essentials
- Getting Started
- Agent
- API
- APM Tracing
- Containers
- Dashboards
- Database Monitoring
- Datadog
- Datadog Site
- DevSecOps
- Incident Management
- Integrations
- Internal Developer Portal
- Logs
- Monitors
- Notebooks
- OpenTelemetry
- Profiler
- Search
- Session Replay
- Security
- Serverless for AWS Lambda
- Software Delivery
- Synthetic Monitoring and Testing
- Tags
- Workflow Automation
- Learning Center
- Support
- Glossary
- Standard Attributes
- Guides
- Agent
- Integrations
- Developers
- Authorization
- DogStatsD
- Custom Checks
- Integrations
- Build an Integration with Datadog
- Create an Agent-based Integration
- Create an API-based Integration
- Create a Log Pipeline
- Integration Assets Reference
- Build a Marketplace Offering
- Create an Integration Dashboard
- Create a Monitor Template
- Create a Cloud SIEM Detection Rule
- Install Agent Integration Developer Tool
- Service Checks
- IDE Plugins
- Community
- Guides
- OpenTelemetry
- Administrator's Guide
- API
- Partners
- Datadog Mobile App
- DDSQL Reference
- CoScreen
- CoTerm
- Remote Configuration
- Cloudcraft (Standalone)
- In The App
- Dashboards
- Notebooks
- DDSQL Editor
- Reference Tables
- Sheets
- Monitors and Alerting
- Service Level Objectives
- Metrics
- Watchdog
- Bits AI
- Internal Developer Portal
- Error Tracking
- Change Tracking
- Event Management
- Incident Response
- Actions & Remediations
- Infrastructure
- Cloudcraft
- Resource Catalog
- Universal Service Monitoring
- End User Device Monitoring
- Hosts
- Containers
- Processes
- Serverless
- Network Monitoring
- Storage Management
- Cloud Cost
- Application Performance
- APM
- Continuous Profiler
- Database Monitoring
- Agent Integration Overhead
- Setup Architectures
- Setting Up Postgres
- Setting Up MySQL
- Setting Up SQL Server
- Setting Up Oracle
- Setting Up Amazon DocumentDB
- Setting Up MongoDB
- Connecting DBM and Traces
- Data Collected
- Exploring Database Hosts
- Exploring Query Metrics
- Exploring Query Samples
- Exploring Database Schemas
- Exploring Recommendations
- Troubleshooting
- Guides
- Data Streams Monitoring
- Data Observability
- Digital Experience
- Real User Monitoring
- Synthetic Testing and Monitoring
- Continuous Testing
- Product Analytics
- Session Replay
- Software Delivery
- CI Visibility
- CD Visibility
- Deployment Gates
- Test Optimization
- Code Coverage
- PR Gates
- DORA Metrics
- Feature Flags
- Security
- Security Overview
- Cloud SIEM
- Code Security
- Cloud Security
- App and API Protection
- Workload Protection
- Sensitive Data Scanner
- AI Observability
- Log Management
- Administration
Configuring Single Sign-On With SAML
Overview
This page covers how to enable single sign-on (SSO) with SAML in Datadog, as well as how enterprise customers can enable multiple SAML identity providers (IdPs).
Notes:
- If you don’t have SAML enabled on your Datadog account, reach out to support to enable it.
- This documentation assumes that you already have a SAML Identity Provider (IdP). If you do not have a SAML IdP, there are several IdPs that have integrations with Datadog such as Active Directory, Auth0, Google, LastPass, Microsoft Entra ID, Okta, and SafeNet.
- SAML configuration requires Datadog Administrator access, or the
Org Managementpermission if you’re using custom roles.
Configuring SAML
To begin configuration, see your IdP’s documentation:
Download Datadog’s Service Provider metadata to configure your IdP to recognize Datadog as a Service Provider.
In Datadog, hover over your username in the bottom left corner and select Organization Settings. Select Login Methods and click Configure under SAML.
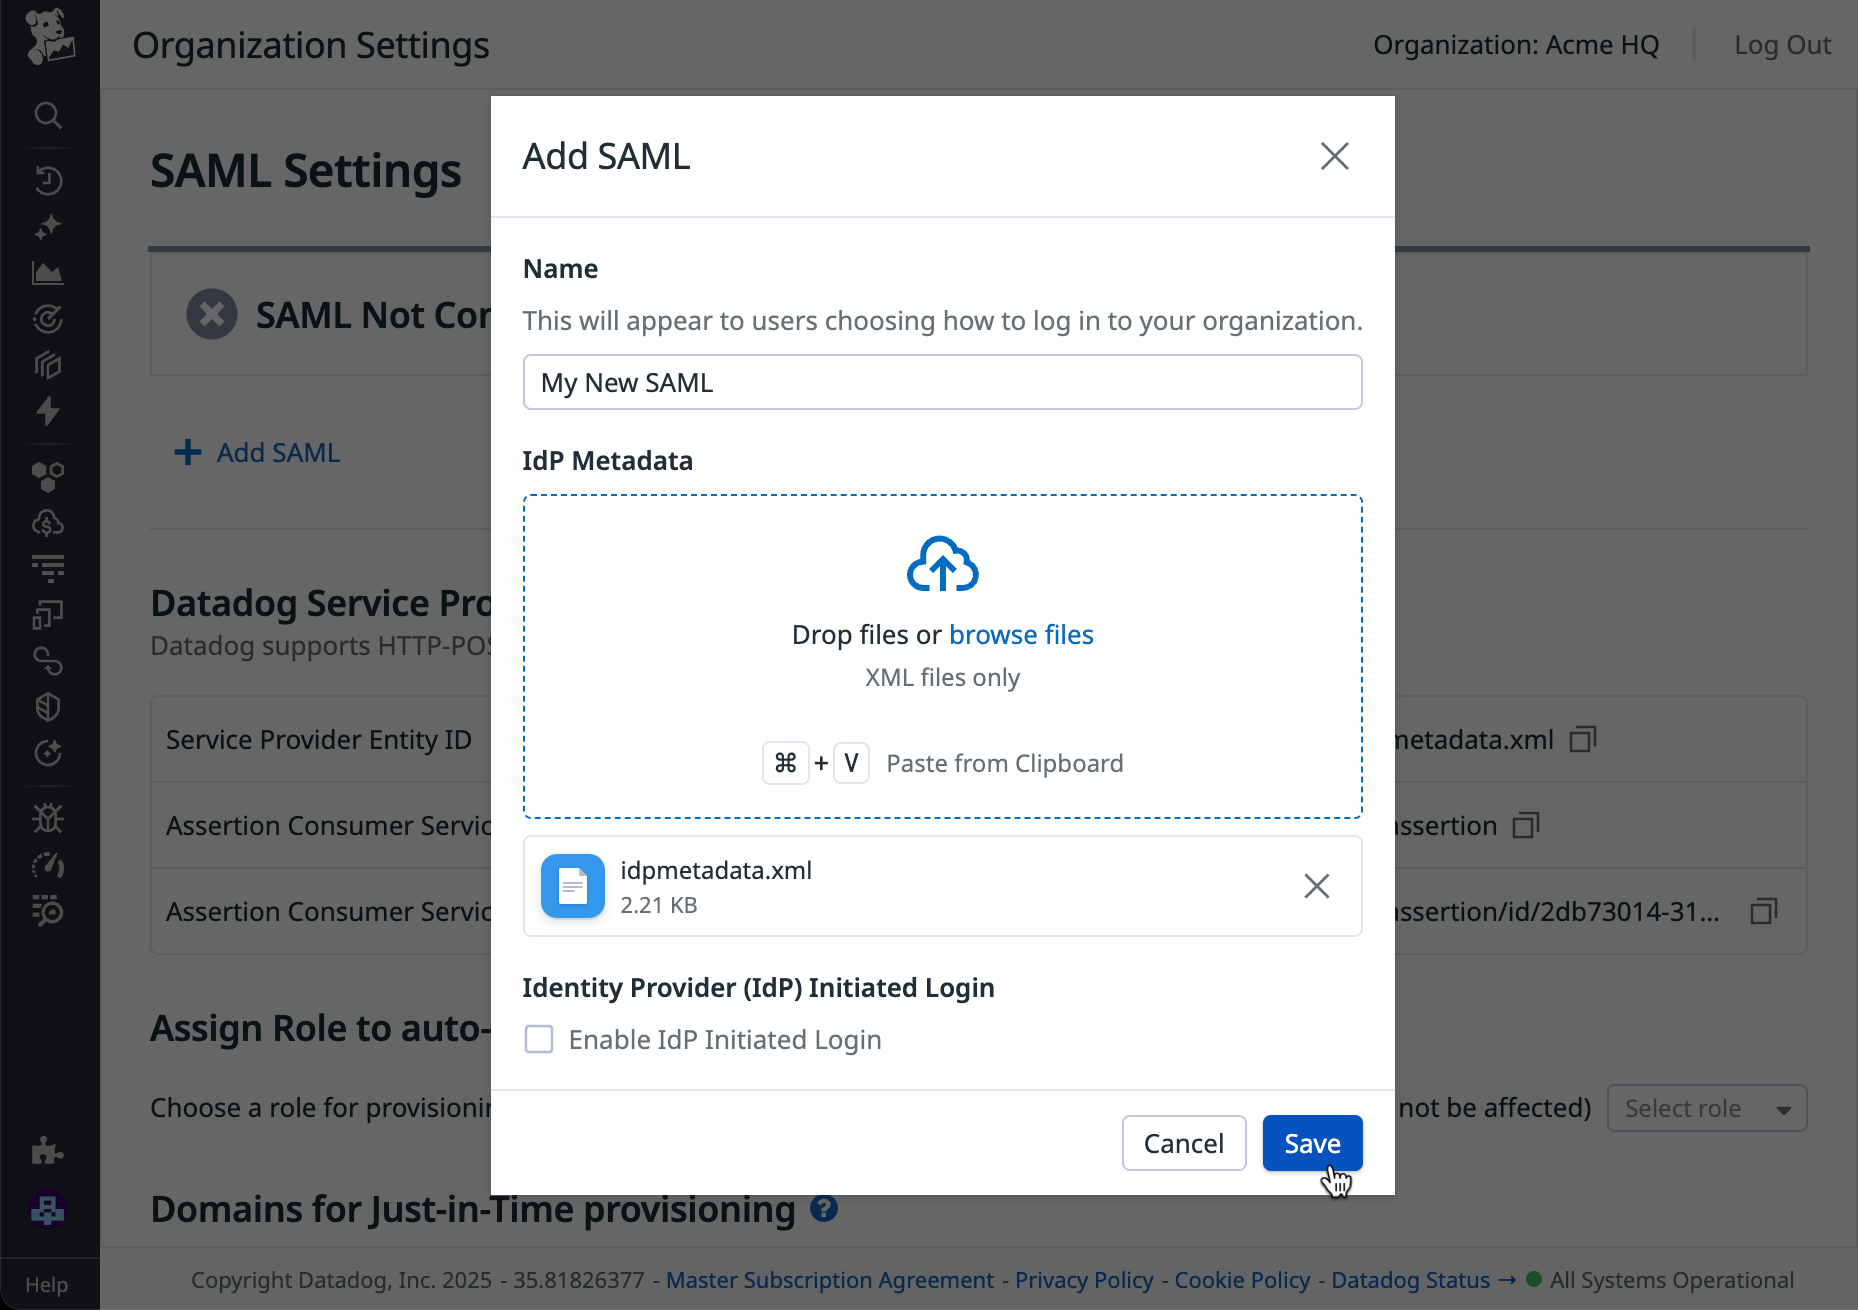
Click Add SAML.
In the configuration modal:
- Create a user-friendly name for this SAML provider. The name appears to end users when they choose a login method.
- Upload the IdP metadata from your SAML identity provider by clicking browse files or dragging and dropping the XML metadata file onto the modal.The IdP metadata must contain ASCII characters only.
Click Save.
Note: To configure SAML for a multi-org, see Managing Multiple-Organization Accounts.
Configuring multiple SAML providers
Enterprise customers can have multiple SAML configurations per organization (up to three at the same time). This feature simplifies identity management across complex environments, such as during IdP changes, mergers, or contractor onboarding.
To configure additional SAML providers:
Navigate to Organization Settings > Login Methods. Under SAML, click Update, then Add SAML.
In the configuration modal:
- Create a user-friendly name for this SAML provider. The name appears to end users when they choose a login method.All users can see and access all configured IdPs; there is no way to assign specific user groups to specific configurations. Setting clear and descriptive names for each provider helps users select the appropriate IdP during login. Also note that there is no way to set a default configuration.
- Upload the IdP metadata from your SAML identity provider by clicking browse files or dragging and dropping the XML metadata file onto the modal.
- Create a user-friendly name for this SAML provider. The name appears to end users when they choose a login method.
Click Save.
Role mapping with multiple SAML providers
If you use SAML role mapping or team mapping and want to use the same mappings in any additional providers you add, make sure the attributes in the new IdP(s) match what is defined in your mappings. If you add a new IdP, make sure to either use the same attribute names as your existing IdP, or add new mappings that align with the new IdP’s attributes to ensure roles and teams are assigned correctly when users log in with different IdPs.

