- Essentials
- Getting Started
- Agent
- API
- APM Tracing
- Containers
- Dashboards
- Database Monitoring
- Datadog
- Datadog Site
- DevSecOps
- Incident Management
- Integrations
- Internal Developer Portal
- Logs
- Monitors
- Notebooks
- OpenTelemetry
- Profiler
- Search
- Session Replay
- Security
- Serverless for AWS Lambda
- Software Delivery
- Synthetic Monitoring and Testing
- Tags
- Workflow Automation
- Learning Center
- Support
- Glossary
- Standard Attributes
- Guides
- Agent
- Integrations
- Developers
- Authorization
- DogStatsD
- Custom Checks
- Integrations
- Build an Integration with Datadog
- Create an Agent-based Integration
- Create an API-based Integration
- Create a Log Pipeline
- Integration Assets Reference
- Build a Marketplace Offering
- Create an Integration Dashboard
- Create a Monitor Template
- Create a Cloud SIEM Detection Rule
- Install Agent Integration Developer Tool
- Service Checks
- IDE Plugins
- Community
- Guides
- OpenTelemetry
- Administrator's Guide
- API
- Partners
- Datadog Mobile App
- DDSQL Reference
- CoScreen
- CoTerm
- Remote Configuration
- Cloudcraft (Standalone)
- In The App
- Dashboards
- Notebooks
- DDSQL Editor
- Reference Tables
- Sheets
- Monitors and Alerting
- Service Level Objectives
- Metrics
- Watchdog
- Bits AI
- Internal Developer Portal
- Error Tracking
- Change Tracking
- Event Management
- Incident Response
- Actions & Remediations
- Infrastructure
- Cloudcraft
- Resource Catalog
- Universal Service Monitoring
- End User Device Monitoring
- Hosts
- Containers
- Processes
- Serverless
- Network Monitoring
- Storage Management
- Cloud Cost
- Application Performance
- APM
- Continuous Profiler
- Database Monitoring
- Agent Integration Overhead
- Setup Architectures
- Setting Up Postgres
- Setting Up MySQL
- Setting Up SQL Server
- Setting Up Oracle
- Setting Up Amazon DocumentDB
- Setting Up MongoDB
- Connecting DBM and Traces
- Data Collected
- Exploring Database Hosts
- Exploring Query Metrics
- Exploring Query Samples
- Exploring Database Schemas
- Exploring Recommendations
- Troubleshooting
- Guides
- Data Streams Monitoring
- Data Observability
- Digital Experience
- Real User Monitoring
- Synthetic Testing and Monitoring
- Continuous Testing
- Product Analytics
- Session Replay
- Software Delivery
- CI Visibility
- CD Visibility
- Deployment Gates
- Test Optimization
- Code Coverage
- PR Gates
- DORA Metrics
- Feature Flags
- Developer Integrations
- Security
- Security Overview
- Cloud SIEM
- Code Security
- Cloud Security
- App and API Protection
- AI Guard
- Workload Protection
- Sensitive Data Scanner
- AI Observability
- Log Management
- Observability Pipelines
- Configuration
- Sources
- Processors
- Destinations
- Packs
- Akamai CDN
- Amazon CloudFront
- Amazon VPC Flow Logs
- AWS Application Load Balancer Logs
- AWS CloudTrail
- AWS Elastic Load Balancer Logs
- AWS Network Load Balancer Logs
- Cisco ASA
- Cloudflare
- F5
- Fastly
- Fortinet Firewall
- HAProxy Ingress
- Istio Proxy
- Juniper SRX Firewall Traffic Logs
- Netskope
- NGINX
- Okta
- Palo Alto Firewall
- Windows XML
- ZScaler ZIA DNS
- Zscaler ZIA Firewall
- Zscaler ZIA Tunnel
- Zscaler ZIA Web Logs
- Search Syntax
- Scaling and Performance
- Monitoring and Troubleshooting
- Guides and Resources
- Log Management
- CloudPrem
- Administration
Advanced Options for Browser Testing Steps
Overview
This page describes advanced options for Synthetic Monitoring Browser Tests.
Locate an element
Datadog algorithm
Flakiness is a pain point in end-to-end testing because tests occasionally fail when a frontend team implements changes, causing an identifier in your test to alert instead of an actual application issue.
To prevent flaky tests, Datadog uses an algorithm that leverages a set of locators to target elements in browser tests. A small change in the UI may modify an element (for example, moving it to another location). The browser test automatically locates the element again based on points of reference that were not affected by the change.
When the test runs successfully, the browser test recomputes (or “self heals”) any broken locators with updated values, ensuring your tests do not break from minor UI changes and automatically adapt to your application’s UI.
To ensure that your browser test does not validate an unexpected change, use assertions in your test creation. Assertions allow you to define what is and what is not expected behavior associated with the test step journey.
User specified locator
By default, browser tests use the Datadog locator system. When a test searches for a specific element to interact with (for example, a checkout button), instead of looking at an element with a specific XPath or a specific CSS selector, the test uses several different points of reference to locate the element (for example, XPath, text, classes, and nearby elements).
These points of reference become a set of locators, each of which uniquely define the element. You should only use custom selectors in edge cases because the Datadog locator system enables tests to be self-maintaining.
Custom selectors are created by performing a step of interest in the recorder (such as a click, hover, or assert) on any element of your page. This specifies the kind of step that needs to be performed.
To use a specific identifier (for example, to click on the nth element in a dropdown menu regardless of what the content of the element is):
- Record or manually add a step to your recording.
- Click on the recorded step and click Advanced options.
- Enter an XPath 1.0 selector or CSS class/ID under User Specified Locator, for example:
div,h1, or.hero-body, for the HTML element. - Optionally, use handlebars (
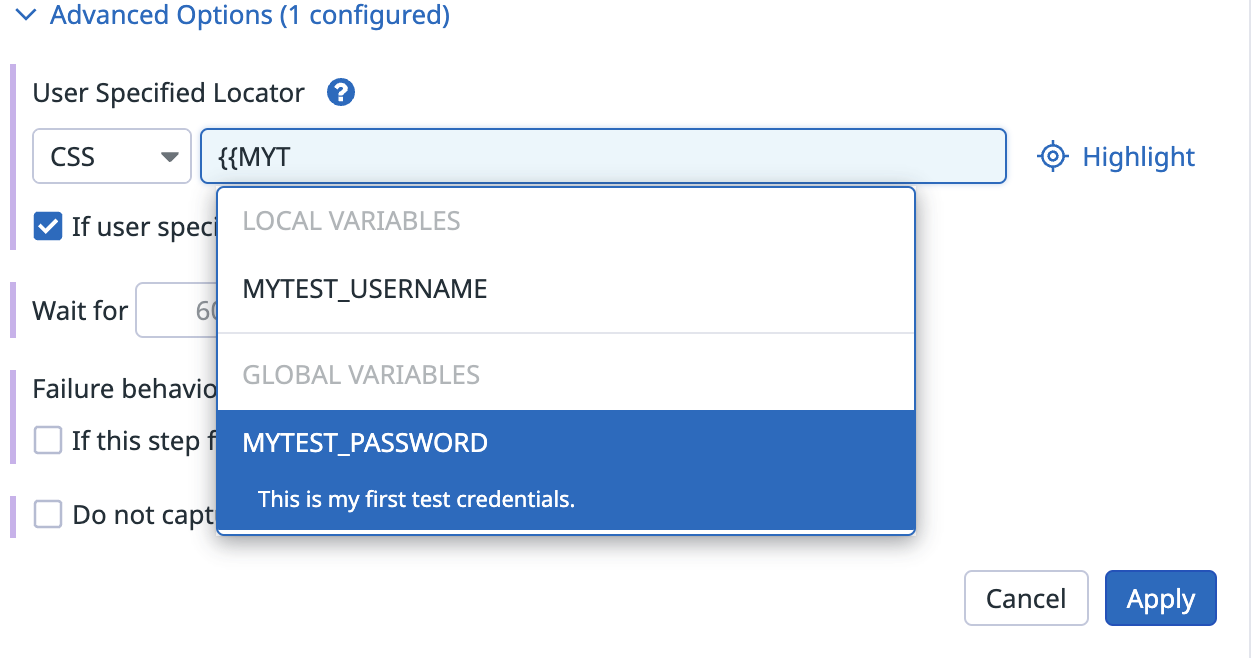
{{) syntax to insert dynamic content. A pre-populated dropdown list of variables is shown:
- Once you have defined an element, click Highlight to highlight the element in the recording to the right.
By default, the If user specified locator fails, fail test checkbox is selected. This means that if the defined locator fails, the test is considered a failure.
You can decide to fall back on the regular browser test algorithm by clearing the If user specified locator fails, fail test box.
Timeout
If a browser test cannot locate an element, it retries the step for 60 seconds.
You can decide to decrease or increase this time out up to 300 seconds if you want your test to wait for less or more time to be able to find the step targeted element.
Optional step
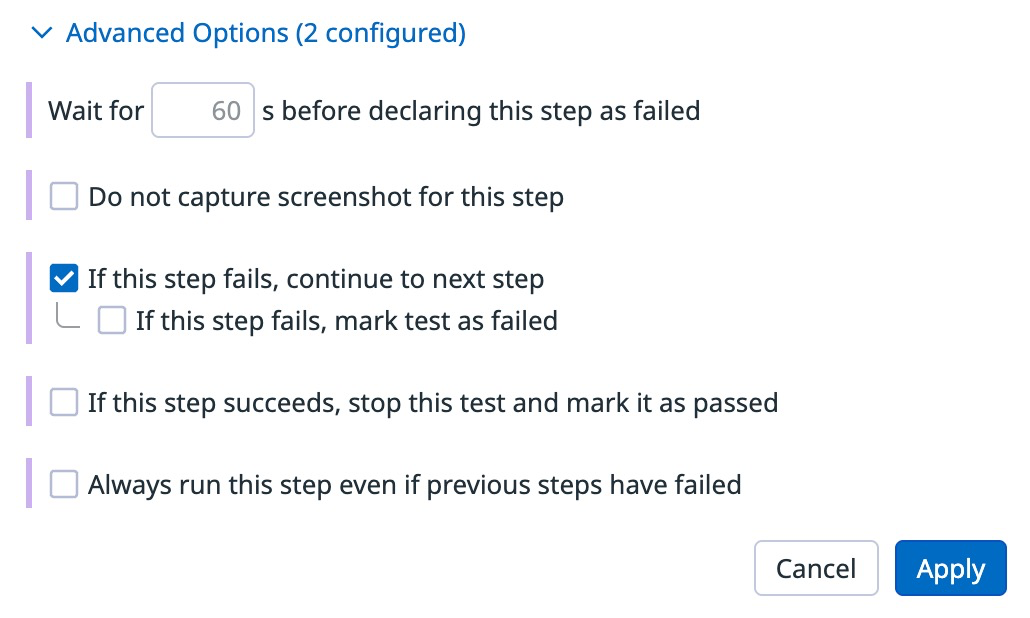
In some cases, such as in the event of a pop-up, you may want to make some steps optional. To configure this option, select If this step fails, continue to next step. For example, if the step fails after the amount of minutes specified on the timeout option (60 seconds by default), then the test moves on and executes the next step.
Exit on success
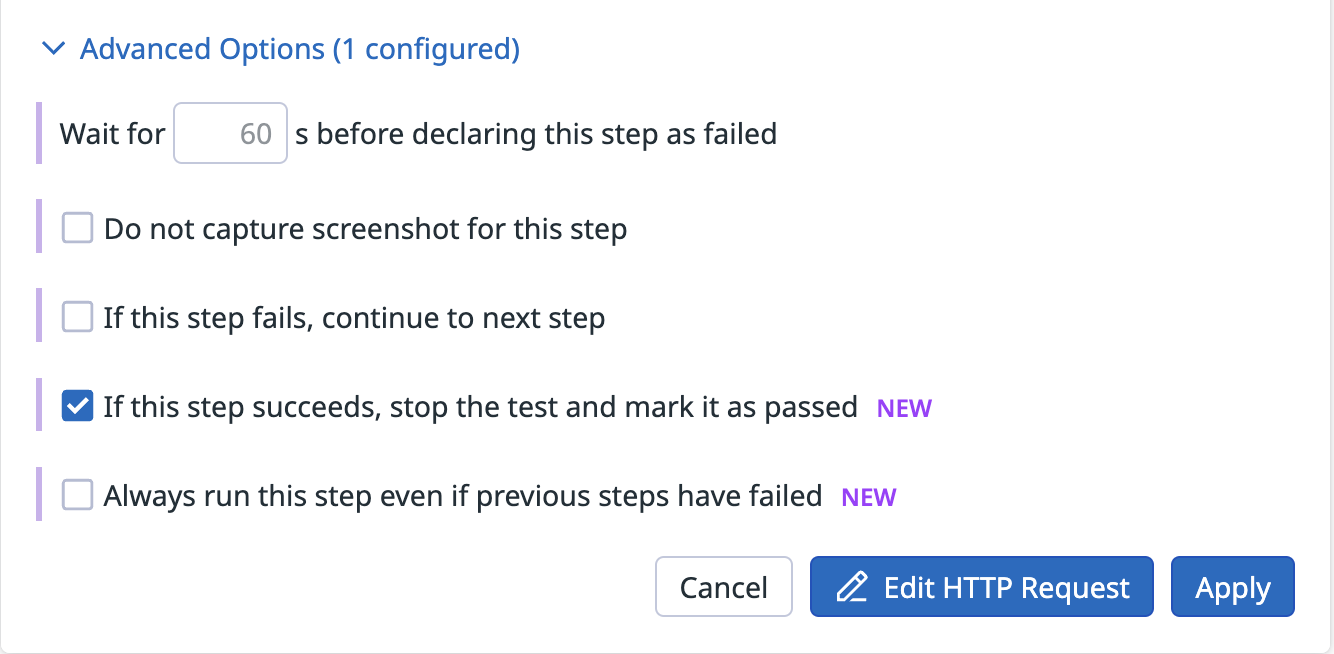
Configure this option to exit the test after a successful step completion. This prevents running unnecessary steps and avoids marking the test as a failure.
Always run this step
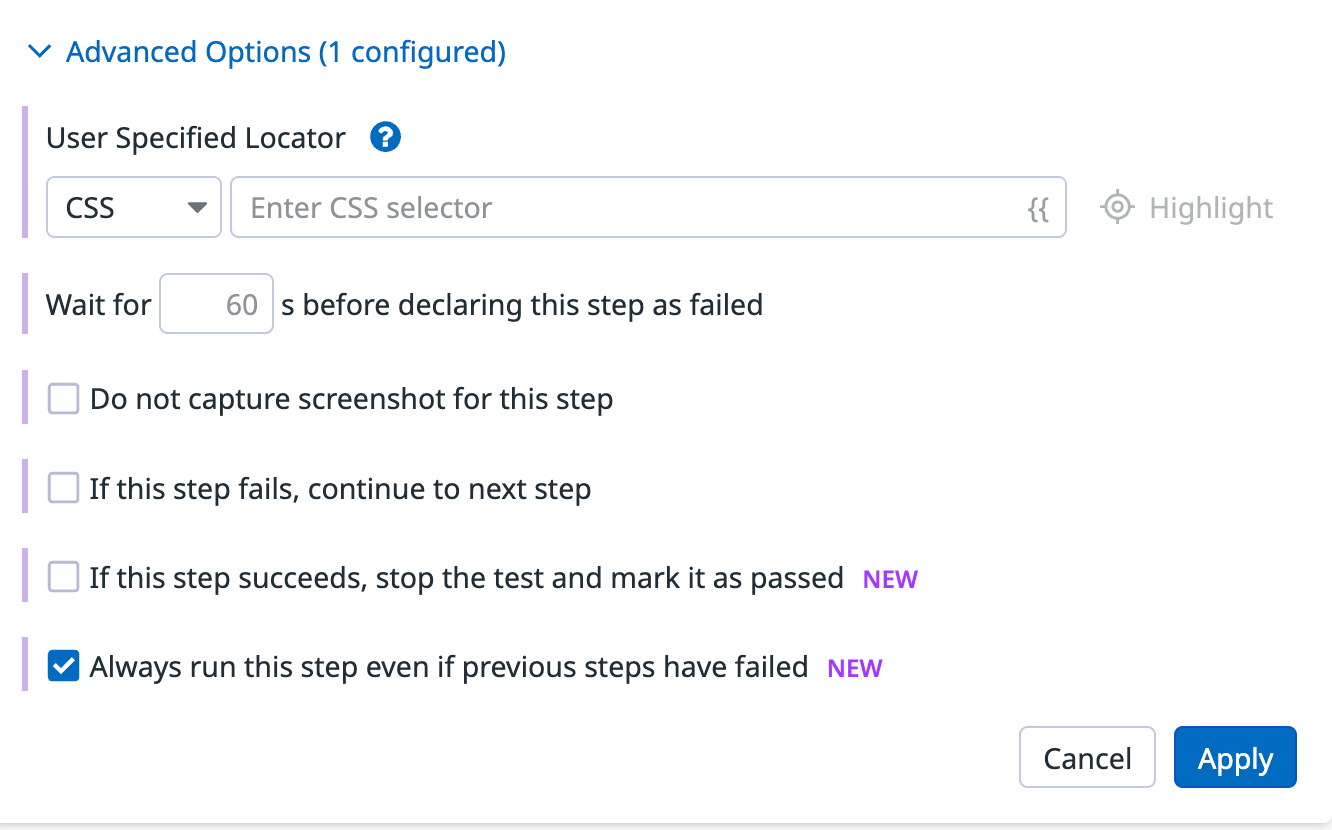
Configure this option to run this step even if the previous steps have failed. This can be useful for clean-up tasks when you want subsequent steps to proceed.
Prevent screenshot capture
You can prevent a step screenshot from being captured at test execution. This is helpful to ensure no sensitive data gets featured in your test results. Use mindfully as it can make failure troubleshooting more difficult. For more information, see Synthetic Monitoring Data Security.
Note: This feature is also available at the global test level as an advanced option in your browser test configuration.
Subtests
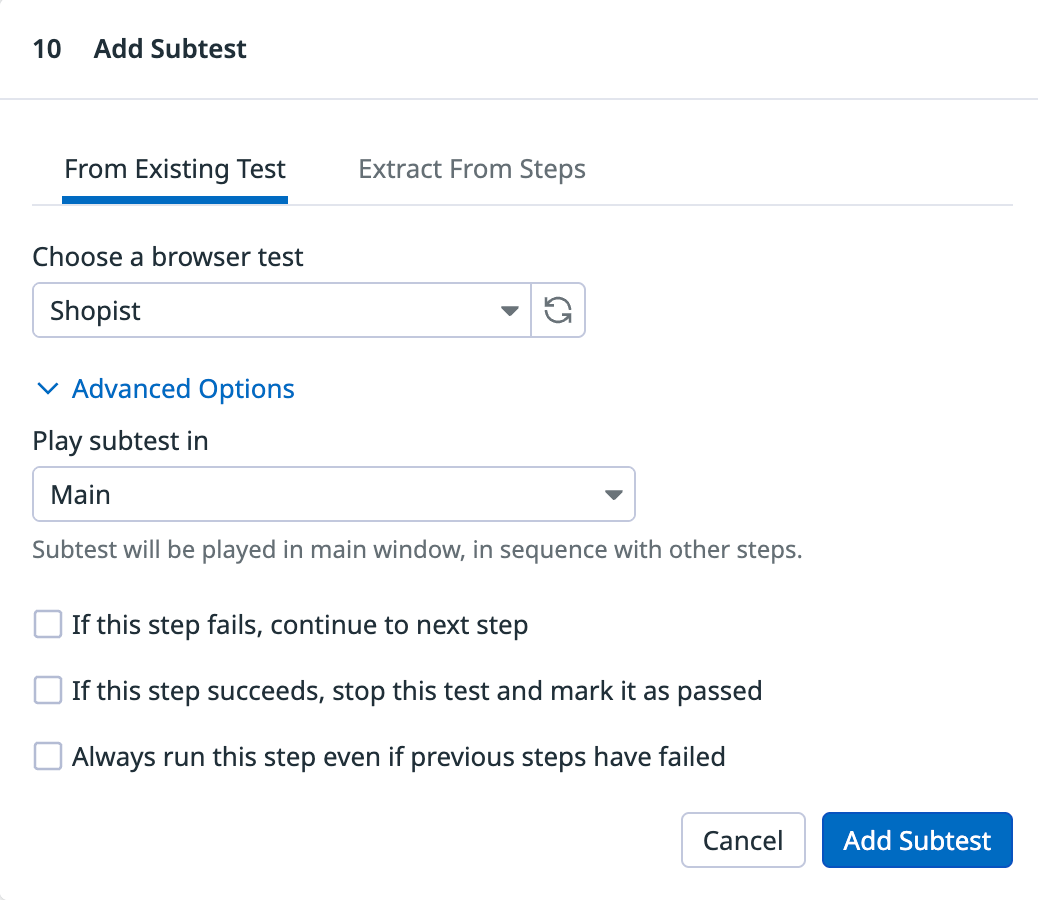
The advanced options for subtests allow you to choose where you want your subtest to be played and set the behavior of your browser test if the subtest fails.
Set the subtest window
- Main (default): Subtest is played in your main window, in sequence with other steps.
- New: Subtest is played in a new window, which is closed at the end of the subtest. This means the window cannot be reused.
- Specific window: Subtest is played in a numbered window, which can be reused by other subtests.
Opening your subtest in the main window means that your subtest is the continuation of your main test as it uses the URL from the previous step. Opening your subtest in a new window, or in a specific window, means that the test starts running from the subtest start URL.
Set failure behavior
Click If this step fails, continue to next step and If this step fails, mark test as failed to ensure your browser test continues if the subtest fails, or fails entirely if the subtest fails.
Set success behavior
Click If this step succeeds, stop this test and mark it as passed to ensure your browser test stops immediately and is marked as passed.
Set execution behavior
Click Always run this step to ensure this step runs even if the previous steps in the browser test have failed.
Override variables in subtests
To override a variable value in a browser test subtest, name the variable in the subtest and use the same variable name in the parent test, and the browser test overrides the subtest value.
For more information, see Browser Test Steps.
Further Reading
Additional helpful documentation, links, and articles:
