- Esenciales
- Empezando
- Agent
- API
- Rastreo de APM
- Contenedores
- Dashboards
- Monitorización de bases de datos
- Datadog
- Sitio web de Datadog
- DevSecOps
- Gestión de incidencias
- Integraciones
- Internal Developer Portal
- Logs
- Monitores
- OpenTelemetry
- Generador de perfiles
- Session Replay
- Security
- Serverless para Lambda AWS
- Software Delivery
- Monitorización Synthetic
- Etiquetas (tags)
- Workflow Automation
- Centro de aprendizaje
- Compatibilidad
- Glosario
- Atributos estándar
- Guías
- Agent
- Arquitectura
- IoT
- Plataformas compatibles
- Recopilación de logs
- Configuración
- Automatización de flotas
- Solucionar problemas
- Detección de nombres de host en contenedores
- Modo de depuración
- Flare del Agent
- Estado del check del Agent
- Problemas de NTP
- Problemas de permisos
- Problemas de integraciones
- Problemas del sitio
- Problemas de Autodiscovery
- Problemas de contenedores de Windows
- Configuración del tiempo de ejecución del Agent
- Consumo elevado de memoria o CPU
- Guías
- Seguridad de datos
- Integraciones
- Desarrolladores
- Autorización
- DogStatsD
- Checks personalizados
- Integraciones
- Build an Integration with Datadog
- Crear una integración basada en el Agent
- Crear una integración API
- Crear un pipeline de logs
- Referencia de activos de integración
- Crear una oferta de mercado
- Crear un dashboard de integración
- Create a Monitor Template
- Crear una regla de detección Cloud SIEM
- Instalar la herramienta de desarrollo de integraciones del Agente
- Checks de servicio
- Complementos de IDE
- Comunidad
- Guías
- OpenTelemetry
- Administrator's Guide
- API
- Partners
- Aplicación móvil de Datadog
- DDSQL Reference
- CoScreen
- CoTerm
- Remote Configuration
- Cloudcraft
- En la aplicación
- Dashboards
- Notebooks
- Editor DDSQL
- Reference Tables
- Hojas
- Monitores y alertas
- Watchdog
- Métricas
- Bits AI
- Internal Developer Portal
- Error Tracking
- Explorador
- Estados de problemas
- Detección de regresión
- Suspected Causes
- Error Grouping
- Bits AI Dev Agent
- Monitores
- Issue Correlation
- Identificar confirmaciones sospechosas
- Auto Assign
- Issue Team Ownership
- Rastrear errores del navegador y móviles
- Rastrear errores de backend
- Manage Data Collection
- Solucionar problemas
- Guides
- Change Tracking
- Gestión de servicios
- Objetivos de nivel de servicio (SLOs)
- Gestión de incidentes
- De guardia
- Status Pages
- Gestión de eventos
- Gestión de casos
- Actions & Remediations
- Infraestructura
- Cloudcraft
- Catálogo de recursos
- Universal Service Monitoring
- Hosts
- Contenedores
- Processes
- Serverless
- Monitorización de red
- Cloud Cost
- Rendimiento de las aplicaciones
- APM
- Términos y conceptos de APM
- Instrumentación de aplicación
- Recopilación de métricas de APM
- Configuración de pipelines de trazas
- Correlacionar trazas (traces) y otros datos de telemetría
- Trace Explorer
- Recommendations
- Code Origin for Spans
- Observabilidad del servicio
- Endpoint Observability
- Instrumentación dinámica
- Live Debugger
- Error Tracking
- Seguridad de los datos
- Guías
- Solucionar problemas
- Límites de tasa del Agent
- Métricas de APM del Agent
- Uso de recursos del Agent
- Logs correlacionados
- Stacks tecnológicos de llamada en profundidad PHP 5
- Herramienta de diagnóstico de .NET
- Cuantificación de APM
- Go Compile-Time Instrumentation
- Logs de inicio del rastreador
- Logs de depuración del rastreador
- Errores de conexión
- Continuous Profiler
- Database Monitoring
- Gastos generales de integración del Agent
- Arquitecturas de configuración
- Configuración de Postgres
- Configuración de MySQL
- Configuración de SQL Server
- Configuración de Oracle
- Configuración de MongoDB
- Setting Up Amazon DocumentDB
- Conexión de DBM y trazas
- Datos recopilados
- Explorar hosts de bases de datos
- Explorar métricas de consultas
- Explorar ejemplos de consulta
- Exploring Database Schemas
- Exploring Recommendations
- Solucionar problemas
- Guías
- Data Streams Monitoring
- Data Jobs Monitoring
- Data Observability
- Experiencia digital
- Real User Monitoring
- Pruebas y monitorización de Synthetics
- Continuous Testing
- Análisis de productos
- Entrega de software
- CI Visibility
- CD Visibility
- Deployment Gates
- Test Visibility
- Configuración
- Network Settings
- Tests en contenedores
- Repositories
- Explorador
- Monitores
- Test Health
- Flaky Test Management
- Working with Flaky Tests
- Test Impact Analysis
- Flujos de trabajo de desarrolladores
- Cobertura de código
- Instrumentar tests de navegador con RUM
- Instrumentar tests de Swift con RUM
- Correlacionar logs y tests
- Guías
- Solucionar problemas
- Code Coverage
- Quality Gates
- Métricas de DORA
- Feature Flags
- Seguridad
- Información general de seguridad
- Cloud SIEM
- Code Security
- Cloud Security Management
- Application Security Management
- Workload Protection
- Sensitive Data Scanner
- Observabilidad de la IA
- Log Management
- Observability Pipelines
- Gestión de logs
- CloudPrem
- Administración
- Gestión de cuentas
- Seguridad de los datos
- Ayuda
Empezando con los Feature Flags
Este producto no es compatible con el sitio Datadog seleccionado. ().
Join the Preview!
Feature Flags está en vista previa. Completa el formulario para solicitar acceso.
Request AccessInformación general
Los marcadores de funciones de Datadog ofrecen una forma potente e integrada de gestionar la entrega de funciones, con capacidad de observación incorporada y una integración perfecta en toda la plataforma.
Métricas en tiempo real: Conoce quién recibe cada variante y la manera en que tu marcador afecta al estado y al rendimiento de tu aplicación, todo en tiempo real.
Admite cualquier tipo de datos: Utiliza booleanos, cadenas, números u objetos completos de JSON, el que necesite tu uso en case (incidencia).
Creado para la experimentación: Dirígete a audiencias específicas para tests A/B, lanza funciones gradualmente con versiones canarias y retrocede automáticamente cuando se detecten regresiones.
Compatible con OpenFeature: Se basa en la norma de OpenFeature, lo que garantiza la compatibilidad con las implementaciones existentes de OpenFeature y proporciona un enfoque independiente del proveedor para la gestión de marcadores de funciones.
Configura tus entornos
Es probable que tu organización ya disponga de entornos preconfigurados para Desarrollo, Escenificación y Producción. Si necesitas configurar estos u otros entornos, ve a la page (página) Entornos para crear consultas de etiquetas para cada entorno. También puedes identificar qué entorno debe considerarse como entorno de Producción.
Crea tu primer marcador de funciones
Step (UI) / paso (generic) 1: Importar e inicializar el kit de desarrollo de software (SDK)
En primer lugar, instala @datadog/openfeature-browser, @openfeature/web-sdk, y @openfeature/core como dependencias en tu project (proyecto):
yarn add @datadog/openfeature-browser@preview @openfeature/web-sdk @openfeature/core
A continuación, añade lo siguiente a tu project (proyecto) para inicializar el kit de desarrollo de software (SDK):
import { DatadogProvider } from '@datadog/openfeature-browser';
import { OpenFeature } from '@openfeature/web-sdk';

// Initialize the provider
const provider = new DatadogProvider({
   clientToken: '<CLIENT_TOKEN>',
   applicationId: '<APPLICATION_ID>',
   enableExposureLogging: true,
   site: 'datadoghq.com',
   env: '<YOUR_ENV>', // Same environment normally passed to the RUM SDK
   service: '<SERVICE_NAME>',
   version: '1.0.0',
});

// Set the provider
await OpenFeature.setProviderAndWait(provider);
Puedes encontrar más información sobre las opciones de configuración del kit de desarrollo de software (SDK) de OpenFeature en tu documentación. Para obtener más información sobre la creación de tokens del cliente e identificadores de la aplicación, consulta Claves de API y de aplicaciones.
Ptep (UI) / paso (generic) 2: Crear un marcador de función
Utiliza la interfaz de usuario de creación de marcadores de funciones para arrancar tu primer marcador de función. En forma predeterminada, el marcador está desactivado en todos los entornos.
Step (UI) / paso (generic) 3: Evaluar el marcador y escribir el código de la función
En el código de tu aplicación, utiliza el kit de desarrollo de software (SDK) para evaluar el marcador y la puerta de la nueva función.
import { OpenFeature } from '@openfeature/web-sdk';

const client = OpenFeature.getClient();

// If applicable, set relevant attributes on the client's global context
// (e.g. org id, user email)
await OpenFeature.setContext({
   org_id: 2,
   user_id: 'user-123',
   email: 'user@example.com',
   targetingKey: 'user-123',
});

// This is what the SDK returns if the flag is disabled in
// the current environment
const fallback = false;

const showFeature = await client.getBooleanValue('show-new-feature', fallback);
if (showFeature) {
   // Feature code here
}
Una vez que hayas finalizado este step (UI) / paso (generic), vuelve a desplegar la aplicación para recoger estos cambios. Puedes encontrar más ejemplos de uso en la documentación del kit de desarrollo de software (SDK).
Step (UI) / paso (generic) 4: Definir las reglas de selección y activar el marcador de función
Ahora que la aplicación está lista para check el valor de su marcador, puedes empezar a añadir reglas de orientación. Las reglas de orientación te permiten definir dónde o a quién servir diferentes variantes de tu función.
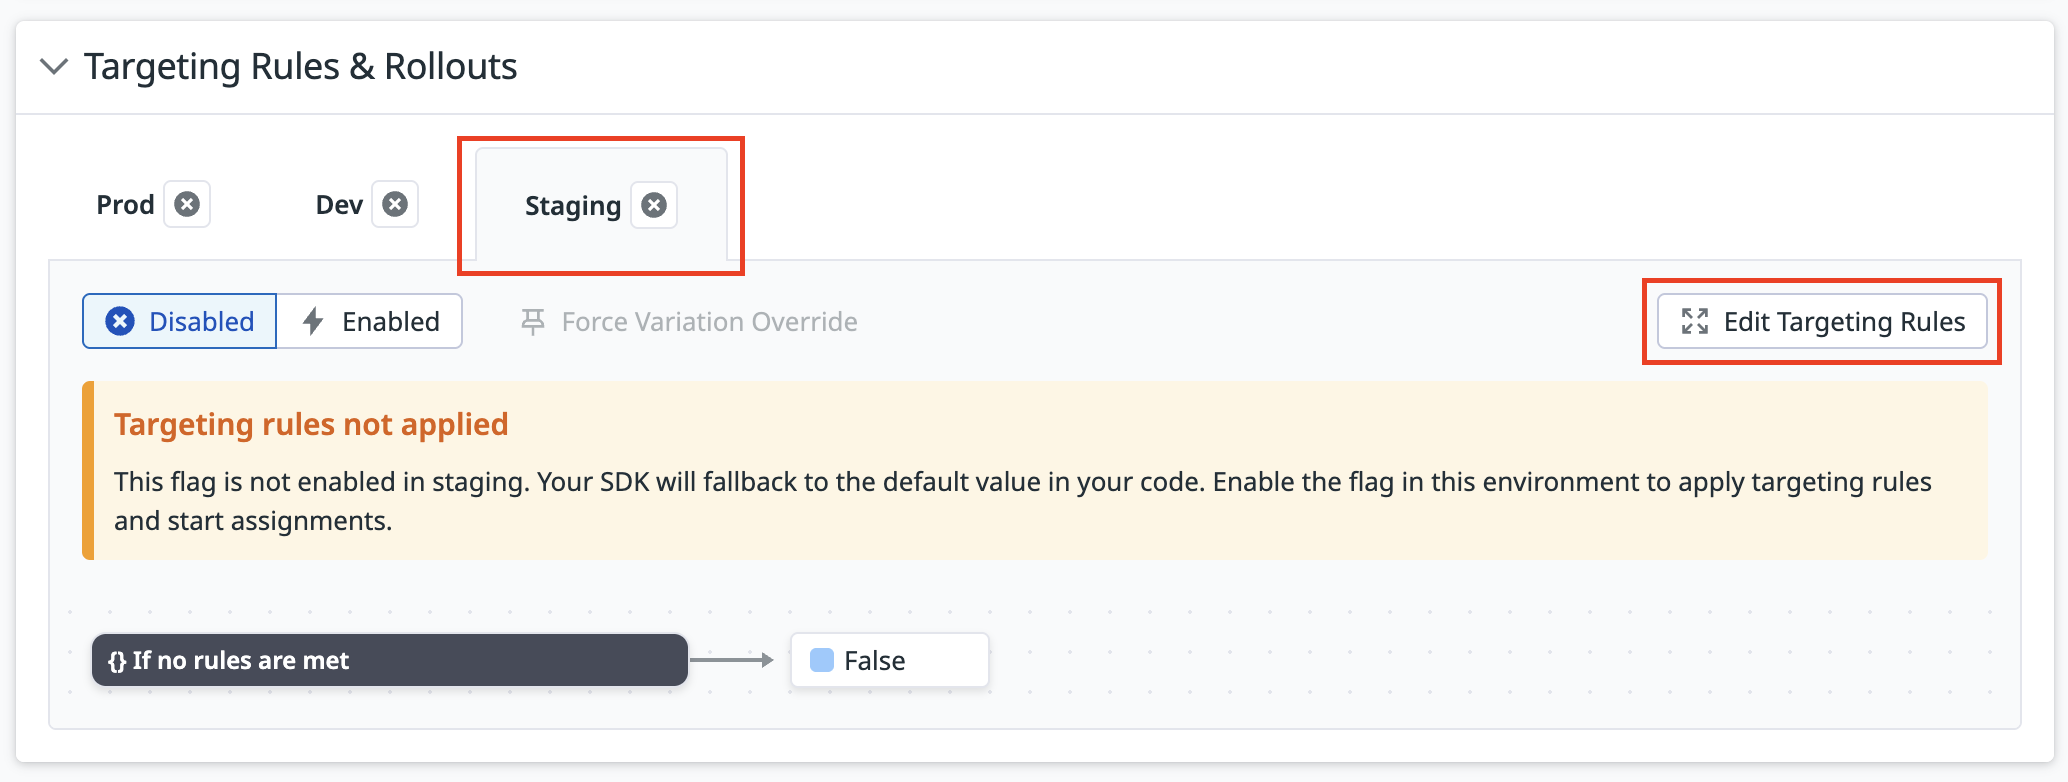
Ve a Feature Flags, selecciona tu marcador y busca la sección Targeting Rules & Rollouts (Reglas de oriengación y lanzamientos. Selecciona el entorno cuyas reglas deseas modificar y haz clic en Edit Targeting Rules (Editar reglas de orientación).
Ptep (UI) / paso (generic) 5: Publicar las normas en tus entornos
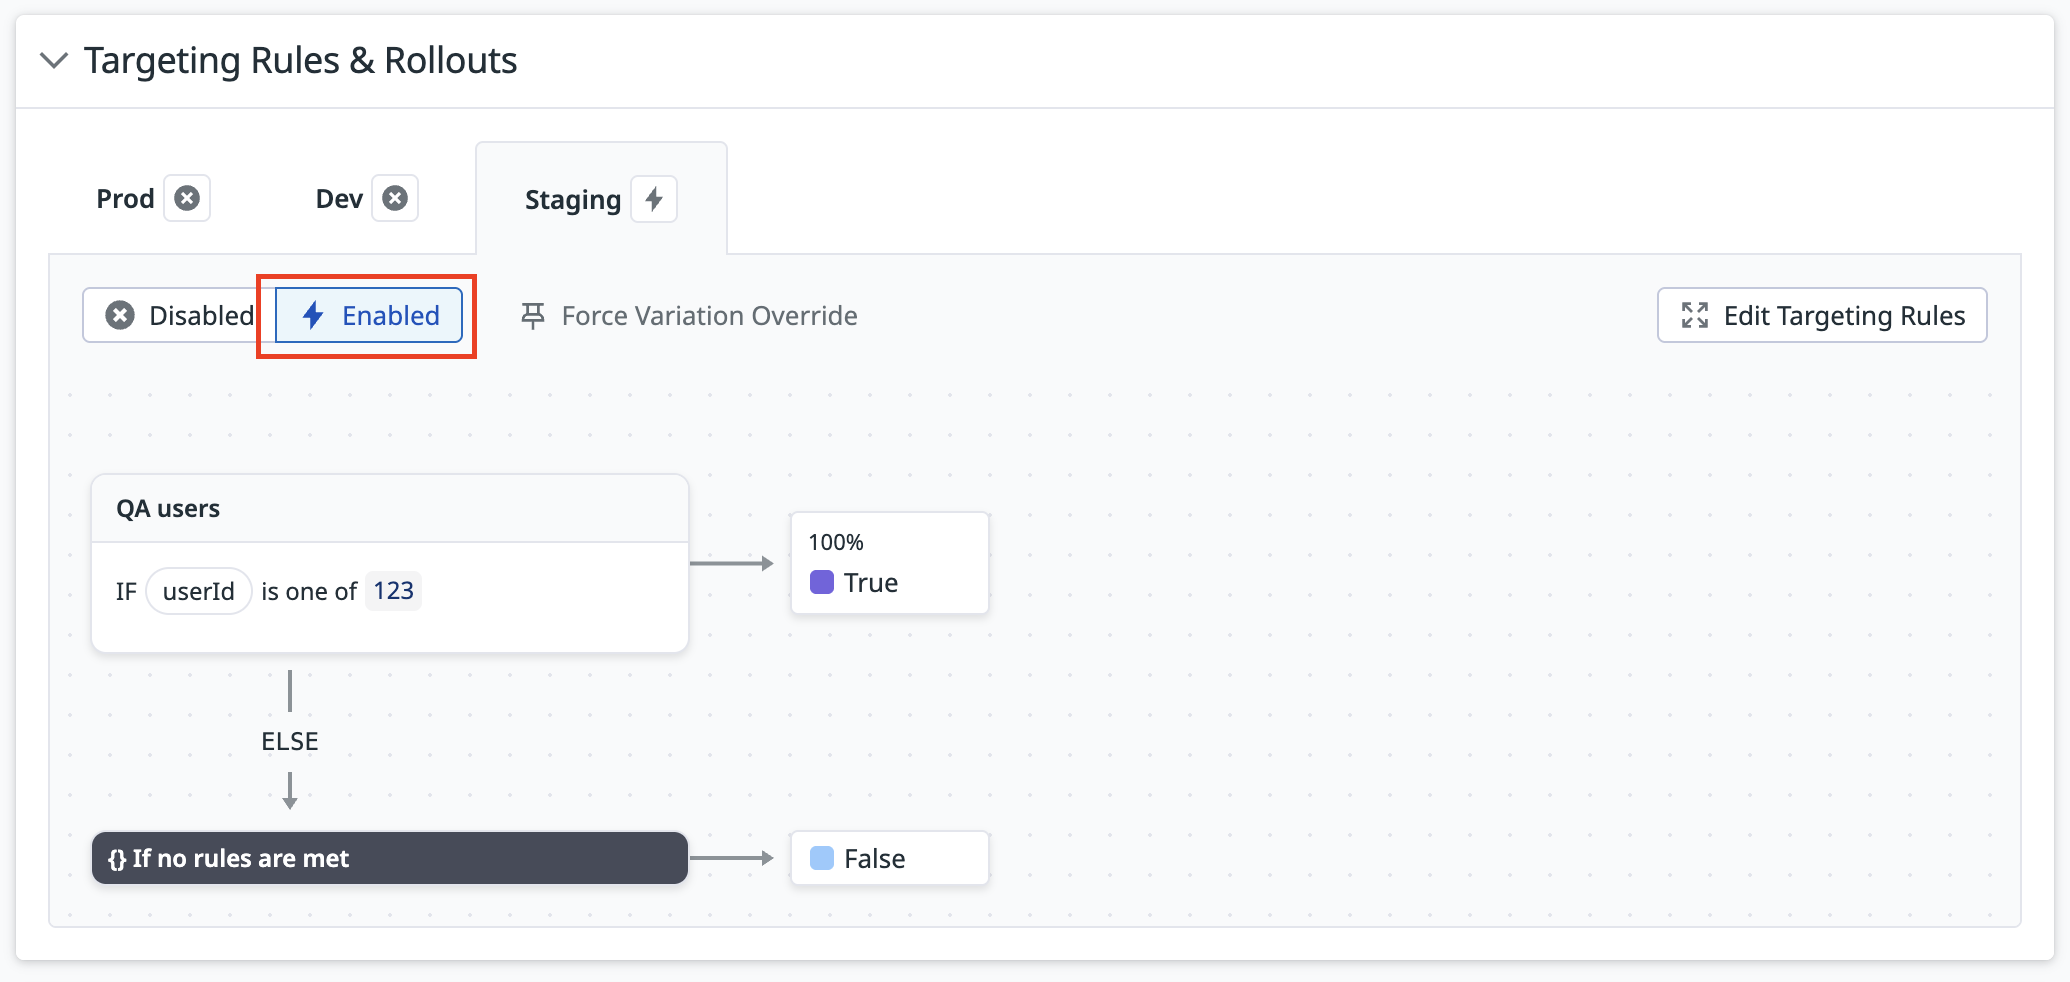
Tras guardar los cambios en las reglas de orientación, publícalas activando tu marcador en el entorno que desees.
Como práctica general, los cambios deben implementarse en un entorno de pruebas antes de implementarlos en producción.
En la sección Reglas de orientación y lanzamientos, cambia el entorno seleccionado a Activado.
El marcador sirve tus reglas de orientación en este entorno. Puedes seguir editando estas reglas de orientación para controlar dónde se sirven las variantes.
Step (UI) / paso (generic) 6: Monitorizar tu despliegue
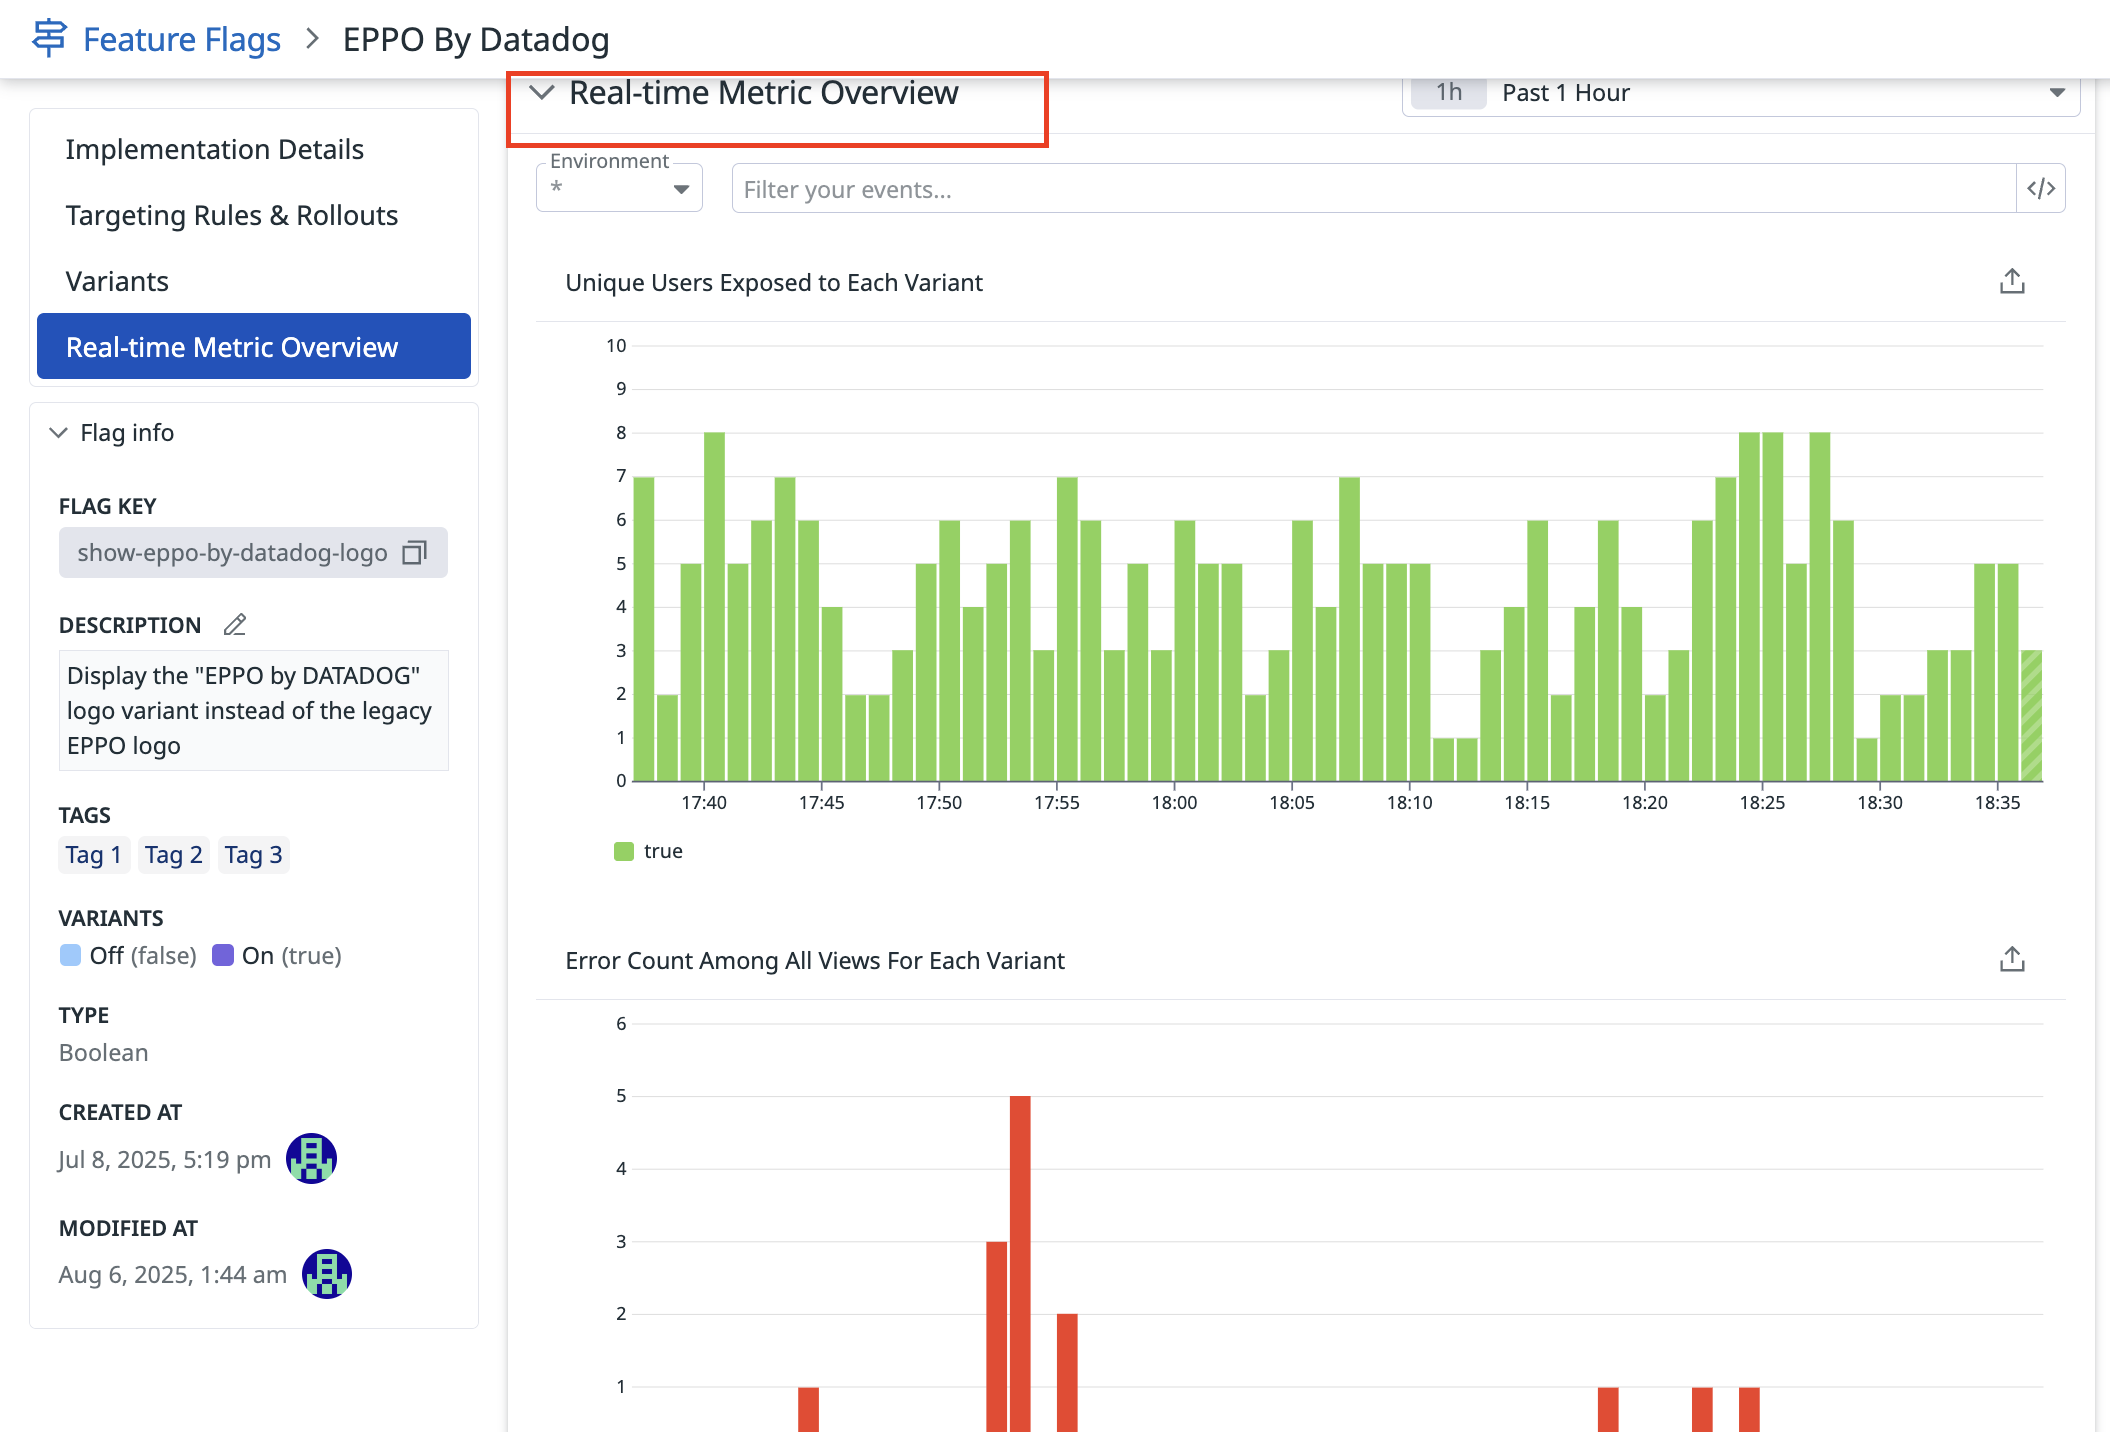
Monitoriza el despliegue de la función desde la page (página) de detalles del marcador de función, en que se proporciona un rastreo de la exposición en tiempo real y métricas como la tasa de errores y **el tiempo de carga de la page (página) **. A medida que vayas lanzando la función con el marcador, consulta el panel Real-Time Metric Overview (Información general de métricas en tiempo real) de la interfaz de usuario de Datadog para ver cómo afecta la función al rendimiento de la aplicación.
Referencias adicionales
Más enlaces, artículos y documentación útiles:


