- Essentials
- Getting Started
- Agent
- API
- APM Tracing
- Containers
- Dashboards
- Database Monitoring
- Datadog
- Datadog Site
- DevSecOps
- Incident Management
- Integrations
- Internal Developer Portal
- Logs
- Monitors
- OpenTelemetry
- Profiler
- Session Replay
- Security
- Serverless for AWS Lambda
- Software Delivery
- Synthetic Monitoring and Testing
- Tags
- Workflow Automation
- Learning Center
- Support
- Glossary
- Standard Attributes
- Guides
- Agent
- Integrations
- Developers
- Authorization
- DogStatsD
- Custom Checks
- Integrations
- Create an Agent-based Integration
- Create an API Integration
- Create a Log Pipeline
- Integration Assets Reference
- Build a Marketplace Offering
- Create a Tile
- Create an Integration Dashboard
- Create a Monitor Template
- Create a Cloud SIEM Detection Rule
- OAuth for Integrations
- Install Agent Integration Developer Tool
- Service Checks
- IDE Plugins
- Community
- Guides
- OpenTelemetry
- Administrator's Guide
- API
- Partners
- Datadog Mobile App
- DDSQL Reference
- CoScreen
- CoTerm
- Cloudcraft (Standalone)
- In The App
- Dashboards
- Notebooks
- DDSQL Editor
- Reference Tables
- Sheets
- Monitors and Alerting
- Metrics
- Watchdog
- Bits AI
- Internal Developer Portal
- Error Tracking
- Change Tracking
- Service Management
- Actions & Remediations
- Infrastructure
- Cloudcraft
- Resource Catalog
- Universal Service Monitoring
- Hosts
- Containers
- Processes
- Serverless
- Network Monitoring
- Cloud Cost
- Application Performance
- APM
- APM Terms and Concepts
- Application Instrumentation
- APM Metrics Collection
- Trace Pipeline Configuration
- Correlate Traces with Other Telemetry
- Trace Explorer
- Recommendations
- Code Origins for Spans
- Service Observability
- Endpoint Observability
- Dynamic Instrumentation
- Live Debugger
- Error Tracking
- Data Security
- Guides
- Troubleshooting
- Continuous Profiler
- Database Monitoring
- Agent Integration Overhead
- Setup Architectures
- Setting Up Postgres
- Setting Up MySQL
- Setting Up SQL Server
- Setting Up Oracle
- Setting Up Amazon DocumentDB
- Setting Up MongoDB
- Connecting DBM and Traces
- Data Collected
- Exploring Database Hosts
- Exploring Query Metrics
- Exploring Query Samples
- Exploring Database Schemas
- Exploring Recommendations
- Troubleshooting
- Guides
- Data Streams Monitoring
- Data Jobs Monitoring
- Data Observability
- Digital Experience
- Real User Monitoring
- Synthetic Testing and Monitoring
- Continuous Testing
- Product Analytics
- Software Delivery
- CI Visibility
- CD Visibility
- Deployment Gates
- Test Optimization
- Quality Gates
- DORA Metrics
- Security
- Security Overview
- Cloud SIEM
- Code Security
- Cloud Security
- App and API Protection
- Workload Protection
- Sensitive Data Scanner
- AI Observability
- Log Management
- Observability Pipelines
- Log Management
- Administration
Browser Testing Steps
This product is not supported for your selected Datadog site. ().
Overview
Steps are a series of actions that you can record for a browser test and edit or build on. To define the steps you want your browser test to execute, either directly record them with the Datadog test recorder extension or add them manually. Every step includes a set of configurable advanced options.
The default timeout for each step is 60 seconds. You can override this default timeout through the dedicated timeout option.
Automatically recorded steps
Once you click Start Recording, the Datadog browser test recorder extension, automatically detects and records steps on your website.
Click
Interacting with elements on your page records a step.
Click on the step and select a click type you want the browser test to perform at execution time:
- Primary click corresponding to a left click
- Double click
- Contextual click corresponding to a right click
Type text
Datadog records steps you perform on your application, such as selecting an option from a select dropdown menu, and a recap appears as a step.
Select option
Datadog records steps you perform on your application, such as selecting an option from a select dropdown menu, and a recap appears as a step on the left corner.
Upload file
To record an Upload step, either:
- Open your desktop from the browser
- Drag and drop your file in the recording iframe
Datadog records steps you perform on your application, such as uploading, and a recap appears as a step in the left corner. You can upload up to 10 files with a limit of 5MB each.
Manually added steps
You can manually add and arrange steps on the left corner of the browser test recording.
Assertion
Assertions allow you to validate that your browser test is in the state you expect it to be in at any point of a simulated user journey.
To confirm your test ends in an expected state, you must end your browser tests with an assertion.
Some assertions validate the active page, the page the user last interacted with, such as a click or an assertion on a page element.
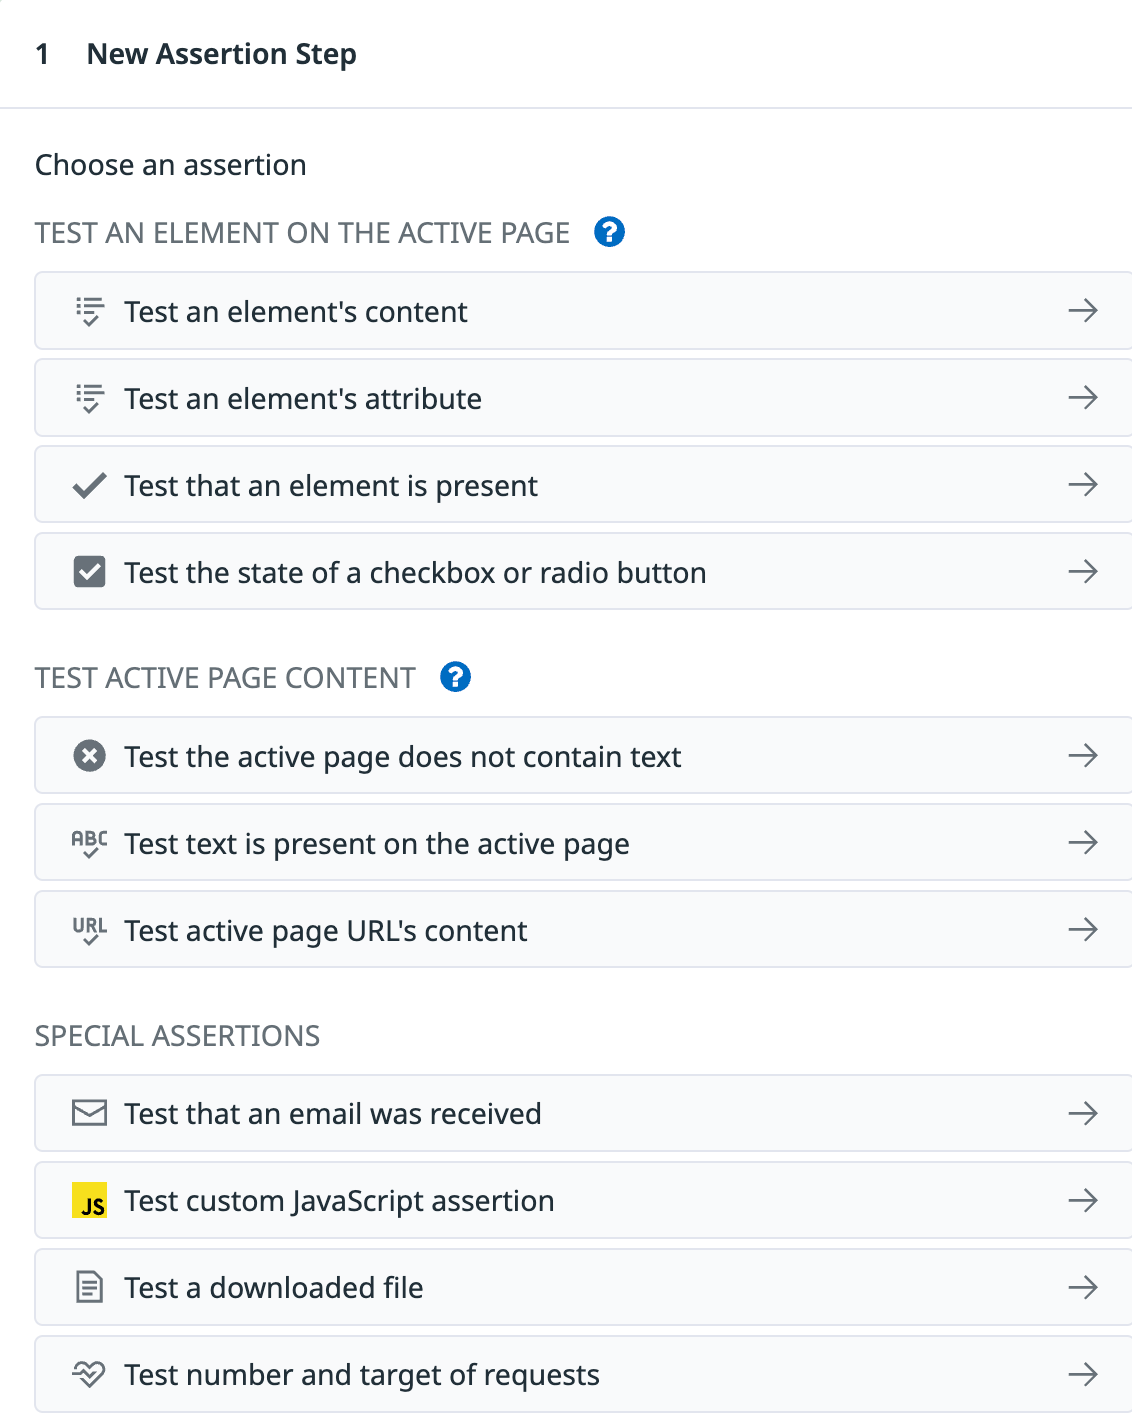
To create a step, select an assertion type:
Test an element’s content
Create this assertion step to have your browser test select a page element and check if it contains a specific value.
Test an element’s attribute
Create this assertion step to have your browser test select a page element and check if one of its attributes matches the expected content.
Test that an element is present
Create this assertion step to have your browser test select a page element such as a specific span, div, h, or a, and confirm that it is present on the page.
Set the user locator to ensure the browser test targets the correct element by selecting CSS or XPath 1.0 from the dropdown menu and adding a selector. Click Test.
Test the state of a checkbox or radio button
Create this assertion step to have your browser test select a page element and validate the state of the assertion (unchecked or checked).
Test that some text is not present on the active page
Create this assertion step to have your browser test confirm that the text you specified in the Value field is not present on the current page being recorded.
Test that some text is present on the active page
Create this assertion step to have your browser test confirm that the text you specified in the Value field is present on the current page being recorded.
Test the content of the URL of the active page
Create this assertion step to have your browser test verify that the URL of the last page that was interacted with contains a value you specified.
You can test for a value in the URL such as string, number, or regex.
Test that an email was received
Create this assertion step to have your browser test confirm that your application’s email mechanisms are working and verify that the values you specified, such as string, number, or regex, are present in the email subject or body.
For more information, see Email Validation with Browser Tests.
Test your UI with custom JavaScript
Create this assertion step to test a custom assertion on the active page using your JavaScript code. JavaScript assertions support both synchronous and asynchronous code. Because browser tests load external JavaScript by adding the script to the page, they only work if your website accepts external JavaScript.
The JavaScript assertion function contains the following parameters and requires a return statement.
The
return(mandatory) statement reflects the condition the assertion needs to meet for your test step to succeed. Any type can be returned, but the value is automatically cast as a boolean. If a falsy value is returned, the test step fails.vars(optional): A string containing your browser test’s variables. Usevars.<YOUR_VARIABLE>to reference a browser test variable in your JavaScript snippet. For example, if your browser test contains aUSERNAMEvariable, call it in your JavaScript snippet usingvars.USERNAME.element(optional): The locator of the element on the page. To set this up, use the Select and Update target element buttons. The selected element automatically leverages Datadog’s browser test multi-locating algorithm.
Since JavaScript assertions run in the context of the active page, these steps can access all the objects defined in the active page (such as libraries, built-ins, and global variables). To load external libraries, use a promise.
For example:
const script = document.createElement('script');
script.type = 'text/javascript';
script.src = "https://code.jquery.com/jquery-3.5.1.slim.min.js";
const promise = new Promise((r) => script.onload = r)
document.head.appendChild(script)

await promise

// Script is now loaded

return jQuery().jquery.startsWith('3.5.1')
Test a downloaded file
Create this assertion step to have your browser test verify the downloaded files from the previous steps. You can check that a file was correctly downloaded and assert the file name, size, and MD5 value.
For more information about how to test downloads, see Test File Upload and Download.
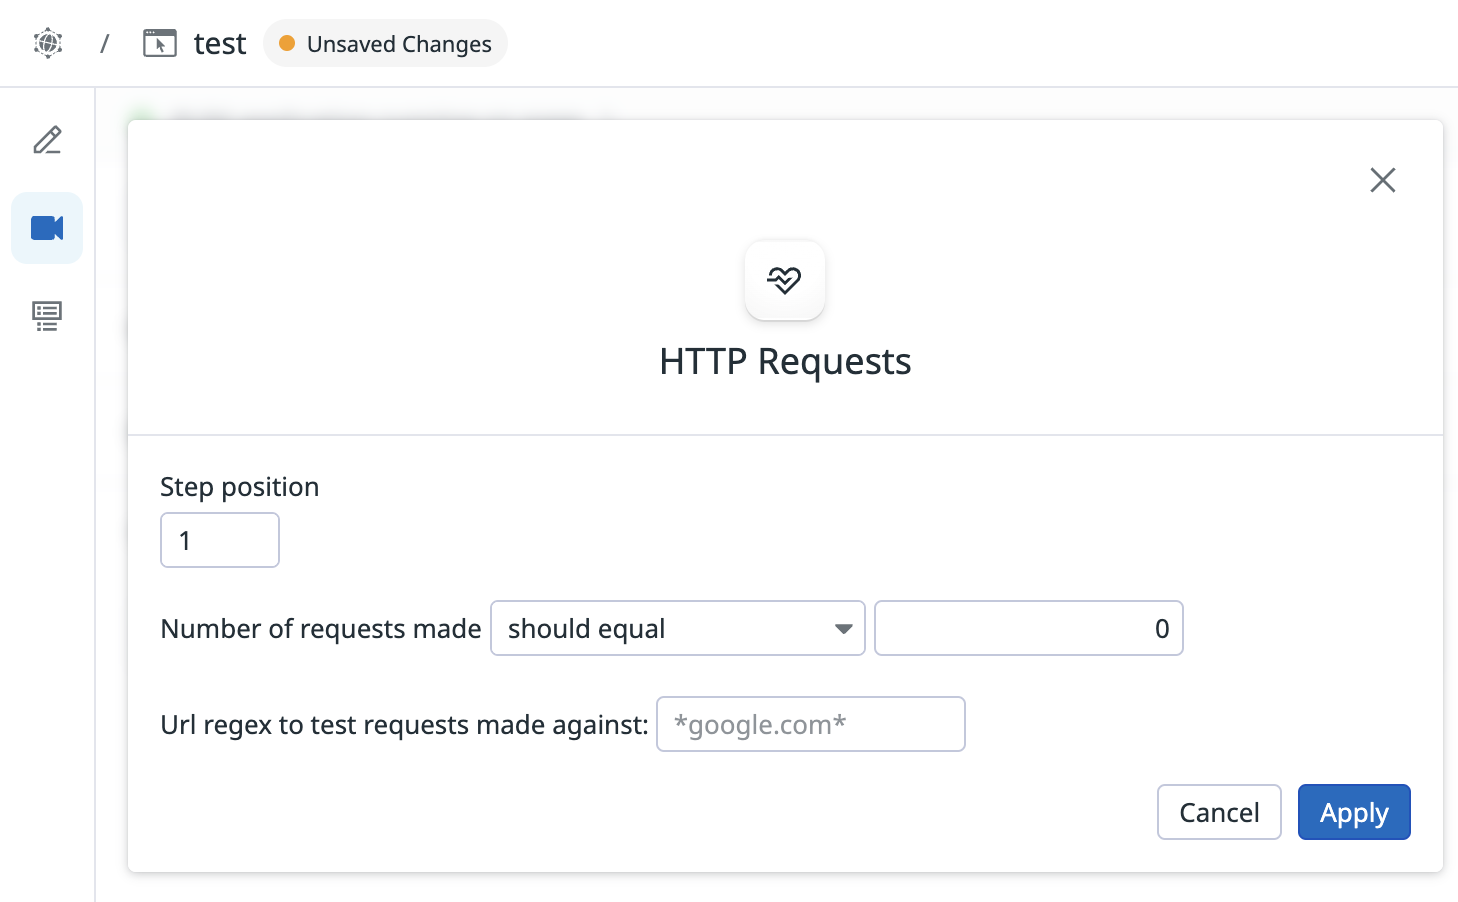
Test HTTP Request Count
Create this assertion step to test the number of HTTP requests made to a specific URL pattern. Enter the expected request count and the target URL regex to test against.
Interaction
In addition to recording steps based on your browser assertions, you can also manually create steps by clicking Interaction. Then, you can choose an action type to add an interaction.
Refresh page
Create this navigation step to have your browser test refresh the current page of the recording.
Click on email link
After you have created an email variable, create this navigation step to have your browser test access unique Synthetic mail inboxes.
Select the email and links you want the browser test to click on. This step brings you to the corresponding page and allows you to move on with the rest of your journey from that specific page.
Navigate to link
Create this navigation step to have your browser test go to a specific page. You must prepend your URLs with http or https in the Enter link URL box.
Press key
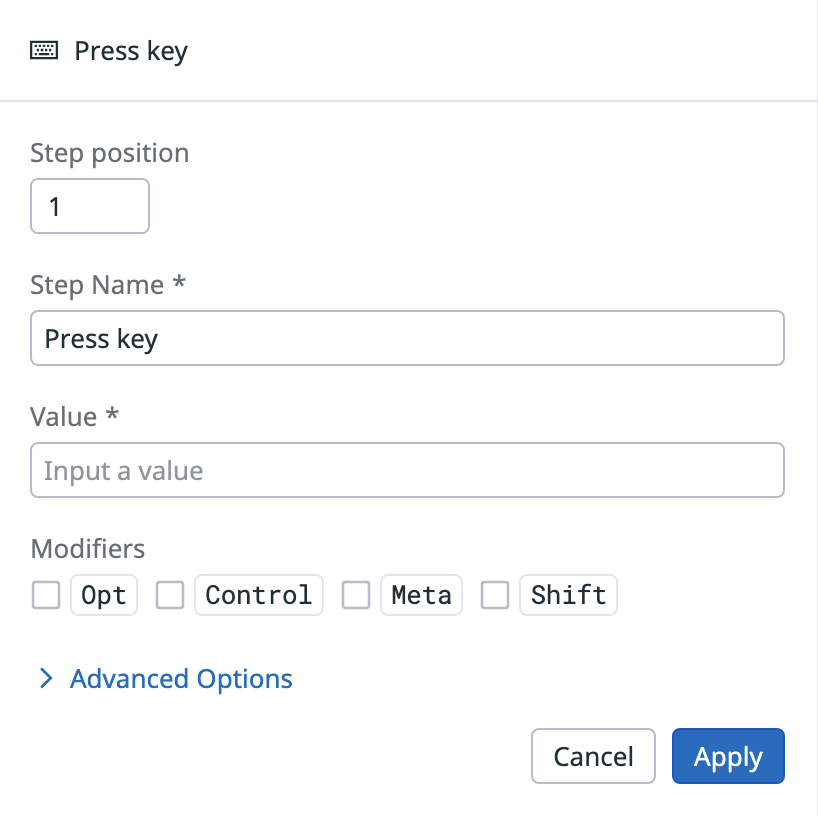
Add a Press Key step to simulate users entering keystrokes. The Datadog browser test recorder extension can record the following keys:
- Enter
- Arrows (up, down, right, and left)
- Tab (outside a form)
- Escape
- Backspace
To press keys that are not automatically recorded, specify the values that need to be pressed in the Value field.
Select Alt, Control, Meta, and Shift modifiers to add to the inputted value.
Hover on element
This step uses a dedicated click, not a hovering mechanism, to avoid generating a separate step every time a user hovers over an element during recording.
Select Hover and click on an element to add a step.
Scroll
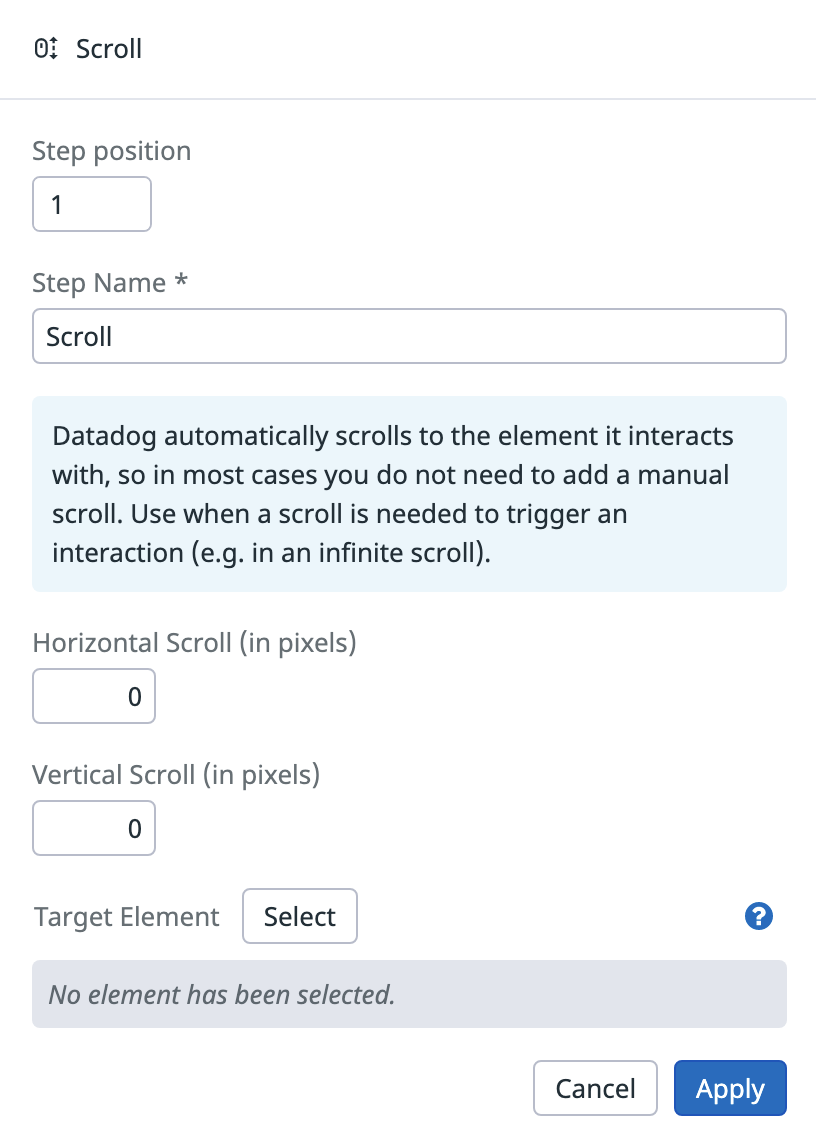
Browser tests automatically scroll to the elements that need to be interacted with. In most cases, you do not need to add a scroll step manually. Use the scroll step when you need to trigger an additional interaction, such as an infinite scroll.
Specify the number of pixels you want the browser test to scroll vertically and horizontally.
By default, the Scroll step scrolls through the entire page. If you need to scroll on a specific element (for example, a specific <div>), click Target Element and select an element you want the browser test to scroll on.
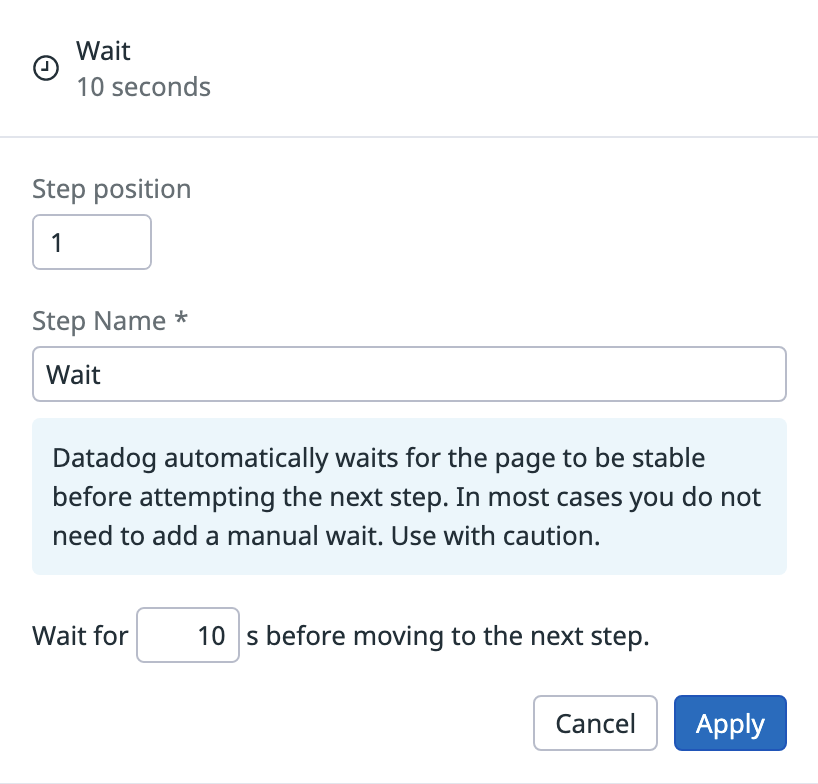
Wait
By default, browser tests wait for a page to be fully loaded before performing a step or the next step with a timeout of 60 seconds.
If you know that a page or page element takes more than 60 seconds to load, you can customize the timeout in the step’s advanced options or add a hardcoded wait step with a max value of 300 seconds.
This additional time is systematically added to every run of your browser test’s recording.
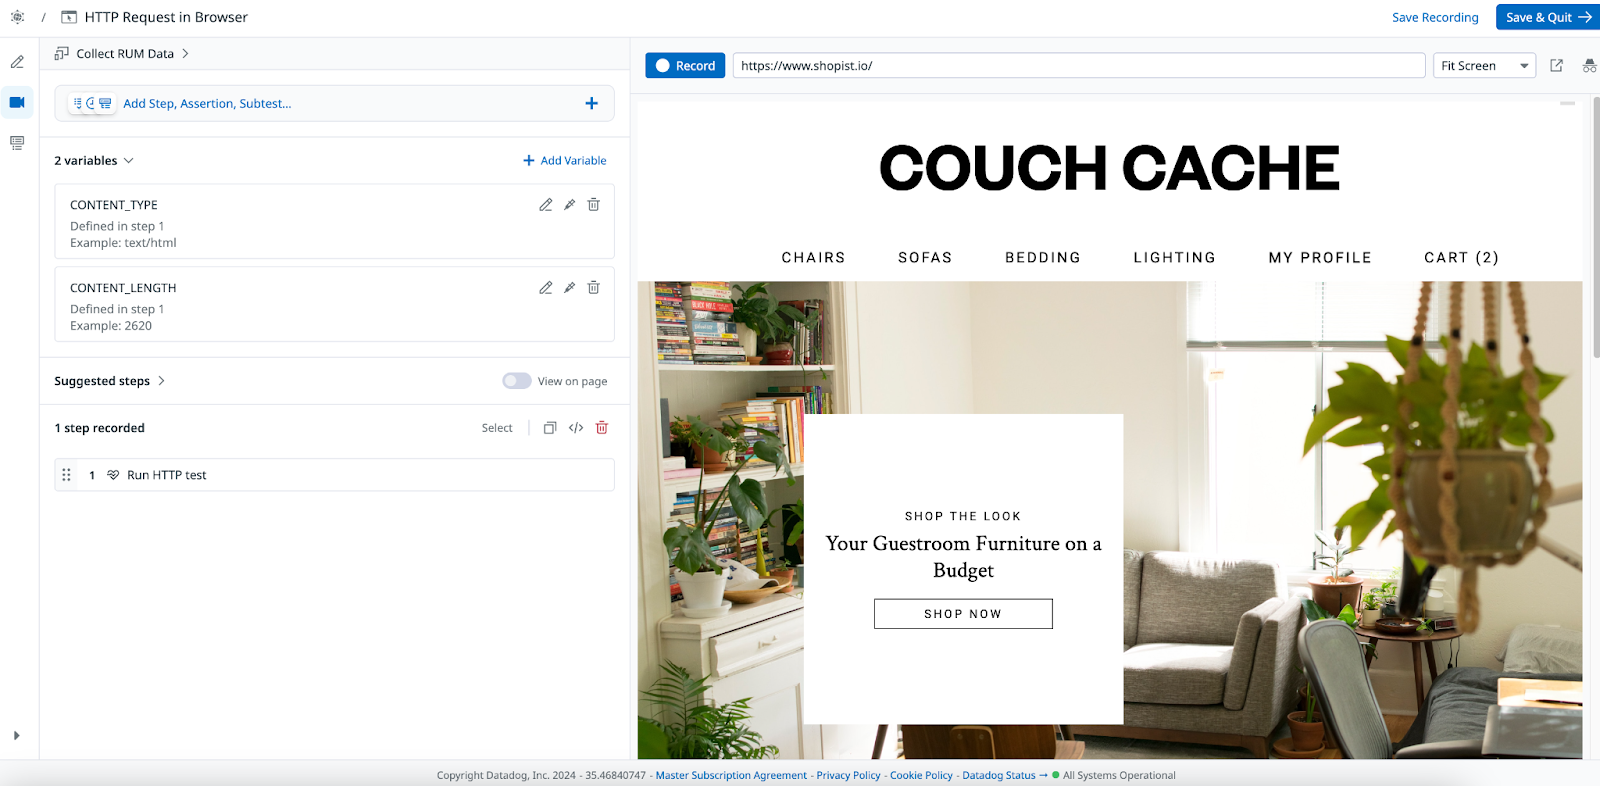
Run HTTP test
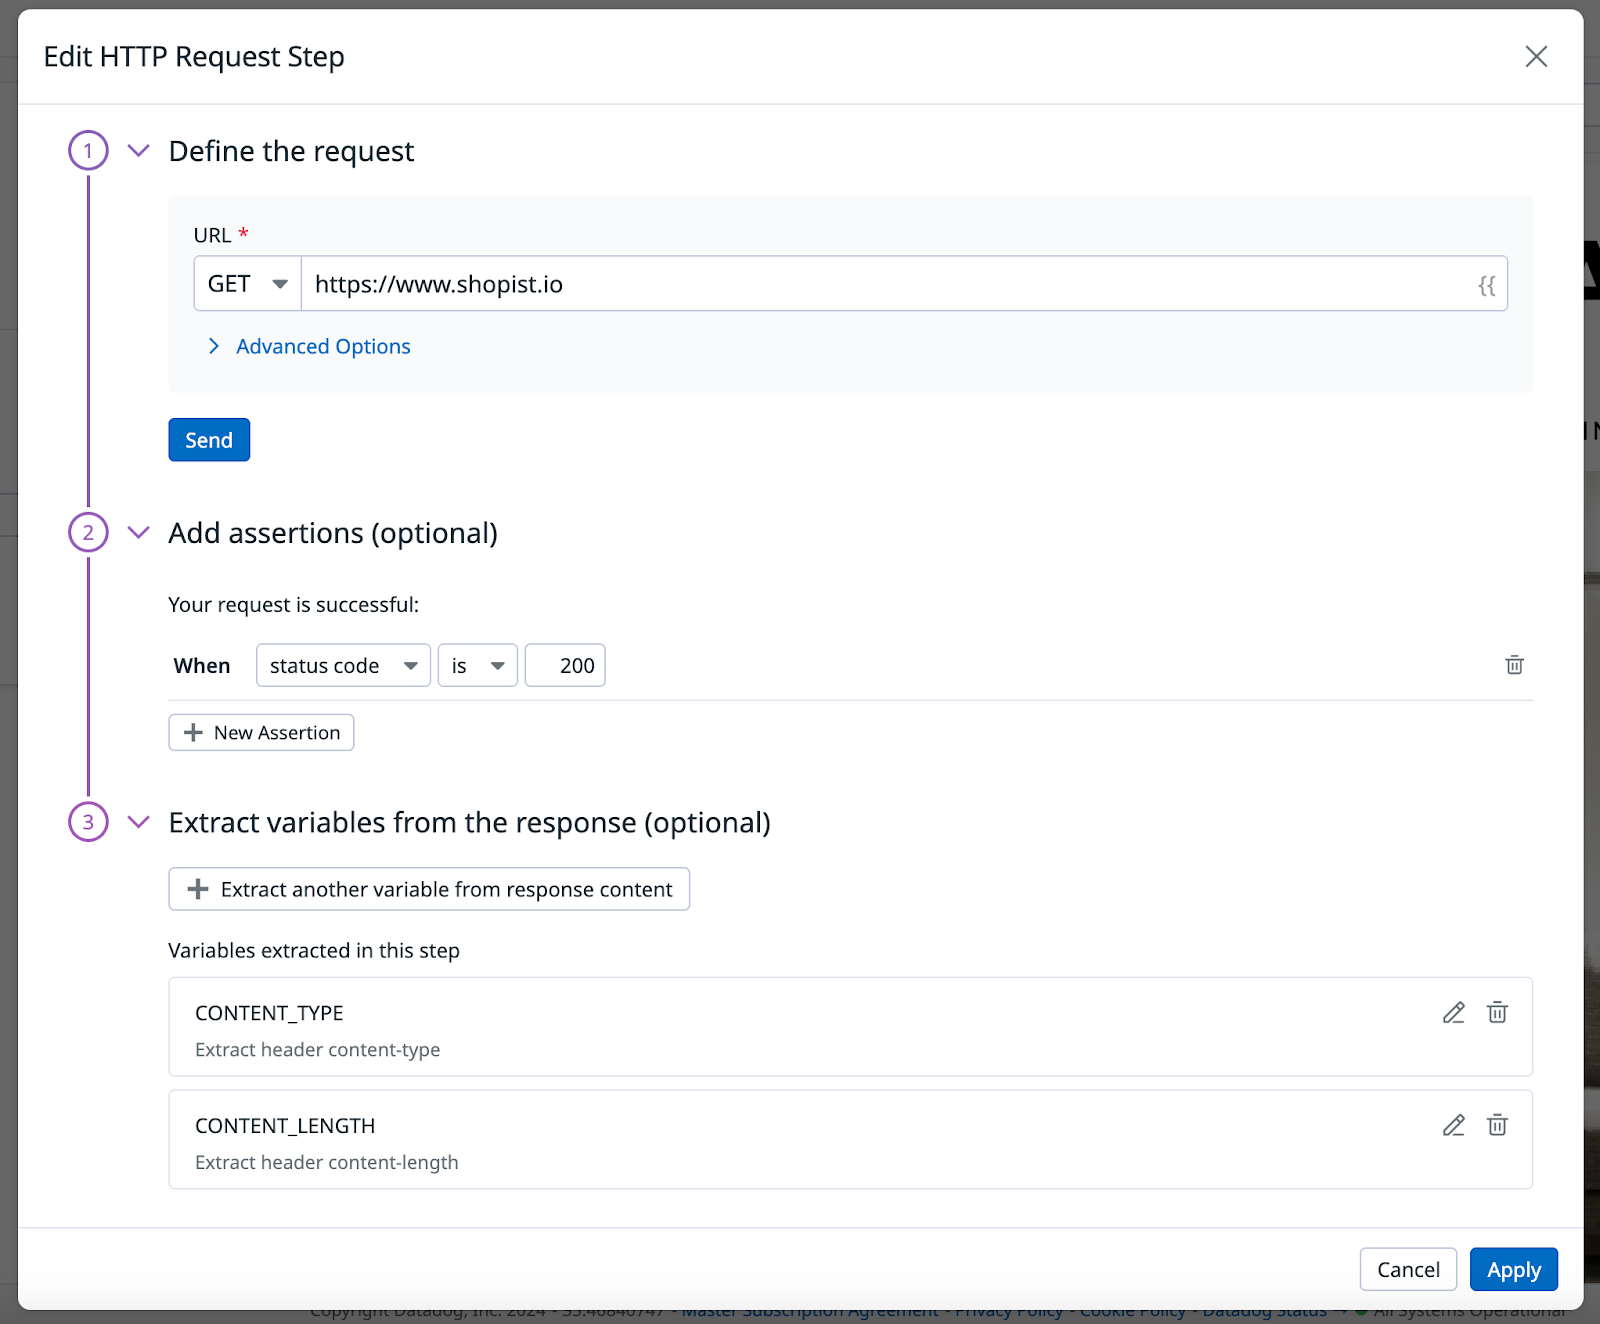
You can run HTTP requests, add assertions, and extract variables as part of your browser tests.
To define your HTTP request:
Enter the URL you wish to test.
Optionally, specify Advanced Options:
- Follow redirects: Select this option to have your HTTP test follow up to ten redirects when performing the request.
- Ignore server certificate error: Select this option to have your HTTP test go on with connection even if there are errors when validating the SSL certificate.
- Request headers: Define headers to add to your HTTP request. You can also override the default headers (for example, the
user-agentheader). - Cookies: Define cookies to add to your HTTP request. Set multiple cookies using the format
<COOKIE_NAME1>=<COOKIE_VALUE1>; <COOKIE_NAME2>=<COOKIE_VALUE2>.
- Client certificate: Authenticate through mTLS by uploading your client certificate and the associated private key.
- HTTP Basic Auth: Add HTTP basic authentication credentials.
- Digest Auth: Add Digest authentication credentials.
- AWS Signature: Add AWS Access Key ID and Secret Access Key.
- NTLM: Add NTLM authentication credentials. Supports both NTLMv2 and NTLMv1.
- OAuth 2.0: Select a Grant Type (Client credentials, or Resource owner password).
- Encode parameters: Add the names and values of query parameters that require encoding.
- Body type: Select the type of the request body (
text/plain,application/json,text/xml,text/html,application/x-www-form-urlencoded,application/octet-stream,multipart/form-data,GraphQL, orNone) you want to add to your HTTP request. - Request body: Add the content of your HTTP request body. For file uploads in Browser HTTP steps, the body size is limited to 3MB, while the request body has a maximum size limit of 50 KB.
- Proxy URL: Specify the URL of the proxy the HTTP request should go through (
http://<YOUR_USER>:<YOUR_PWD>@<YOUR_IP>:<YOUR_PORT>). - Proxy Header: Add headers to include in the HTTP request to the proxy.
- Do not save response body: Select this option to prevent the response body from being saved at runtime. This helps ensure no sensitive data is displayed in your test results, but it can make failure troubleshooting more difficult. For full security recommendations, see Synthetic Monitoring Data Security.
Click Send to try out the request configuration. A response preview appears.
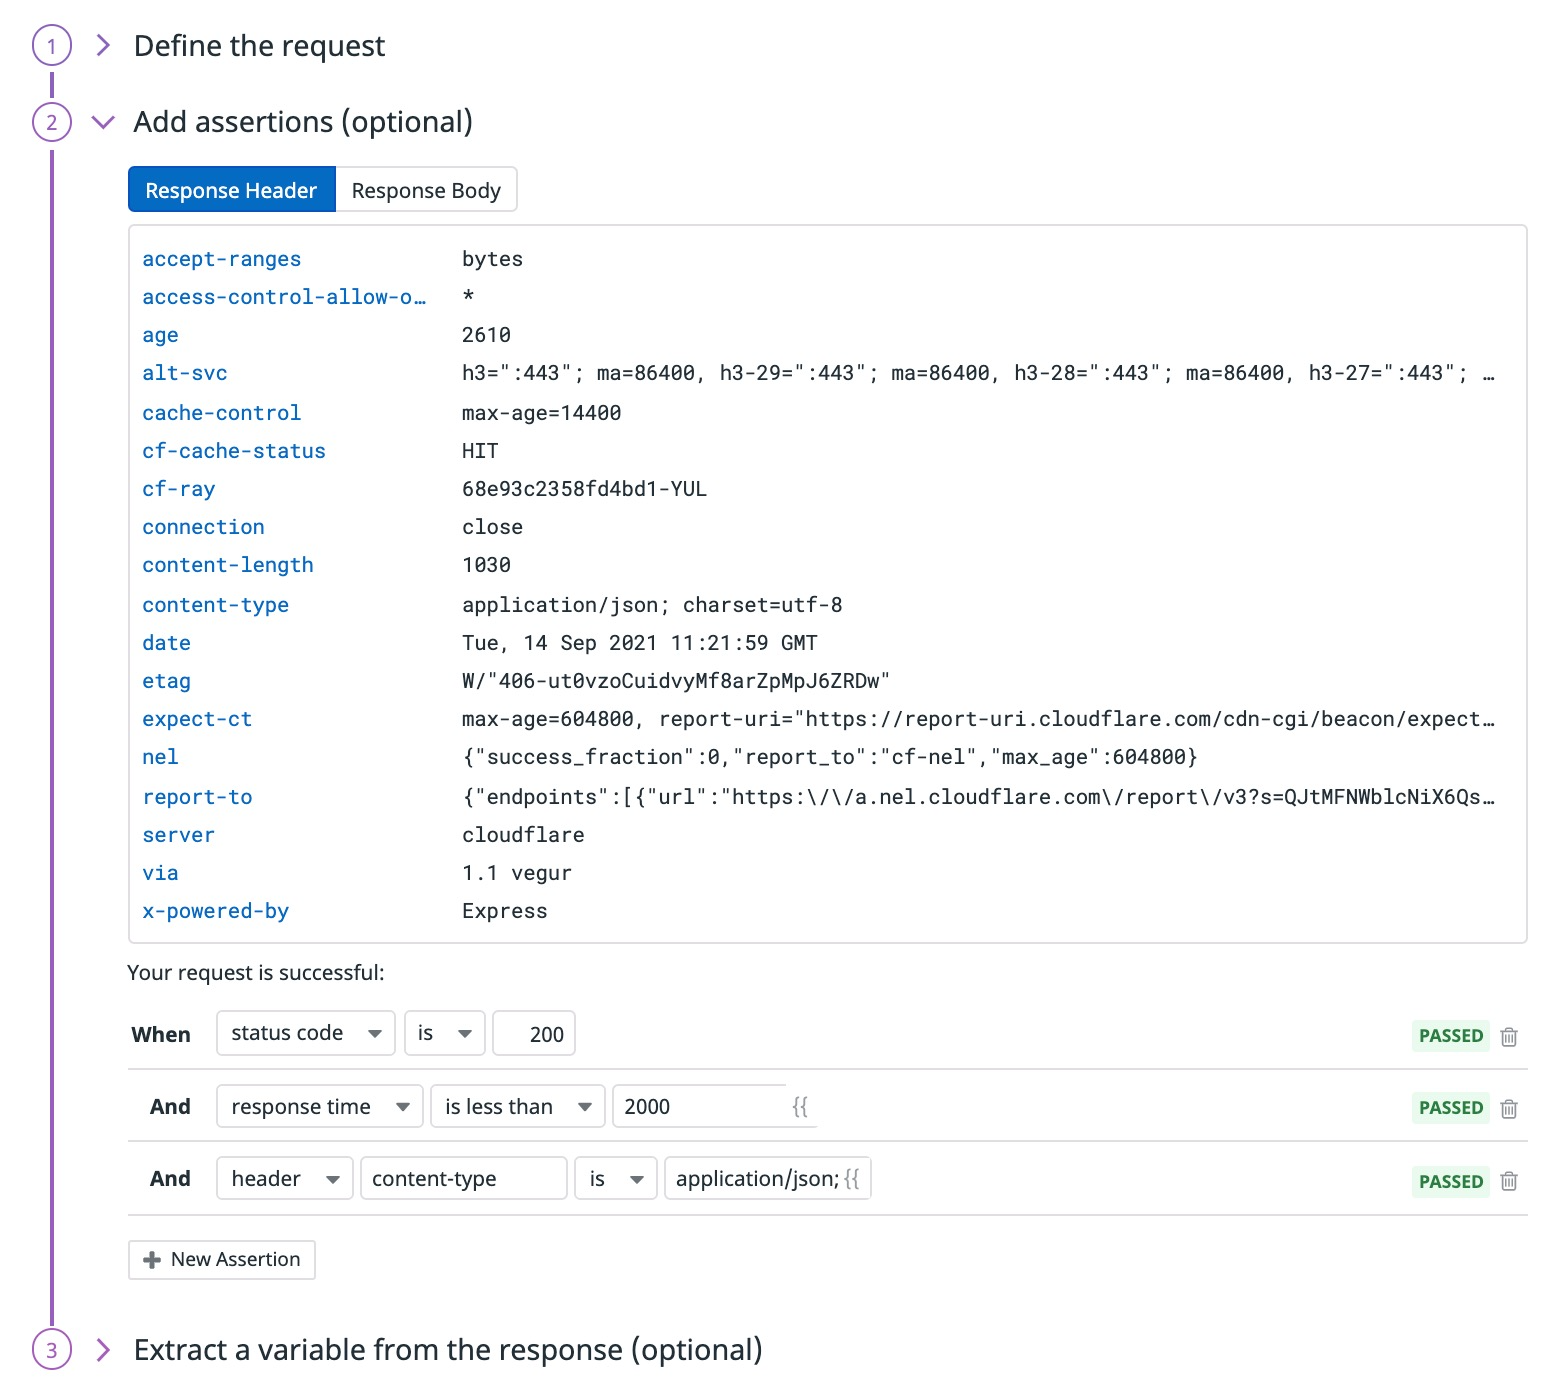
Add assertions
Assertions define what an expected test result is. After you click Send, basic assertions on status code, response time, and header content-type are added based on the test response. Assertions are optional for HTTP steps in browser tests.
| Type | Operator | Value type |
|---|---|---|
body | contains, does not contain, is, is not,matches, does not match,jsonpath, xpath | String Regex String, Regex |
header | contains, does not contain, is, is not,matches, does not match | String Regex |
response time | is less than | Integer (ms) |
status code | is, is not | Integer |
HTTP requests can decompress bodies with the following content-encoding headers: br, deflate, gzip, and identity.
If a test does not contain an assertion on the response body, the body payload drops and returns an associated response time for the request within the timeout limit set by the Synthetics Worker.
If a test contains an assertion on the response body and the timeout limit is reached, an
Assertions on the body/response cannot be run beyond this limiterror appears.
You can create up to 20 assertions per step by clicking New Assertion or by clicking directly on the response preview.
Extract a variable from the response
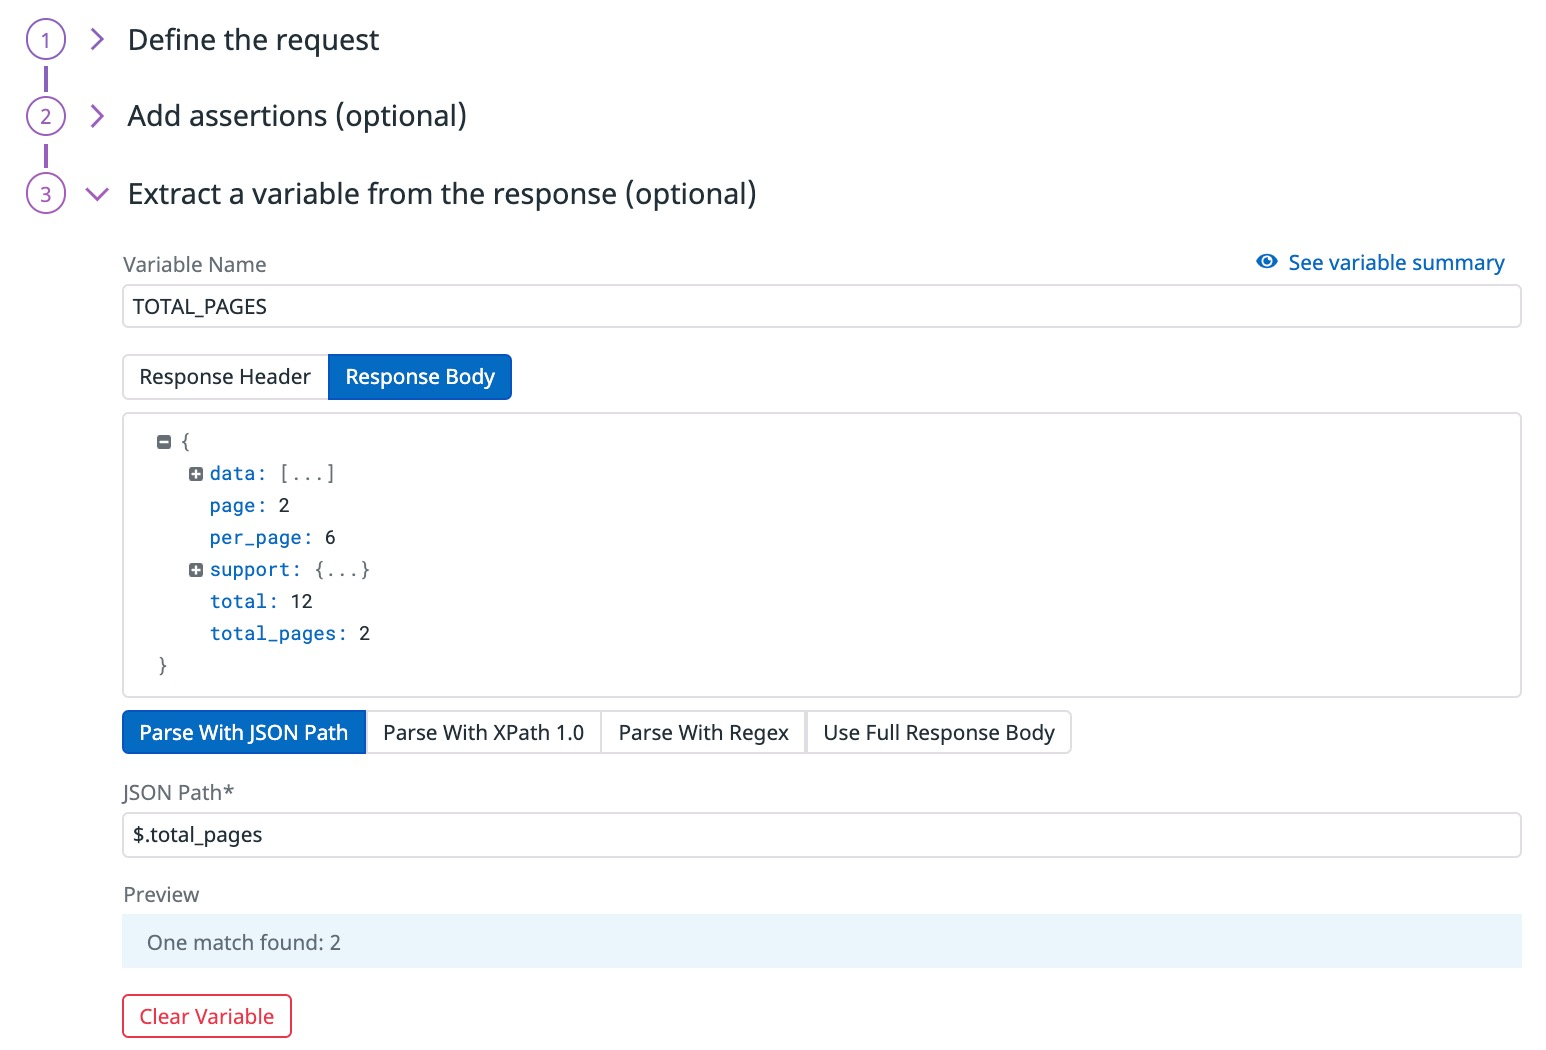
Optionally, extract a variable from the response of your HTTP request by parsing its response headers or body. The value of the variable updates each time the HTTP request step runs. Then, you can use the variable in later steps of your browser test.
To start parsing a variable, click Extract a variable from response content. Then, define the variable:
Enter a Variable Name. Your variable name can only use uppercase letters, numbers, and underscores and must have at least three characters.
Decide whether to extract your variable from the response headers or the response body.
Special actions
You can use the Datadog browser test recorder extension to record and monitor most steps associated with user journeys. However, the extension does not automatically record some steps such as Hover, Press Key, Scroll, and Wait.
Create this assertion step manually by clicking Special Actions and selecting an action type.
Variables
Click Variables and select a variable creation type from the dropdown menu.
To learn how to use variables inside of your steps, see Use variables.
Pattern
You can select one of the following available builtins:
{{ numeric(n) }}- Generates a numeric string with
ndigits. {{ alphabetic(n) }}- Generates an alphabetic string with
nletters. {{ alphanumeric(n) }}- Generates an alphanumeric string with
ncharacters. {{ date(n unit, format) }}- Generates a date in one of Datadog’s accepted formats with a value corresponding to the UTC date the test is initiated at + or -
nunits. {{ timestamp(n, unit) }}- Generates a timestamp in one of Datadog’s accepted units with a value corresponding to the UTC timestamp the test is initiated at + or -
nunits. {{ uuid }}- Generates a version 4 universally unique identifier (UUID).
To obfuscate local variable values in test results, select Hide and obfuscate variable value. Once you have defined the variable string, click Add Variable.
Element
Create a variable from content such as a span or div by extracting the element’s text.
Email body
Create a variable from the email body using one of the following methods: regex or Xpath.
Regexsearches and returns the first matching pattern (for example,/*./) from the email’s plain text body. If the pattern is not found, it then searches the HTML body.Xpathis only applicable when the email contains an HTML body. It returns the content of the corresponding location (for example,$).
JavaScript
JavaScript steps support both synchronous and asynchronous code. Because browser tests load external JavaScript by adding the script to the page, they only work if your website accepts external JavaScript.
The JavaScript function comes with the following parameters and requires a return statement.
The
return(mandatory) statement returns the value you want to associate with your JavaScript variable. The statement can return any type but automatically casts the value as a string.vars(optional): A string containing your browser test’s variables that you can use inside your code. Usevars.<YOUR_VARIABLE>to reference a browser test variable in your JavaScript snippet. For example, if your browser test already features aPRICEvariable, call it in your JavaScript snippet usingvars.PRICE.element(optional): The locator of the element on the page. To set this up, use the Select and Update target element buttons. The selected element automatically leverages Datadog’s browser test multi-locating algorithm.
Since JavaScript assertions run in the context of the active page, these steps can access all the objects defined in the active page (such as libraries, built-ins, and global variables). To load external libraries, use a promise.
For example:
const script = document.createElement('script');
script.type = 'text/javascript';
script.src = "https://code.jquery.com/jquery-3.5.1.slim.min.js";
const promise = new Promise((r) => script.onload = r)
document.head.appendChild(script)

await promise

// Script is now loaded

return jQuery().jquery.startsWith('3.5.1')
Global variable
Select any global variables defined in Synthetic Monitoring Settings.
Global variable - MFA
Select any MFA global variables defined in Synthetic Monitoring Settings.
This type of global variable stores time-based one time password (TOTP) secret keys, allowing you to test your MFA modules and MFA-protected workflows. For more information, see TOTPs For Multi-Factor Authentication (MFA) In Browser Tests.
Create a Datadog Synthetics email address that you can use in test steps to assert if an email was sent correctly or navigate to a link in the email, for example, to click on a confirmation link.
A unique mailbox is generated at each test execution to avoid conflicts between test runs.
Subtests
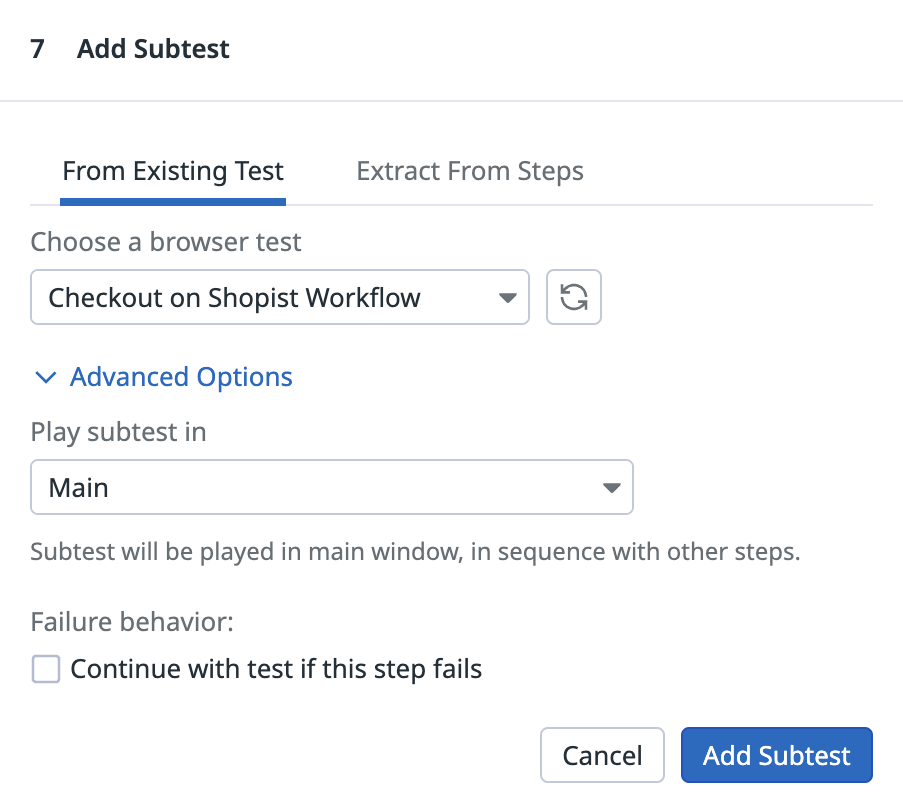
You can run browser tests within other browser tests to reuse existing workflows up to two levels of nesting.
To use an existing browser test as a subtest, click Add New Subtest, select a browser test from the dropdown menu under the From Existing Test tab, and click Add Subtest.
To convert steps from your current browser test into a subtest, click on the Extract From Steps tab, select the recorded steps you want to extract, and click Convert to Subtest. By default, a subtest executes in sequence with the previous steps of the parent test.
In order to override variables from subtests in parent tests, ensure the variables created at the parent test level have the same names as the variables present in the subtest. A variable always uses the value that was first assigned to it.
For more information about advanced options for subtests, see Advanced Options for Browser Test Steps.
If it does not make sense for you to run your subtest independently, you can pause it. The test continues to be called as part of your parent test, and is not executed individually. For more information, see Reusing Browser Test Journeys Across Your Test Suite.
Manage step order
Instead of manually reordering new steps by dragging and dropping individual steps, you can set a cursor on a test step at a particular stage in your recording and insert additional steps.
- Hover over a recorded test step and click the Set Cursor icon. A blue line appears above your test step.
- Record additional test steps or add steps manually.
- When you complete adding additional steps above your tests step, click Clear Cursor to exit.
Use variables
To see all available variables on manually added steps, type {{ in the input field.
To use a variable on automatically recorded steps, click the Inject this variable icon to input the variable value while recording.
If a variable is assigned different values along your browser test steps (for example, across subtests), the variable systematically uses the value that was first assigned to it.
Some variables only compute at runtime, such as a variable from an HTTP request or a JavaScript step. For example, assume you have a Type text step featuring {{ <YOUR_VARIABLE_NAME> }}. At test execution, {{ <YOUR_VARIABLE_NAME> }} is systematically replaced by your variable’s associated value. To record a step using one of these variables, record a step with the actual variable value, and replace the actual value with {{ <YOUR_VARIABLE_NAME> }} in the step’s definition before saving your test.
Use multiple variables
You can add multiple variables to your browser test recording steps.
In your browser test recording, click the + Add Variable button to add one or more variables to your test:
In your browser test’s recorder, add a step recording, and click Extract variables from the response(optional) to extract and use the variables in your browser test:
Edit a recording
To edit a browser recording after it’s saved:
- Navigate to Synthetics > Tests.
- Click on a previously saved browser test.
- Click the gear icon on the top right hand corner and then click “edit recording”.
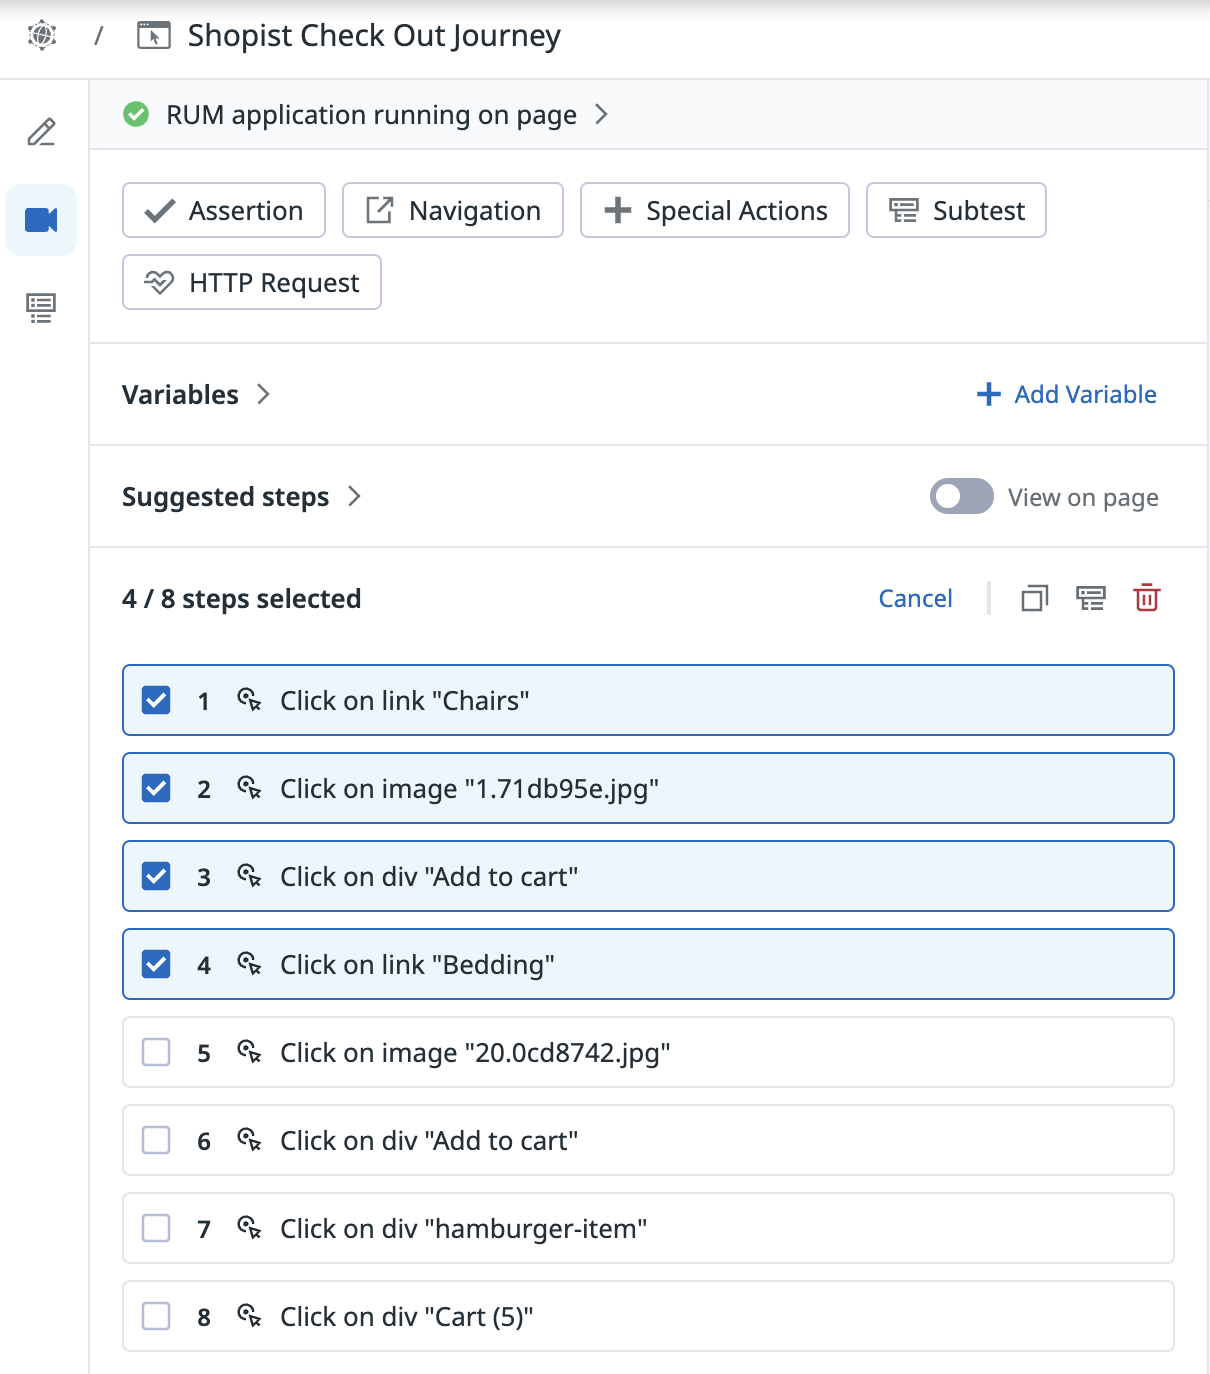
- Select multiple or single steps for deletion or replay, then click Save & Quit.
Further Reading
Additional helpful documentation, links, and articles:


