- Essentials
- Getting Started
- Agent
- API
- APM Tracing
- Containers
- Dashboards
- Database Monitoring
- Datadog
- Datadog Site
- DevSecOps
- Incident Management
- Integrations
- Internal Developer Portal
- Logs
- Monitors
- OpenTelemetry
- Profiler
- Session Replay
- Security
- Serverless for AWS Lambda
- Software Delivery
- Synthetic Monitoring and Testing
- Tags
- Workflow Automation
- Learning Center
- Support
- Glossary
- Standard Attributes
- Guides
- Agent
- Integrations
- Developers
- Authorization
- DogStatsD
- Custom Checks
- Integrations
- Create an Agent-based Integration
- Create an API Integration
- Create a Log Pipeline
- Integration Assets Reference
- Build a Marketplace Offering
- Create a Tile
- Create an Integration Dashboard
- Create a Monitor Template
- Create a Cloud SIEM Detection Rule
- OAuth for Integrations
- Install Agent Integration Developer Tool
- Service Checks
- IDE Plugins
- Community
- Guides
- OpenTelemetry
- Administrator's Guide
- API
- Partners
- Datadog Mobile App
- DDSQL Reference
- CoScreen
- CoTerm
- Cloudcraft (Standalone)
- In The App
- Dashboards
- Notebooks
- DDSQL Editor
- Reference Tables
- Sheets
- Monitors and Alerting
- Metrics
- Watchdog
- Bits AI
- Internal Developer Portal
- Error Tracking
- Change Tracking
- Service Management
- Actions & Remediations
- Infrastructure
- Cloudcraft
- Resource Catalog
- Universal Service Monitoring
- Hosts
- Containers
- Processes
- Serverless
- Network Monitoring
- Cloud Cost
- Application Performance
- APM
- APM Terms and Concepts
- Application Instrumentation
- APM Metrics Collection
- Trace Pipeline Configuration
- Correlate Traces with Other Telemetry
- Trace Explorer
- Recommendations
- Code Origins for Spans
- Service Observability
- Endpoint Observability
- Dynamic Instrumentation
- Live Debugger
- Error Tracking
- Data Security
- Guides
- Troubleshooting
- Continuous Profiler
- Database Monitoring
- Agent Integration Overhead
- Setup Architectures
- Setting Up Postgres
- Setting Up MySQL
- Setting Up SQL Server
- Setting Up Oracle
- Setting Up Amazon DocumentDB
- Setting Up MongoDB
- Connecting DBM and Traces
- Data Collected
- Exploring Database Hosts
- Exploring Query Metrics
- Exploring Query Samples
- Exploring Database Schemas
- Exploring Recommendations
- Troubleshooting
- Guides
- Data Streams Monitoring
- Data Jobs Monitoring
- Data Observability
- Digital Experience
- Real User Monitoring
- Synthetic Testing and Monitoring
- Continuous Testing
- Product Analytics
- Software Delivery
- CI Visibility
- CD Visibility
- Deployment Gates
- Test Optimization
- Quality Gates
- DORA Metrics
- Security
- Security Overview
- Cloud SIEM
- Code Security
- Cloud Security
- App and API Protection
- Workload Protection
- Sensitive Data Scanner
- AI Observability
- Log Management
- Observability Pipelines
- Log Management
- Administration
Automate Security Workflows with Workflow Automation
This product is not supported for your selected Datadog site. ().
Datadog Workflow Automation allows you to orchestrate and automate your end-to-end processes by building workflows made up of actions that connect to your infrastructure and tools.
Use Workflow Automation with Cloud Security to automate your security-related workflows. For example, you can create workflows that allow you to block access to a public Amazon S3 bucket via an interactive Slack message, or automatically create a Jira issue and assign it to a team.
Understanding how triggers and sources work
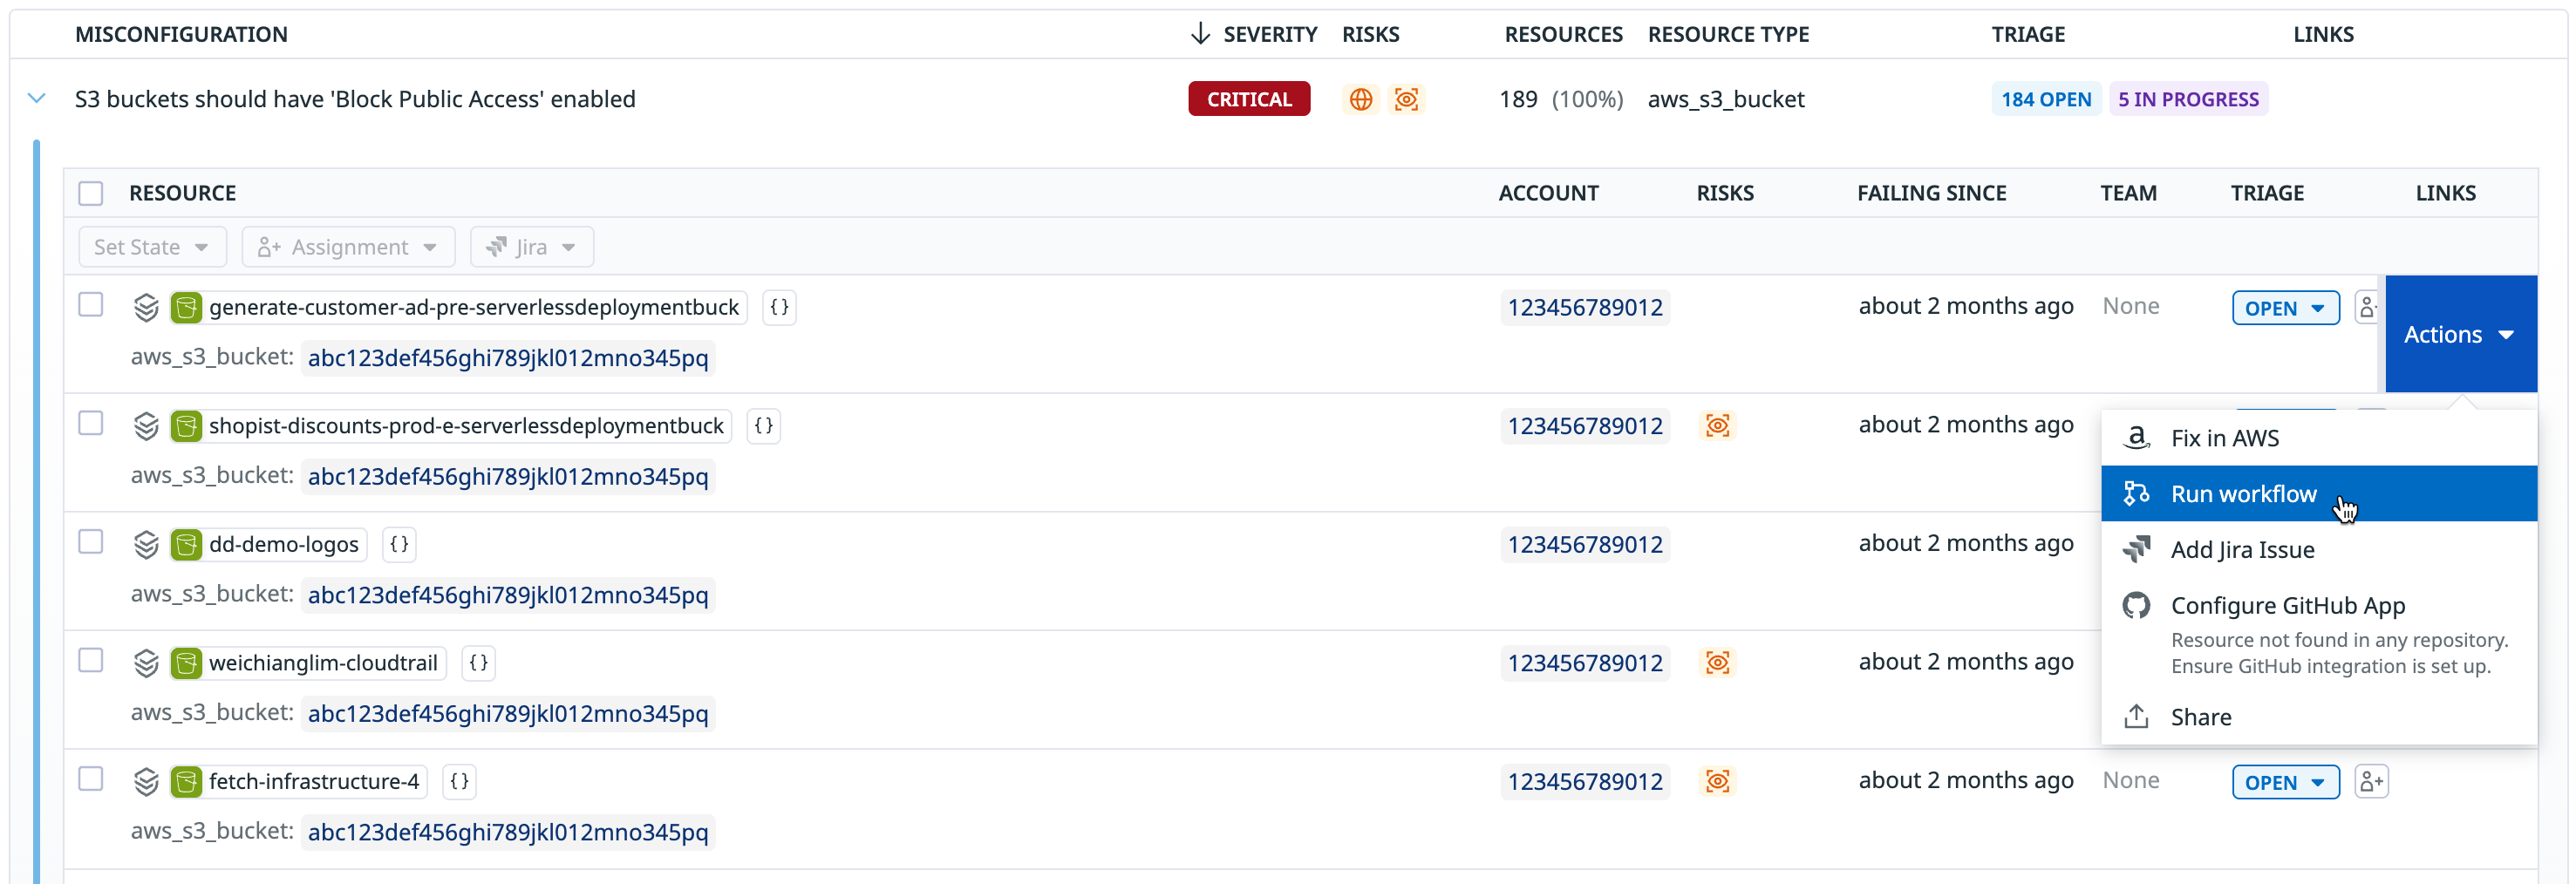
Workflow Automation allows you to trigger a workflow manually or automatically. In the example workflows in this article, the workflows are triggered manually by clicking the Actions > Run Workflow button on the side panels.
When you trigger a workflow, the source ID of the trigger event must be passed on to the next step in the workflow. In the examples in this article, the trigger events are a new security finding. In both cases, the source IDs are specified in the initial step of the workflow using source object variables.
Build a workflow
You can build a workflow using a preconfigured flow from an out-of-the-box blueprint, or by creating a custom workflow. For detailed instructions on how to create a workflow, see the Workflow Automation docs.
Block access to Amazon S3 bucket via Slack
This example creates a remediation workflow that sends an interactive Slack message when a public Amazon S3 bucket is detected. By clicking Approve or Reject, you can automatically block access to the S3 bucket or decline to take action.
Note: To build this workflow, you must configure the Slack integration.
- On the Workflow Automation page, click New Workflow.
- Click Add Trigger > Security. A workflow must have the security trigger before you can run it.
- Enter a name for the workflow and click Save.
Get security misconfiguration
To retrieve the security misconfiguration and pass it into the workflow, use the Get security finding action. The action uses the {{ Source.securityFinding.id }} source object variable to retrieve the misconfiguration’s details from the Get a finding API endpoint.
- Click Add Step to add the first step to your workflow.
- Search for the Get security finding action and select it to add it as a step on your workflow canvas.
- Click the step in the workflow canvas to configure it.
- For Finding ID, enter
{{ Source.securityFinding.id }}. - Click Save to save your workflow.
Add JS function
Next, add the JavaScript Data Transformation Function action to the canvas and configure it to return the region name from the misconfiguration’s tags.
- Click the plus (
+) icon on the workflow canvas to add another step. - Search for the JS Function action and select it to add it as a step on your workflow canvas.
- Click the step in the workflow canvas and paste the following in the script editor:
    // Gets the region info from the misconfiguration tags
    // Use `$` to access Trigger or Steps data.
    // Use `_` to access Lodash.
    // See https://lodash.com/ for reference.

    let tags = $.Steps.Get_security_finding.tags

    let region = tags.filter(t => t.includes('region:'))
    if(region.length == 1){
        return region[0].split(':')[1]
    } else {
        return '';
    }
Add Slack action
- Click the plus (
+) icon on the workflow canvas to add another step. - Search for the Make a decision action for Slack and select it to add it as a step on your workflow canvas.
- Click the step in the workflow canvas and enter the following information:
- Workspace: The name of your Slack workspace.
- Channel: The channel to send the Slack message to.
- Prompt text: The text that appears immediately above the choice buttons in the Slack message, for example, “Would you like to block public access for
{{ Steps.Get_security_finding.resource }}in region{{ Steps.GetRegion.data }}?”
Approve workflow
- Under Approve on the workflow canvas, click the plus (
+) icon to add another step. - Search for the Block Public Access action for Amazon S3 and select it to add it as a step on your workflow canvas.
- Click the step in the workflow canvas and enter the following information:
- Connection: The name of the workflow connection for the AWS integration.
- Region:
{{ Steps.GetRegion.data }} - Bucket name:
{{ Steps.Get_security_finding.resource }}
- Under the Block public access step on the workflow canvas, click the plus (
+) icon to add another step. - Search for the Send message action for Slack and select it to add it as a step on your workflow canvas.
- Click the step in the workflow canvas and enter the following information:
- Workspace: The name of your Slack workspace.
- Channel: The channel to send the Slack message to.
- Message text: The text that appears in the Slack message. For example:
    S3 bucket `{{ Steps.Get_security_finding.resource }}` successfully blocked. AWS API response:
    ```{{ Steps.Block_public_access }}```

    The issue will be marked as fixed the next time the resource is scanned, which can take up to one hour.
Reject workflow
- Under Reject on the workflow canvas, click the plus (
+) icon to add another step. - Search for the Send message action for Slack and select it to add it as a step on your workflow canvas.
- Click the step in the workflow canvas and enter the following information:
- Workspace: The name of your Slack workspace.
- Channel: The channel to send the Slack message to.
- Message text: The text that appears in the Slack message, for example, “User declined the action”.
- Click Save.
Automatically create and assign a Jira issue
This example creates an automated ticket routing workflow that creates and assigns a Jira issue to the appropriate team when a security finding is detected.
Note: To build this workflow, you must configure the Jira integration.
- On the Workflow Automation page, click New Workflow.
- Click Add Trigger > Security. A workflow must have the security trigger before you can run it.
- Enter a name for the workflow and click Save.
Get security finding
To retrieve the finding and pass it into the workflow, use the Get security finding action. The action uses the {{ Source.securityFinding.id }} source object variable to retrieve the finding’s details from the Get a finding API endpoint.
- Click Add Step to add the first step to your workflow.
- Search for the Get security finding action and select it to add it as a step on your workflow canvas.
- Click the step in the workflow canvas to configure it.
- For Security ID, enter
{{ Source.securityFinding.id }}.
Add Jira action
- Click the plus (
+) icon on the workflow canvas to add another step. - Search for the Create issue Jira action and select it to add it as a step on your workflow canvas.
- Click the step in the workflow canvas and enter the following information:
- Jira account: The URL of your Jira account.
- Project:
{{ Source.securityFinding.tags_value.team }} - Summary:
{{ Source.securityFinding.rule.name }}
- Click Save.
Trigger a workflow
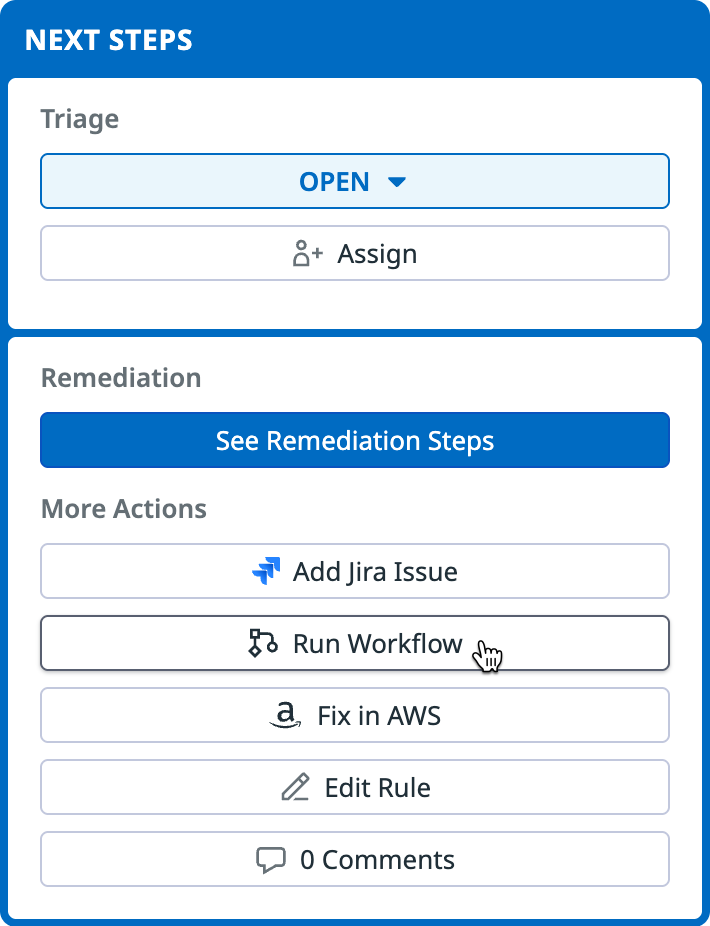
You can trigger an existing workflow from the misconfiguration or identity risks explorers, as well as when you have a resource open in a side panel.
- In an explorer, hover over the resource, click the Actions dropdown that appears, then click Run workflow.
- In the side panel, in the Next Steps section, Run Workflow, and select a workflow to run.
The workflow must have a security trigger to appear in the list of workflows you can run. Depending on the workflow, you may be required to enter additional input parameters, such as incident details and severity, the name of the impacted S3 bucket, or the Slack channel you want to send an alert to.
After running the workflow, additional information is shown on the side panel. You can click the link to view the workflow.
Further Reading
Additional helpful documentation, links, and articles:


