You may create a test using one of the following options:
Create a test from a template:
Hover over one of the pre-populated templates and click View Template. This opens a side panel displaying pre-populated configuration information, including: Test Details, Request Details, Assertions, Alert Conditions, and Monitor Settings.
Click +Create Test to open the Define Request page, where you can review and edit the pre-populated configuration options. The fields presented are identical to those available when creating a test from scratch.
Click Save Details to submit your API test.
Build a test from scratch:
テストを一から作成するには、+ Start from scratch テンプレートをクリックし、WebSocket リクエストタイプを選択します。
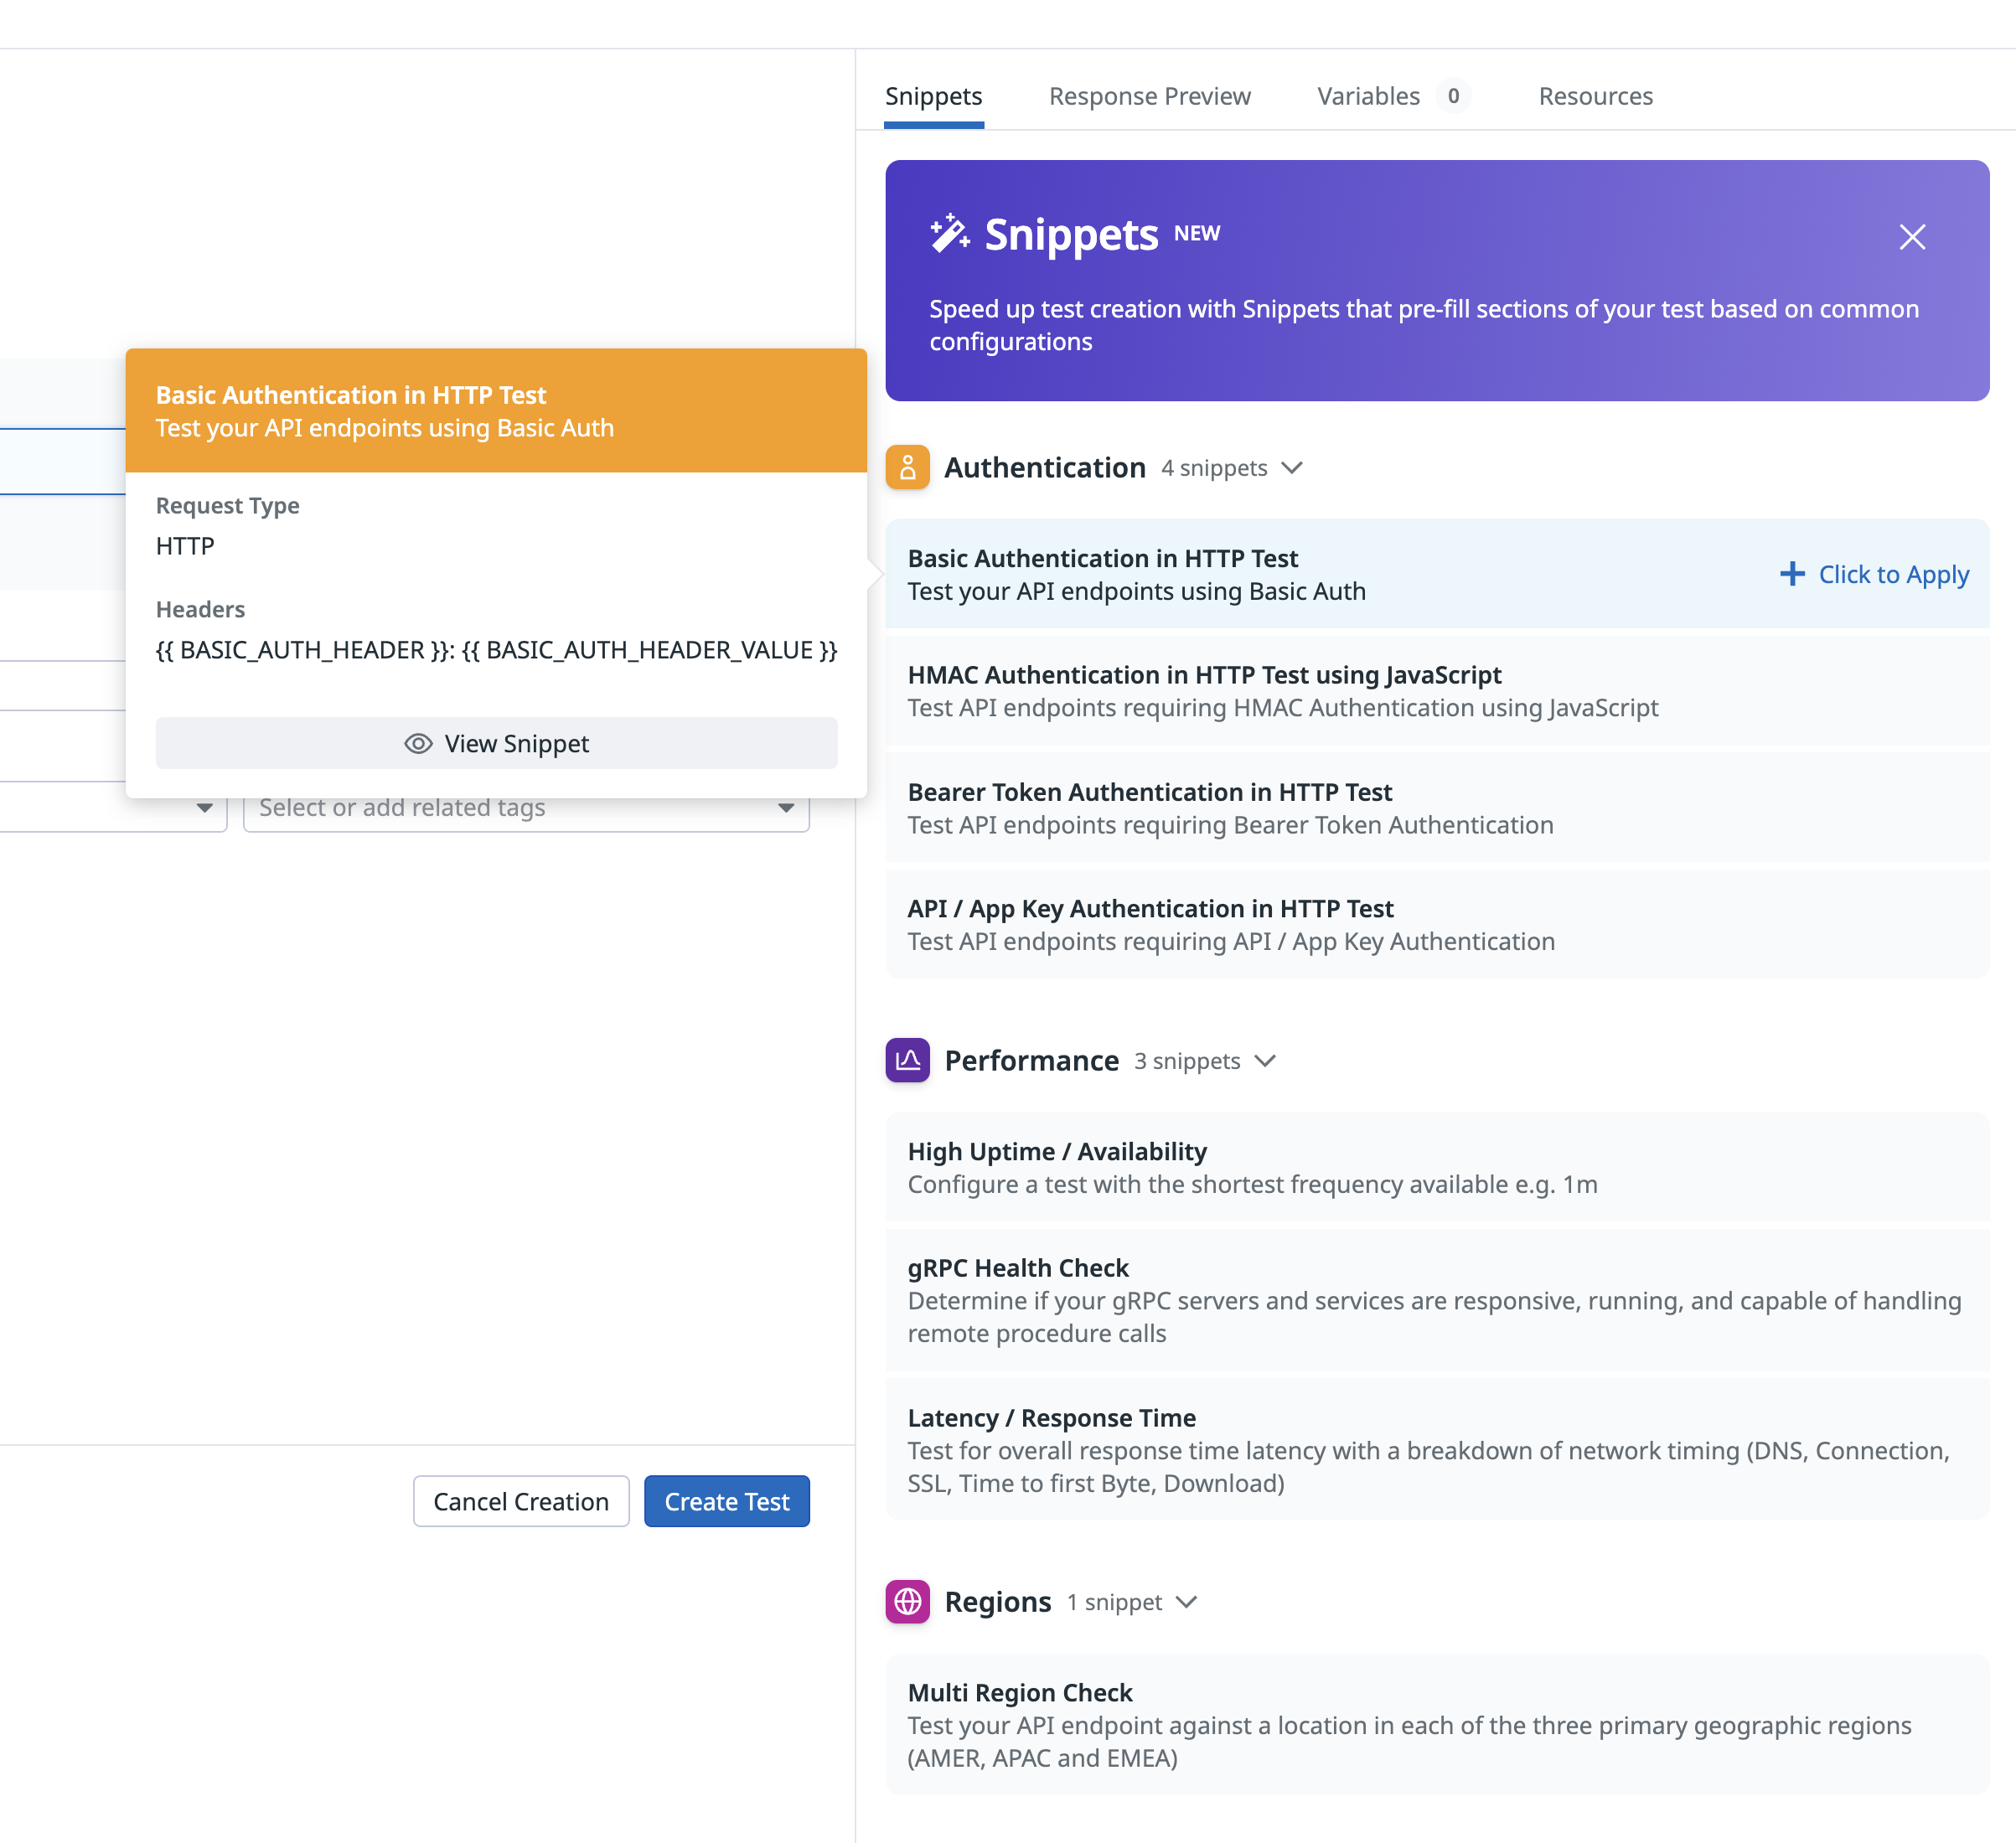
When setting up a new Synthetic Monitoring API test, use snippets to automatically fill in basic auth, performance, and regions, rather than selecting these options manually. The following snippets are available:
Basic Auth: Automatically test your APIs using pre-populated basic auth headers, JavaScript, bearer token, and API/app key auth variables.
Performance: Automatically configure a test with the shortest frequency (one minute), perform a gRPC health check, and test for overall response time latency with a breakdown of network timing.
Regions: Automatically test your API endpoint against a location in each of the three primary geographic regions (AMER, APAC and EMEA).
アサーションを定義する
アサーションは、期待されるテスト結果が何であるかを定義します。Test URL をクリックすると、response time の基本的なアサーションが追加されます。テストで監視するには、少なくとも 1 つのアサーションを定義する必要があります。
タイプ
演算子
値の型
response time
is less than
整数 (ms)
文字列応答
contains、does not contain、is、is not、 matches、does not match
アサーションで OR ロジックを実行するには、matches regex あるいは does not match regex コンパレータを使用して、(0|100) のように同じアサーションタイプに対して複数の期待値を設定した正規表現を定義します。文字列レスポンスまたはヘッダーアサーションの値が 0 あるいは 100 の場合、テストは成功です。
Set alert conditions to determine the circumstances under which you want a test to fail and trigger an alert.
Alerting rule
When you set the alert conditions to: An alert is triggered if any assertion fails for X minutes from any n of N locations, an alert is triggered only if these two conditions are true:
At least one location was in failure (at least one assertion failed) during the last X minutes;
At one moment during the last X minutes, at least n locations were in failure.
Fast retry
Your test can trigger retries X times after Y ms in case of a failed test result. Customize the retry interval to suit your alerting sensibility.
Location uptime is computed on a per-evaluation basis (whether the last test result before evaluation was up or down). The total uptime is computed based on the configured alert conditions. Notifications sent are based on the total uptime.
A notification is sent by your test based on the alerting conditions previously defined. Use this section to define how and what to message your team.
Similar to how you configure monitors, select users and/or services that should receive notifications either by adding an @notification to the message or by searching for team members and connected integrations with the dropdown menu.
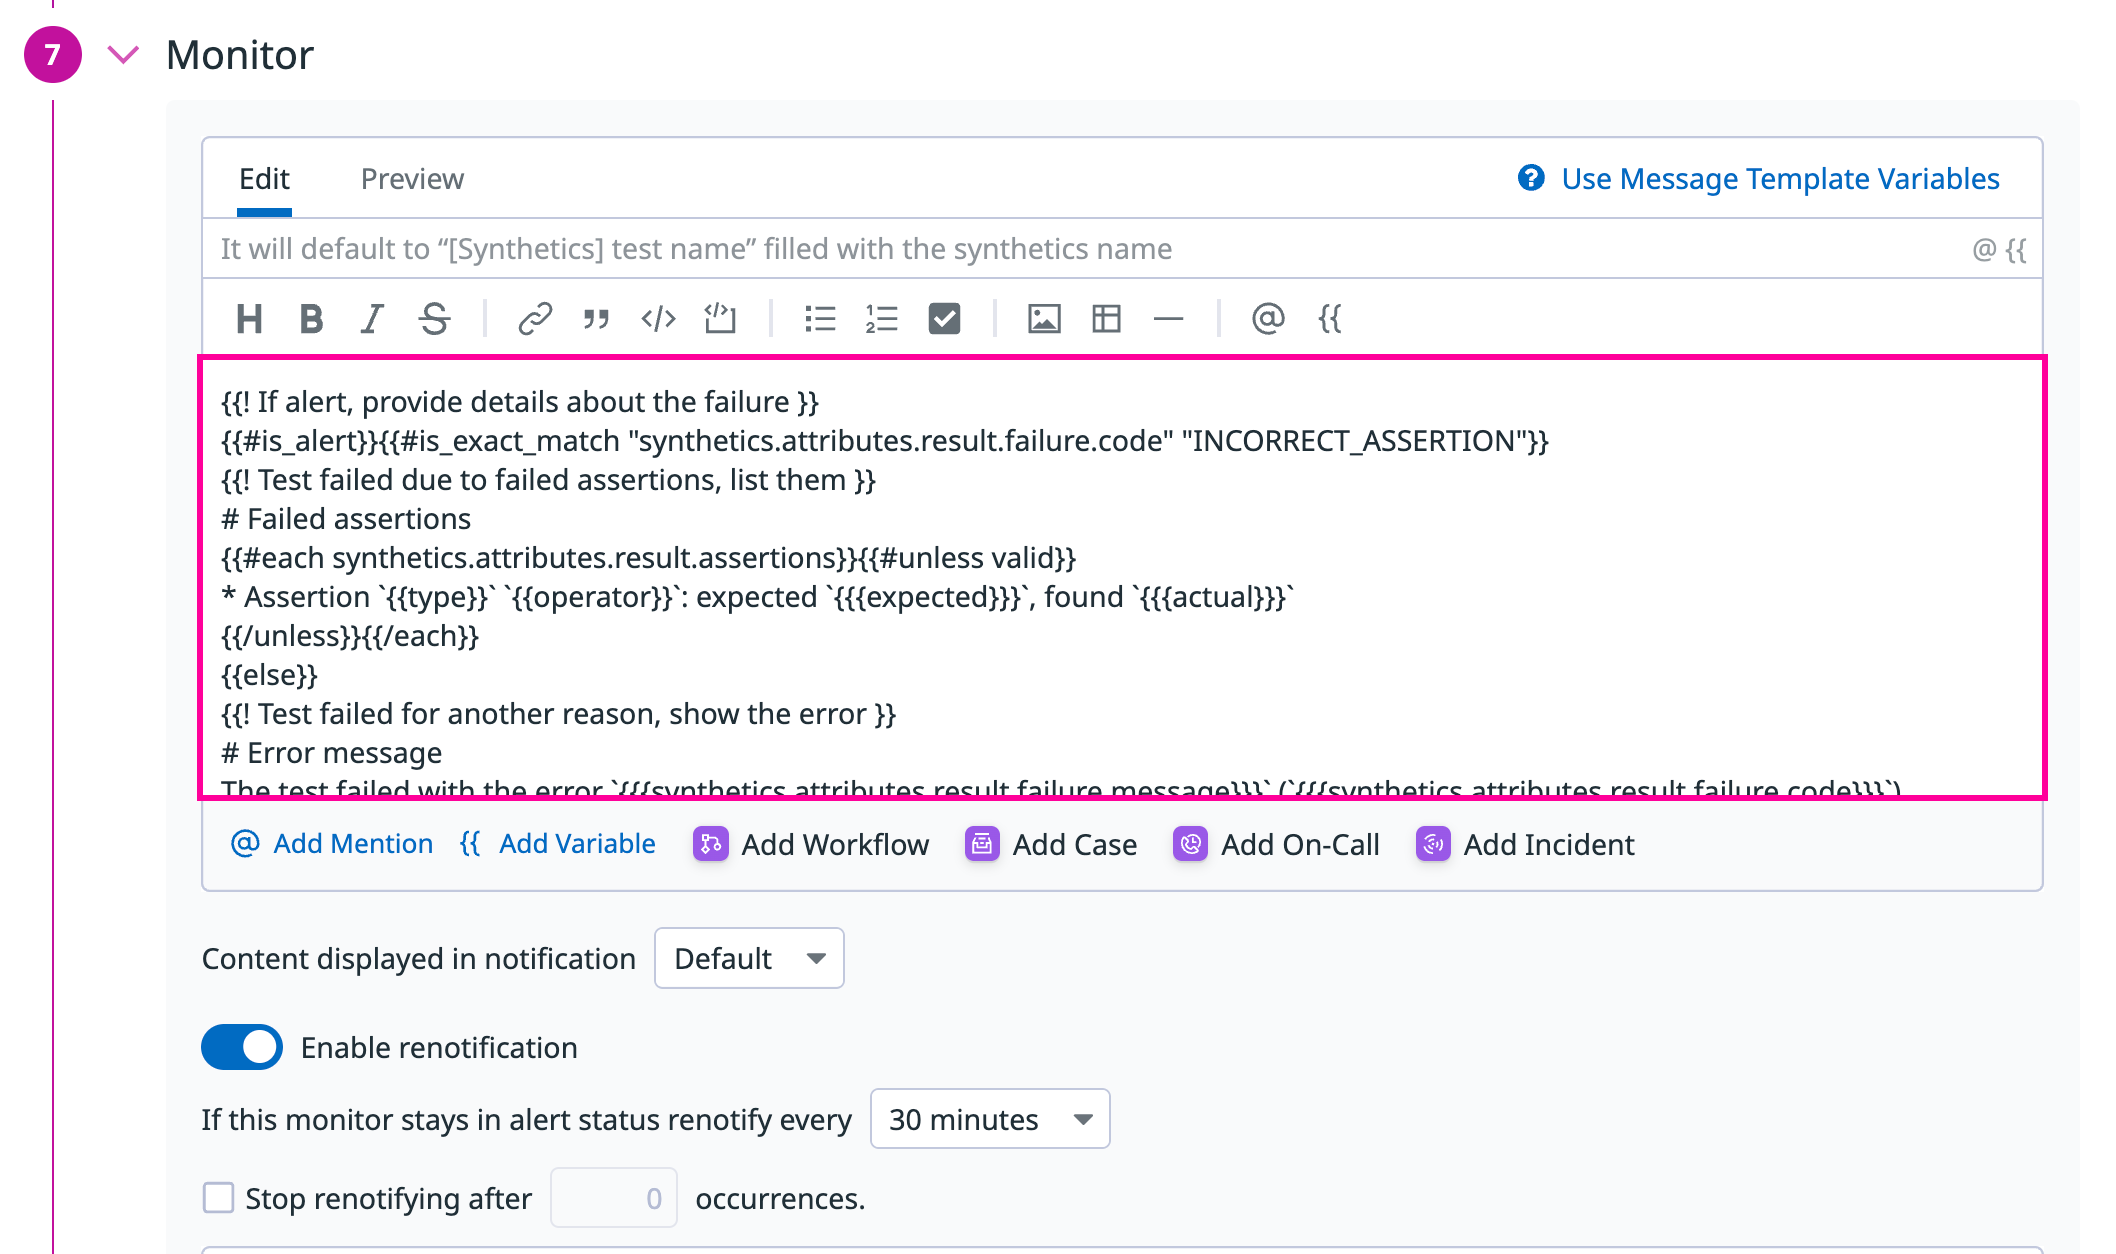
Enter the notification message for your test or use pre-filled monitor messages. This field allows standard Markdown formatting and supports the following conditional variables:
Conditional Variable
Description
{{#is_alert}}
Show when the test alerts.
{{^is_alert}}
Show unless the test alerts.
{{#is_recovery}}
Show when the test recovers from alert.
{{^is_recovery}}
Show unless the test recovers from alert.
{{#is_renotify}}
Show when the monitor renotifies.
{{^is_renotify}}
Show unless the monitor renotifies.
{{#is_priority}}
Show when the monitor matches priority (P1 to P5).
{{^is_priority}}
Show unless the monitor matches priority (P1 to P5).
Notification messages include the message defined in this section and information about the failing locations. Pre-filled monitor messages are included in the message body section:
Specify how often you want your test to re-send the notification message in case of test failure. To prevent renotification on failing tests, check the option Stop re-notifying on X occurrences.
Click Save & Start Recording to save your test configuration and monitor.
To create a local variable, click + All steps > Variables. You can select one of the following available builtins to add to your variable string:
{{ numeric(n) }}
Generates a numeric string with n digits.
{{ alphabetic(n) }}
Generates an alphabetic string with n letters.
{{ alphanumeric(n) }}
Generates an alphanumeric string with n characters.
{{ date(n unit, format) }}
Generates a date in one of Datadog’s accepted formats with a value corresponding to the UTC date the test is initiated at + or - n units.
{{ timestamp(n, unit) }}
Generates a timestamp in one of Datadog’s accepted units with a value corresponding to the UTC timestamp the test is initiated at +/- n units.
{{ uuid }}
Generates a version 4 universally unique identifier (UUID).
{{ public-id }}
Injects the Public ID of your test.
{{ result-id }}
Injects the Result ID of your test run.
To obfuscate local variable values in test results, select Hide and obfuscate variable value. Once you have defined the variable string, click Add Variable.
TIMEOUT: The request couldn't be completed in a reasonable time. は、リクエストの持続時間がテスト定義のタイムアウト (デフォルトは 60 秒に設定されています) に当たったことを示します。
各リクエストについて、ネットワークウォーターフォールに表示されるのは、リクエストの完了したステージのみです。例えば、Total response time だけが表示されている場合、DNS の解決中にタイムアウトが発生したことになります。
TIMEOUT: Overall test execution couldn't be completed in a reasonable time. は、テスト時間 (リクエスト+アサーション) が最大時間 (60.5s) に達したことを示しています。