概要
GitLab パイプラインで Continuous Testing テストを実行し、デプロイをブロックし、ロールバックをトリガーして、重要なビジネスワークフローが期待通りに機能するときに、コードが本番環境に追加されていることを確認します。
Continuous Testing テストを GitLab パイプラインにインテグレーションするには、datadog-ci npm パッケージを使用します。
セットアップ
始めるには
- GitLab プロジェクトに Datadog の API キーとアプリケーションキーを変数として追加します。
- GitLab ランナーに Node.js >= 10.24.1 がインストールされていることを確認します。
詳しくは、CI/CD インテグレーション構成をご覧ください。
シンプルな構成
テスト ID を使ったテストの実行
stages:
  - test
synthetic-tests:
  stage: test
  script:
    - npm install -g @datadog/datadog-ci
    - datadog-ci synthetics run-tests --apiKey "$DATADOG_API_KEY" --appKey "$DATADOG_APP_KEY" --public-id xtf-w5p-z5n --public-id eif-van-tu7
タグを使ったテストの実行
stages:
  - test
synthetic-tests:
  stage: test
  script:
    - npm install -g @datadog/datadog-ci
    - datadog-ci synthetics run-tests --apiKey "$DATADOG_API_KEY" --appKey "$DATADOG_APP_KEY" -s 'tag:e2e-tests'
変数のオーバーライドを使ったテストの実行
もし、CI/CD 環境に固有のテストユーザーやデータがある場合は、-v コマンドでこれらの変数をオーバーライドすることができます。詳しくは、NPM パッケージ datadog-ci の Synthetics コマンドを参照してください。
stages:
  - test
synthetic-tests:
  stage: test
  script:
    - npm install -g @datadog/datadog-ci
    - datadog-ci synthetics run-tests --apiKey "$DATADOG_API_KEY" --appKey "$DATADOG_APP_KEY" -s 'tag:e2e-tests' -v PASSWORD="$PASSWORD"
高度なコンフィギュレーション
カスタムコンフィギュレーションファイルを使ったテストの実行
カスタム config.json ファイルをパイプラインリポジトリに追加し、パイプラインの構成でアクセスします。
stages:
- test
synthetic-tests:
stage: test
script:
- npm install -g @datadog/datadog-ci
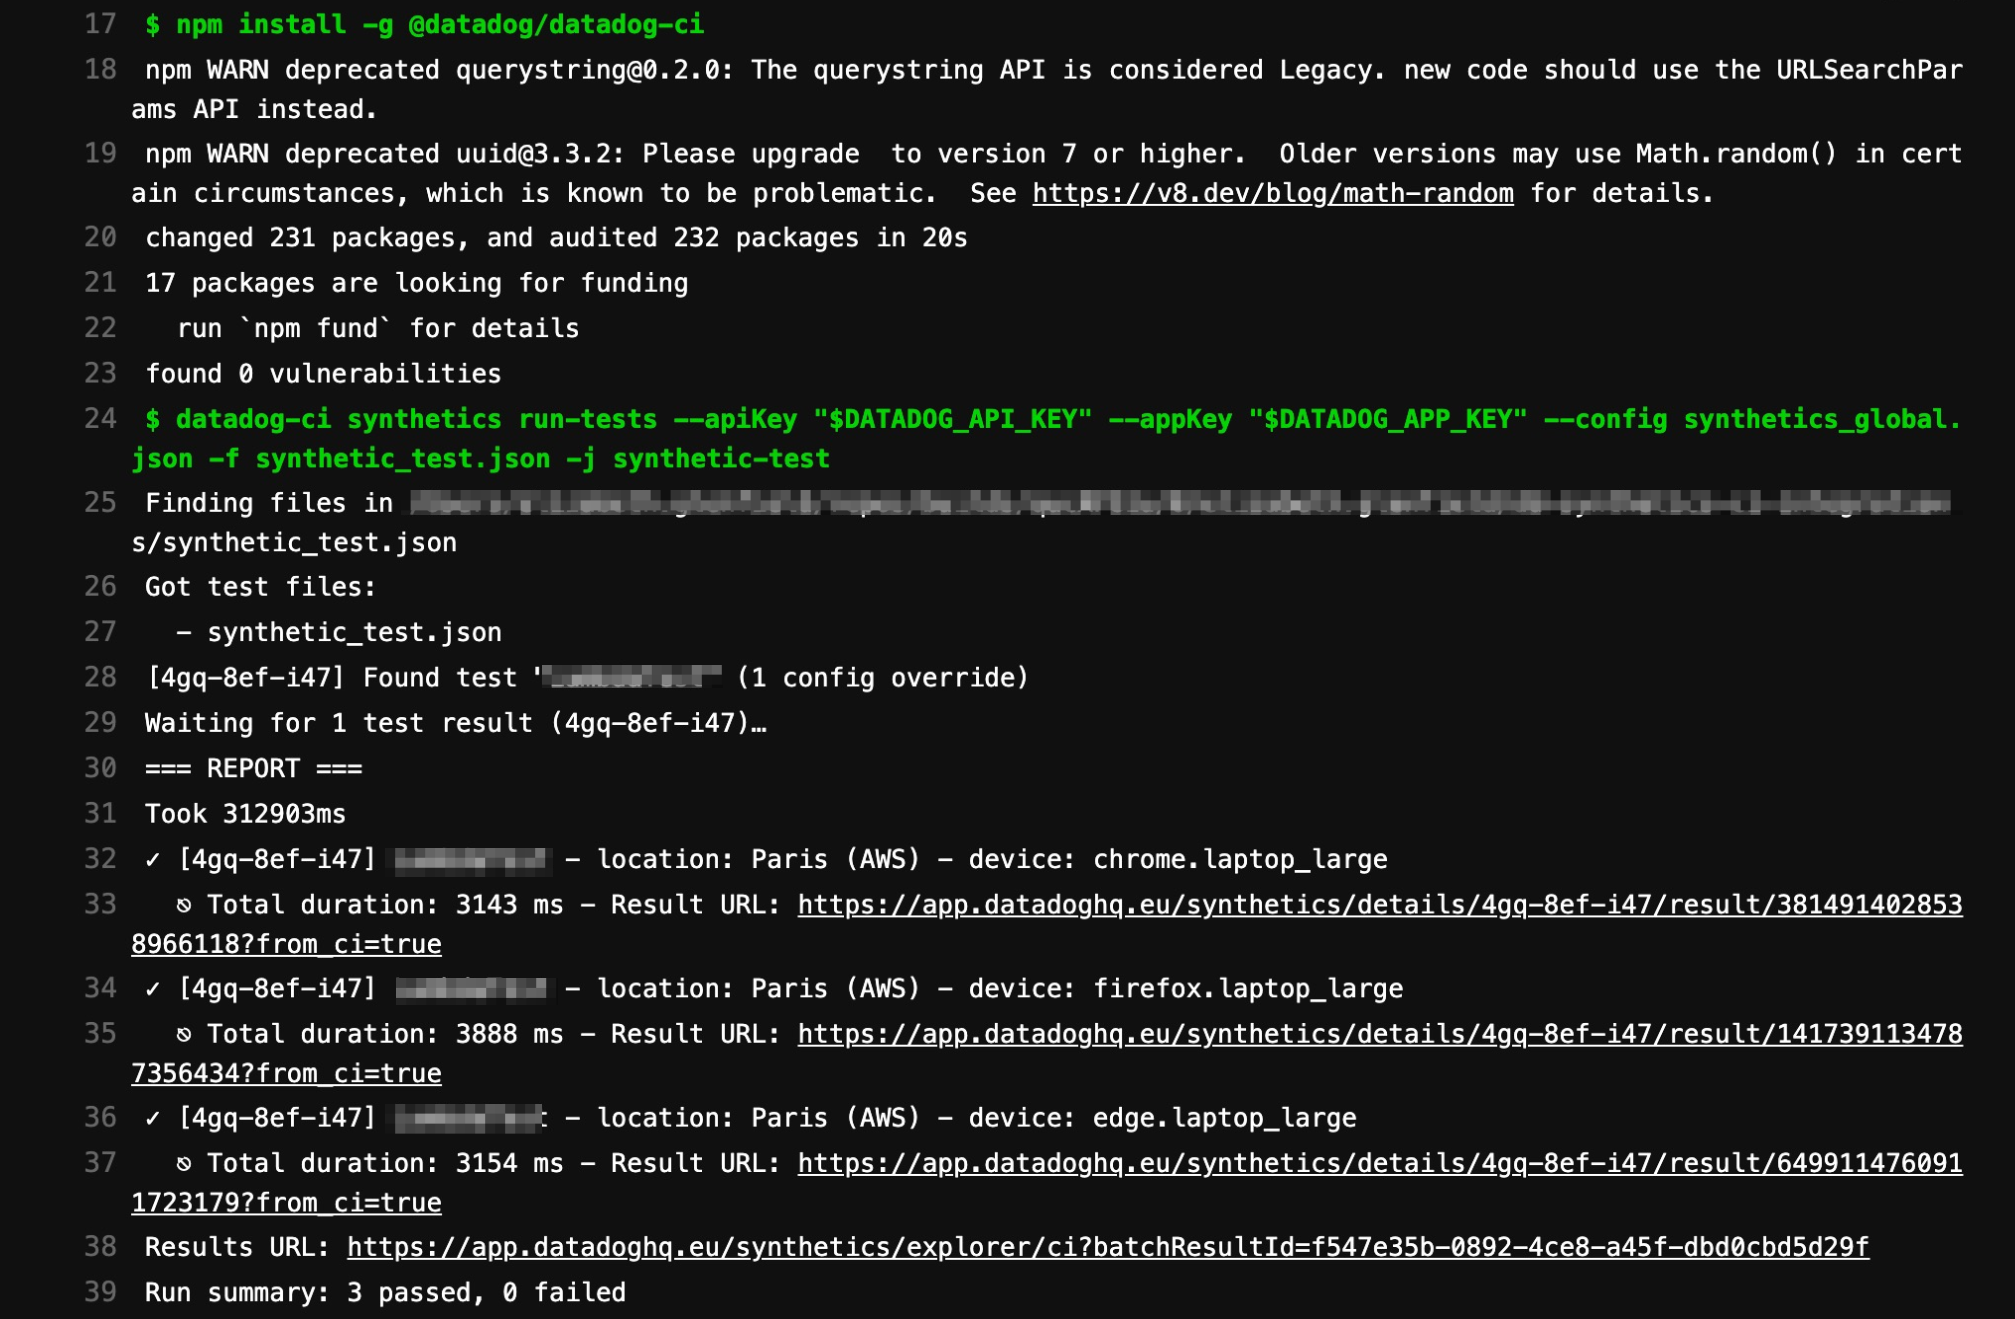
- datadog-ci synthetics run-tests --apiKey "$DATADOG_API_KEY" --appKey "$DATADOG_APP_KEY" --config synthetics_global.json -f synthetic_test.json
テスト出力
この例では、パイプラインがコンフィギュレーションファイルを識別し、テストを実行していることを示しています。
テスト出力に成功すると、GitLab で次のように返されます。
参考資料