Cette page n'est pas encore disponible en français, sa traduction est en cours. Si vous avez des questions ou des retours sur notre projet de traduction actuel, n'hésitez pas à nous contacter.
Overview
WebSocket tests allow you to proactively open WebSocket connections on your endpoints to verify responses and defined conditions, such as overall response times or expected headers.
WebSocket tests can run from both managed and private locations depending on your preference for running the test from outside or inside your network. WebSocket tests can run on a schedule, on-demand, or directly within your CI/CD pipelines.
Configuration
You may create a test using one of the following options:
Create a test from a template:
Hover over one of the pre-populated templates and click View Template. This opens a side panel displaying pre-populated configuration information, including: Test Details, Request Details, Assertions, Alert Conditions, and Monitor Settings.
Click +Create Test to open the Define Request page, where you can review and edit the pre-populated configuration options. The fields presented are identical to those available when creating a test from scratch.
Click Save Details to submit your API test.
Build a test from scratch:
To build a test from scratch, click the + Start from scratch template, then select the WebSocket request type.
Specify the URL to run your test on.
Enter the string you want to send in your test.
Add Advanced Options (optional) to your test:
Timeout: Specify the amount of time in seconds before the test times out.
Request headers: Define headers to add to the HTTP request initiating the WebSocket connection. You can also override the default headers (for example, the user-agent header).
Cookies: Define cookies to add to the HTTP request initiating the WebSocket connection. Set multiple cookies using the format <COOKIE_NAME1>=<COOKIE_VALUE1>; <COOKIE_NAME2>=<COOKIE_VALUE2>.
Add Environment Tags as well as any other tag to your WebSocket test. You can then use these tags to filter through your Synthetic tests on the Synthetic Monitoring & Continuous Testing page.
Click Send to try out the request configuration. A response preview is displayed on the right side of your screen.
Click Create Test to submit your API test.
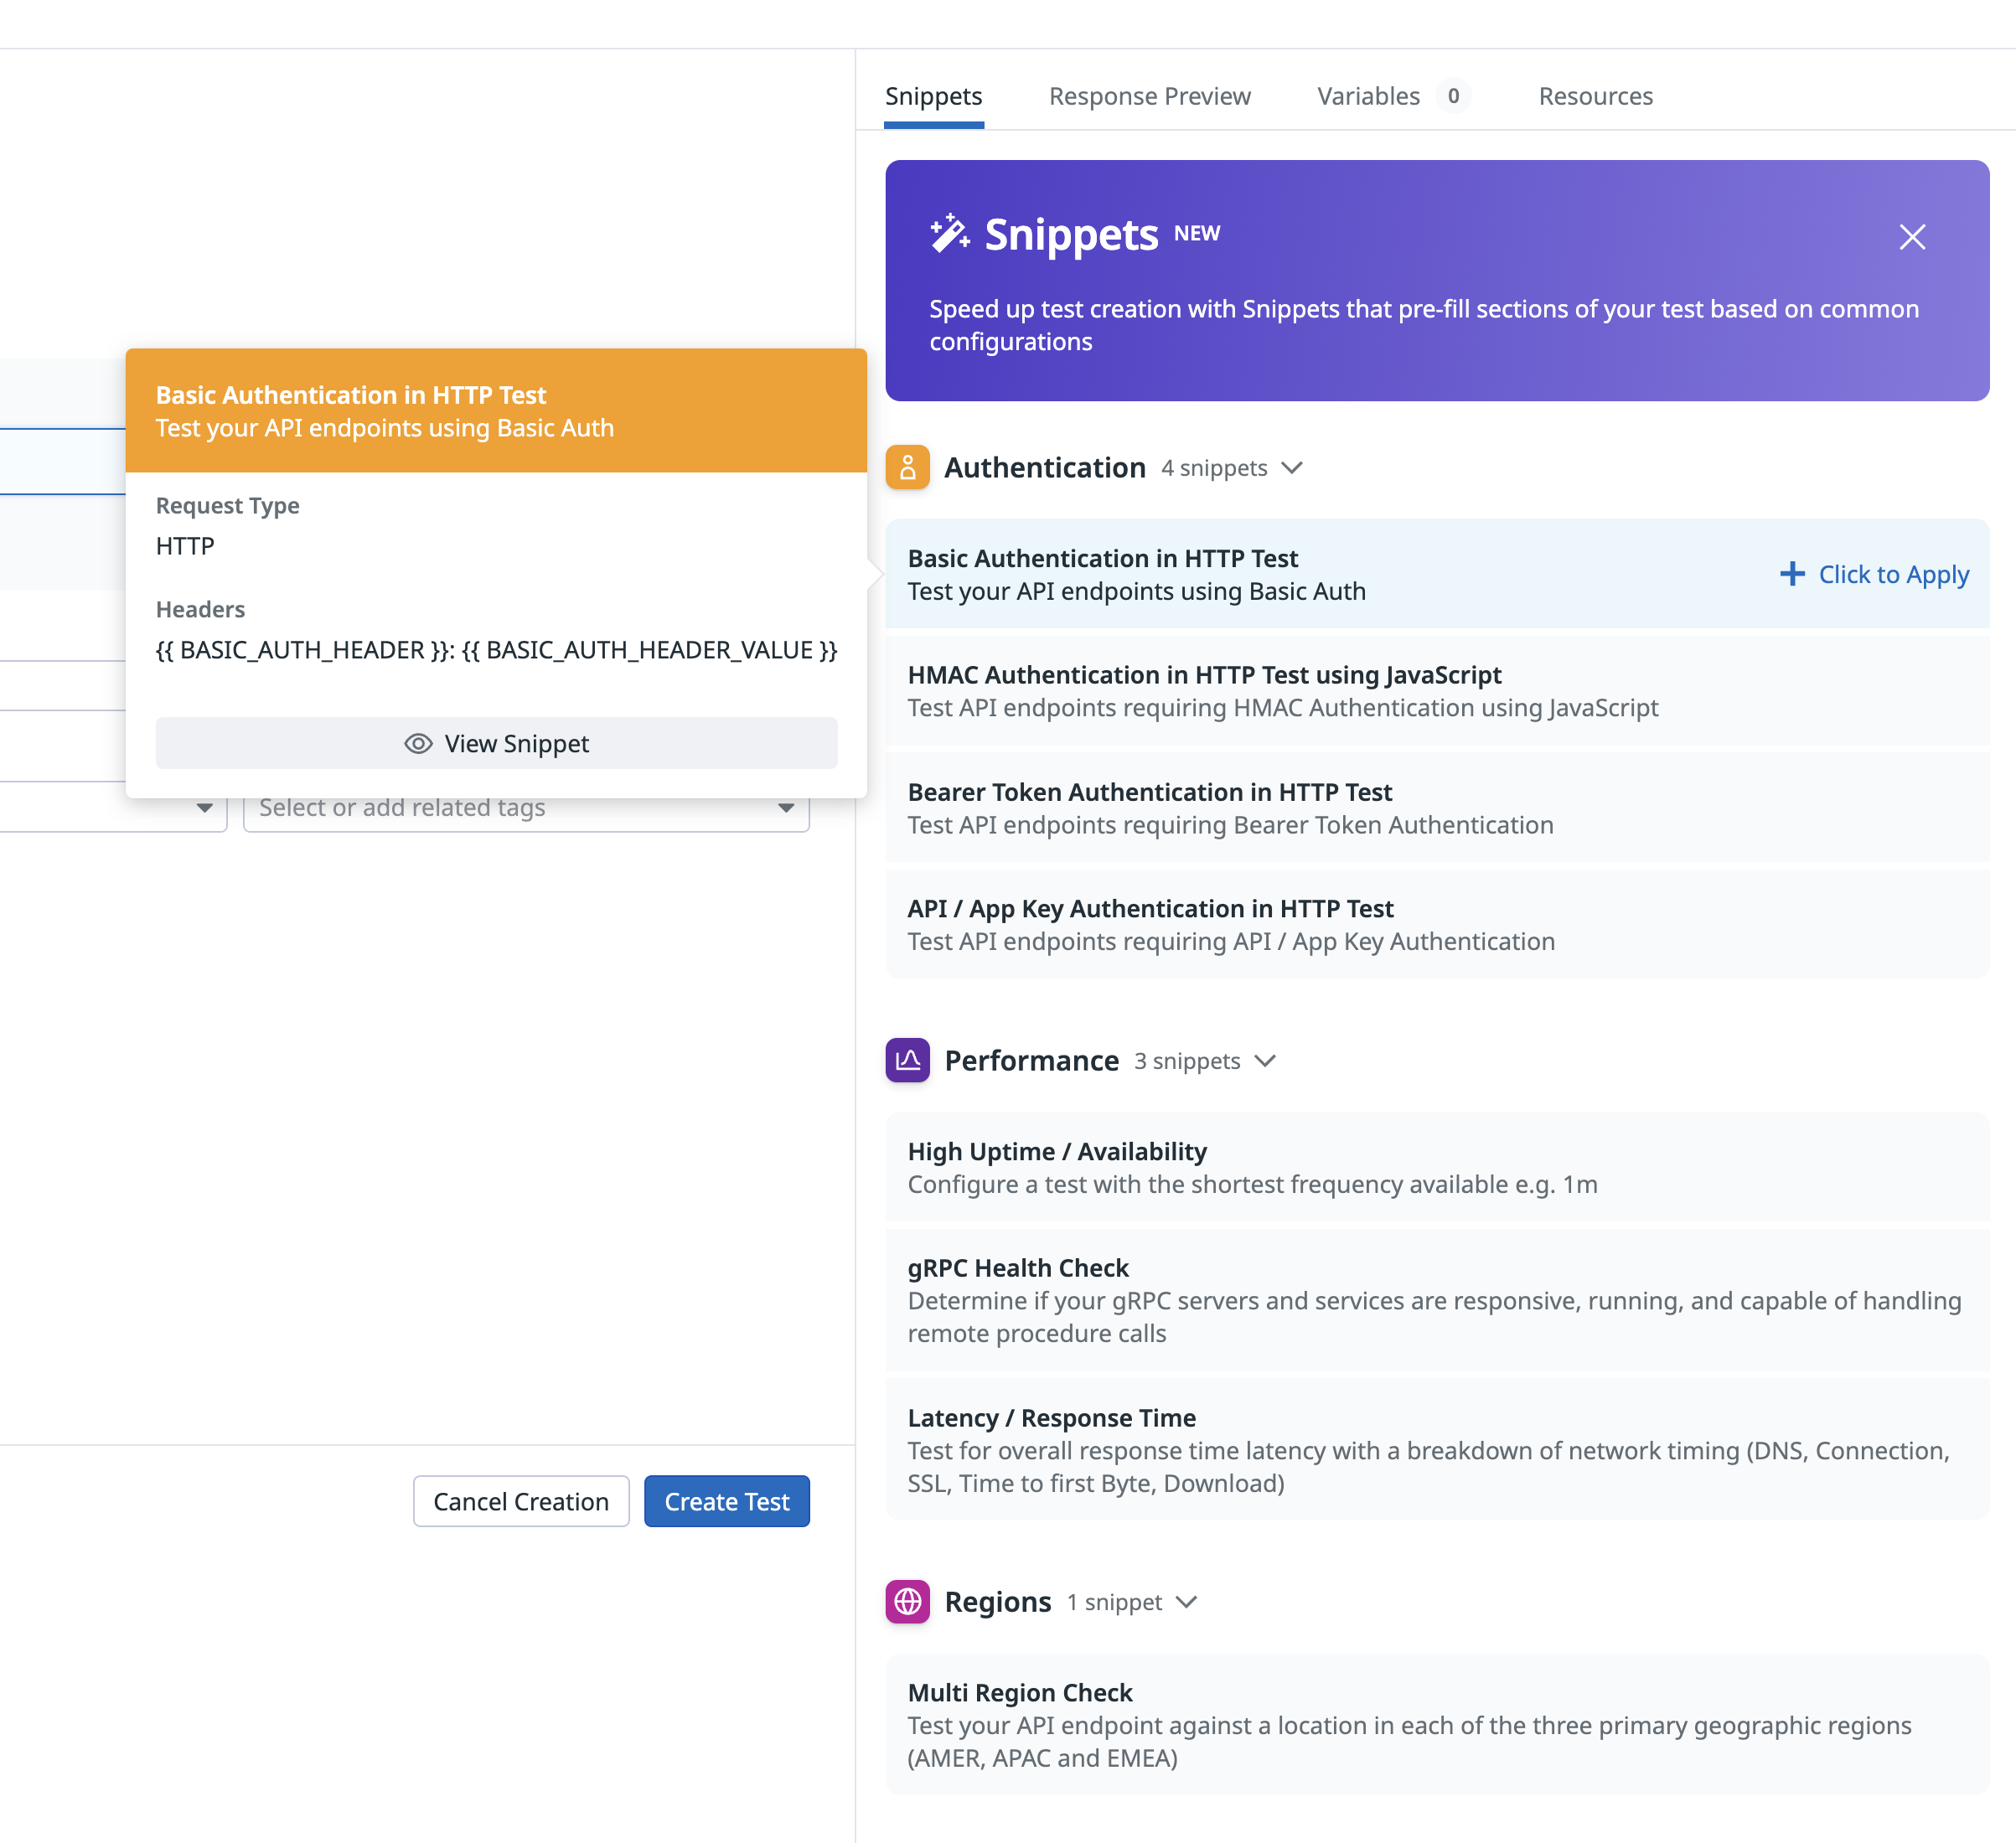
Snippets
When setting up a new Synthetic Monitoring API test, use snippets to automatically fill in basic auth, performance, and regions, rather than selecting these options manually. The following snippets are available:
Basic Auth: Automatically test your APIs using pre-populated basic auth headers, JavaScript, bearer token, and API/app key auth variables.
Performance: Automatically configure a test with the shortest frequency (one minute), perform a gRPC health check, and test for overall response time latency with a breakdown of network timing.
Regions: Automatically test your API endpoint against a location in each of the three primary geographic regions (AMER, APAC and EMEA).
Define assertions
Assertions define what an expected test result is. When you click Test URL, a basic assertion on response time is added. You must define at least one assertion for your test to monitor.
Type
Operator
Value Type
response time
is less than
Integer (ms)
string response
contains, does not contain, is, is not, matches, does not match
Select the response preview directly or click New Assertion to create an assertion. You can create up to 20 assertions per WebSocket test.
To perform OR logic in an assertion, use the matches regex or does not match regex comparators to define a regex with multiple expected values for the same assertion type like (0|100). The test result is successful if the string response or header assertions’ value is 0 or 100.
If a test does not contain an assertion on the response body, the body payload drops and returns an associated response time for the request within the timeout limit set by the Synthetics Worker.
If a test contains an assertion on the response body and the timeout limit is reached, an Assertions on the body/response cannot be run beyond this limit error appears.
Select locations
Select the Locations to run your WebSocket test from. WebSocket tests can run from both managed and private locations depending on your preference for running the test from outside or inside your network.
Datadog’s out-of-the-box managed locations allow you to test public-facing websites and endpoints from regions where your customers are located.
AWS:
Americas
Asia Pacific
EMEA
Canada Central
Hong Kong
Bahrain
Northern California
Jakarta
Cape Town
Northern Virginia
Mumbai
Frankfurt
Ohio
Osaka
Ireland
Oregon
Seoul
London
São Paulo
Singapore
Milan
Sydney
Paris
Tokyo
Stockholm
GCP:
Americas
Asia Pacific
EMEA
Dallas
Tokyo
Frankfurt
Los Angeles
Oregon
Virginia
Azure:
Region
Location
Americas
Virginia
The Datadog for Government site (US1-FED) uses the following managed location:
Region
Location
Americas
US-West
Specify test frequency
WebSocket tests can run:
On a schedule to ensure your most important endpoints are always accessible to your users. Select the frequency at which you want Datadog to run your WebSocket test.
Within your CI/CD pipelines to start shipping without fearing faulty code might impact your customers’ experience.
On-demand to run your tests whenever makes the most sense for your team.
Définir des conditions d’alerte
Définissez des conditions d’alerte afin de spécifier les circonstances dans lesquelles vous souhaitez qu’un test échoue et déclenche une alerte.
Règle d’alerte
Lorsque vous définissez les conditions d’alerte sur An alert is triggered if any assertion fails for X minutes from any n of N locations, une alerte se déclenche uniquement si les deux conditions suivantes se vérifient :
Au moins un emplacement a donné lieu à un échec (au moins une assertion a échoué) au cours des X dernières minutes
À un moment au cours des X dernières minutes, au moins n emplacements ont donné lieu à un échec.
Nouvelle tentative rapide
Votre test peut déclencher X nouvelles tentatives après Y ms en cas d’échec. Cet intervalle peut être personnalisé en fonction de vos préférences en matière d’alertes.
La disponibilité d’un emplacement est calculée pour chaque évaluation (quels que soient les résultats du dernier test avant l’évaluation). La disponibilité totale est calculée selon les conditions d’alerte configurées. Les notifications envoyées se basent sur la disponibilité totale.
Configurer le monitor de test
Votre test envoie une notification selon les conditions d’alerte définies au préalable. Cette section vous permet de définir les conditions et le message à envoyer à vos équipes.
Tout comme pour les monitors, sélectionnez les utilisateurs et/ou services qui doivent recevoir des notifications. Pour ce faire, ajoutez @notification au message, ou cherchez des membres d’équipe ou des intégrations connectées à l’aide du menu déroulant.
S’affiche lorsque le test est rétabli depuis un état d’alerte.
{{ ^is_recovery }}
S’affiche lorsque le test n’est pas rétabli depuis un état d’alerte.
{{ #is_renotify }}
S’affiche lorsque le monitor renvoie des notifications.
{{ ^is_renotify }}
S’affiche lorsque le monitor ne renvoie pas de notification.
{{ #is_priority }}
S’affiche lorsque le monitor correspond à la priorité (P1 à P5).
{{ ^is_priority }}
S’affiche lorsque le monitor ne correspond pas à la priorité (P1 à P5).
Indiquez une fréquence de renvoi du message de notification en cas d’échec d’un test. Si vous ne souhaitez pas renvoyer de notification en cas d’échec, définissez l’option sur Never renotify if the monitor has not been resolved.
Cliquez sur Create pour enregistrer la configuration de votre test et votre monitor.
To create a local variable, click + All steps > Variables. You can select one of the following available builtins to add to your variable string:
{{ numeric(n) }}
Generates a numeric string with n digits.
{{ alphabetic(n) }}
Generates an alphabetic string with n letters.
{{ alphanumeric(n) }}
Generates an alphanumeric string with n characters.
{{ date(n unit, format) }}
Generates a date in one of Datadog’s accepted formats with a value corresponding to the UTC date the test is initiated at + or - n units.
{{ timestamp(n, unit) }}
Generates a timestamp in one of Datadog’s accepted units with a value corresponding to the UTC timestamp the test is initiated at +/- n units.
{{ uuid }}
Generates a version 4 universally unique identifier (UUID).
{{ public-id }}
Injects the Public ID of your test.
{{ result-id }}
Injects the Result ID of your test run.
To obfuscate local variable values in test results, select Hide and obfuscate variable value. Once you have defined the variable string, click Add Variable.
To display your list of variables, type {{ in your desired field.
Test failure
A test is considered FAILED if it does not satisfy one or more assertions or if the request prematurely failed. In some cases, the test can fail without testing the assertions against the endpoint.
These reasons include the following:
CONNRESET
The connection was abruptly closed by the remote server. Possible causes include the web server encountering an error or crashing while responding, or loss of connectivity of the web server.
DNS
DNS entry not found for the test URL. Possible causes include misconfigured test URL or the wrong configuration of your DNS entries.
INVALID_REQUEST
The configuration of the test is invalid (for example, a typo in the URL).
The request couldn’t be completed in a reasonable time. Two types of TIMEOUT errors can happen:
TIMEOUT: The request couldn't be completed in a reasonable time. indicates that the request duration hit the test defined timeout (default is set to 60s).
For each request only the completed stages for the request are displayed in the network waterfall. For example, in the case of Total response time only being displayed, the timeout occurred during the DNS resolution.
TIMEOUT: Overall test execution couldn't be completed in a reasonable time. indicates that the test duration (request + assertions) hits the maximum duration (60.5s).
WEBSOCKET
The WebSocket connection was closed or cannot be opened. One type of WEBSOCKET error can happen:
WEBSOCKET: Received message longer than the maximum supported length. indicates that the response message length hits the maximum length (50kb).
Permissions
By default, only users with the Datadog Admin and Datadog Standard roles can create, edit, and delete Synthetic WebSocket tests. To get create, edit, and delete access to Synthetic WebSocket tests, upgrade your user to one of those two default roles.
If you are using the custom role feature, add your user to any custom role that includes synthetics_read and synthetics_write permissions.
Restrict access
Use granular access control to limit who has access to your test based on roles, teams, or individual users:
Open the permissions section of the form.
Click Edit Access.
Click Restrict Access.
Select teams, roles, or users.
Click Add.
Select the level of access you want to associate with each of them.
Click Done.
Note: You can view results from a Private Location even without Viewer access to that Private Location.
Access level
View test configuration
Edit test configuration
View test results
Run test
No access
Viewer
Yes
Yes
Editor
Yes
Yes
Yes
Yes
Further Reading
Documentation, liens et articles supplémentaires utiles: