- Principales informations
- Getting Started
- Agent
- API
- Tracing
- Conteneurs
- Dashboards
- Database Monitoring
- Datadog
- Site Datadog
- DevSecOps
- Incident Management
- Intégrations
- Internal Developer Portal
- Logs
- Monitors
- OpenTelemetry
- Profileur
- Session Replay
- Security
- Serverless for AWS Lambda
- Software Delivery
- Surveillance Synthetic
- Tags
- Workflow Automation
- Learning Center
- Support
- Glossary
- Standard Attributes
- Guides
- Agent
- Intégrations
- Développeurs
- OpenTelemetry
- Administrator's Guide
- API
- Partners
- Application mobile
- DDSQL Reference
- CoScreen
- CoTerm
- Remote Configuration
- Cloudcraft
- In The App
- Dashboards
- Notebooks
- DDSQL Editor
- Reference Tables
- Sheets
- Alertes
- Watchdog
- Métriques
- Bits AI
- Internal Developer Portal
- Error Tracking
- Change Tracking
- Service Management
- Actions & Remediations
- Infrastructure
- Cloudcraft
- Resource Catalog
- Universal Service Monitoring
- Hosts
- Conteneurs
- Processes
- Sans serveur
- Surveillance réseau
- Cloud Cost
- Application Performance
- APM
- Termes et concepts de l'APM
- Sending Traces to Datadog
- APM Metrics Collection
- Trace Pipeline Configuration
- Connect Traces with Other Telemetry
- Trace Explorer
- Recommendations
- Code Origin for Spans
- Observabilité des services
- Endpoint Observability
- Dynamic Instrumentation
- Live Debugger
- Suivi des erreurs
- Sécurité des données
- Guides
- Dépannage
- Profileur en continu
- Database Monitoring
- Agent Integration Overhead
- Setup Architectures
- Configuration de Postgres
- Configuration de MySQL
- Configuration de SQL Server
- Setting Up Oracle
- Setting Up Amazon DocumentDB
- Setting Up MongoDB
- Connecting DBM and Traces
- Données collectées
- Exploring Database Hosts
- Explorer les métriques de requête
- Explorer des échantillons de requêtes
- Exploring Database Schemas
- Exploring Recommendations
- Dépannage
- Guides
- Data Streams Monitoring
- Data Jobs Monitoring
- Data Observability
- Digital Experience
- RUM et Session Replay
- Surveillance Synthetic
- Continuous Testing
- Product Analytics
- Software Delivery
- CI Visibility
- CD Visibility
- Deployment Gates
- Test Visibility
- Code Coverage
- Quality Gates
- DORA Metrics
- Feature Flags
- Securité
- Security Overview
- Cloud SIEM
- Code Security
- Cloud Security Management
- Application Security Management
- Workload Protection
- Sensitive Data Scanner
- AI Observability
- Log Management
- Pipelines d'observabilité
- Log Management
- CloudPrem
- Administration
Connecter un cluster Amazon EKS à Cloudcraft
En analysant vos clusters Amazon EKS, Cloudcraft permet de générer des diagrammes d’architecture système afin de visualiser vos workloads et pods déployés.
Cloudcraft utilise des entrées d’accès pour accorder au rôle de l’entité IAM existante en lecture seule de Cloudcraft un accès à l’API Kubernetes. Cloudcraft ne nécessite pas l’installation d’un logiciel ou d’un Agent spécifique sur votre cluster.
La possibilité d'analyser des clusters Amazon EKS et des comptes AWS est réservée aux abonnés Cloudcraft Pro. Consultez la page de tarification pour plus d'informations.
Prérequis
Avant de connecter vos clusters Amazon EKS à Cloudcraft, il faut connecter votre compte AWS et générer des diagrammes incluant vos clusters.
Pour connecter votre compte AWS et vous familiariser avec Cloudcraft, consultez les articles suivants :
- Connecter votre compte AWS à Cloudcraft
- Créer de meilleurs diagrammes : diagrammes Live et filtrage dans Cloudcraft
Installez et configurez kubectl, un outil qui vous permet de contrôler des clusters Kubernetes via la ligne de commande. Cloudcraft recommande d’utiliser la dernière version pour éviter tout problème.
De plus, vous devez installer et configurer l’interface de ligne de commande AWS pour gérer vos services AWS à partir de la ligne de commande. Comme pour kubectl, Cloudcraft recommande d’utiliser la dernière version.
Enfin, pour pouvoir scanner correctement vos clusters, Cloudcraft exige qu’ils aient activé un accès public et qu’aucun filtrage d’IP ne soit appliqué. L’option Public Access Source Allow List de la configuration réseau doit rester définie sur sa valeur par défaut, à savoir 0.0.0.0/0.
Créer des entrées d’accès
Commencez par ouvrir un blueprint avec un cluster Amazon EKS existant, ou créez un blueprint pour analyser un compte avec des clusters Amazon EKS.
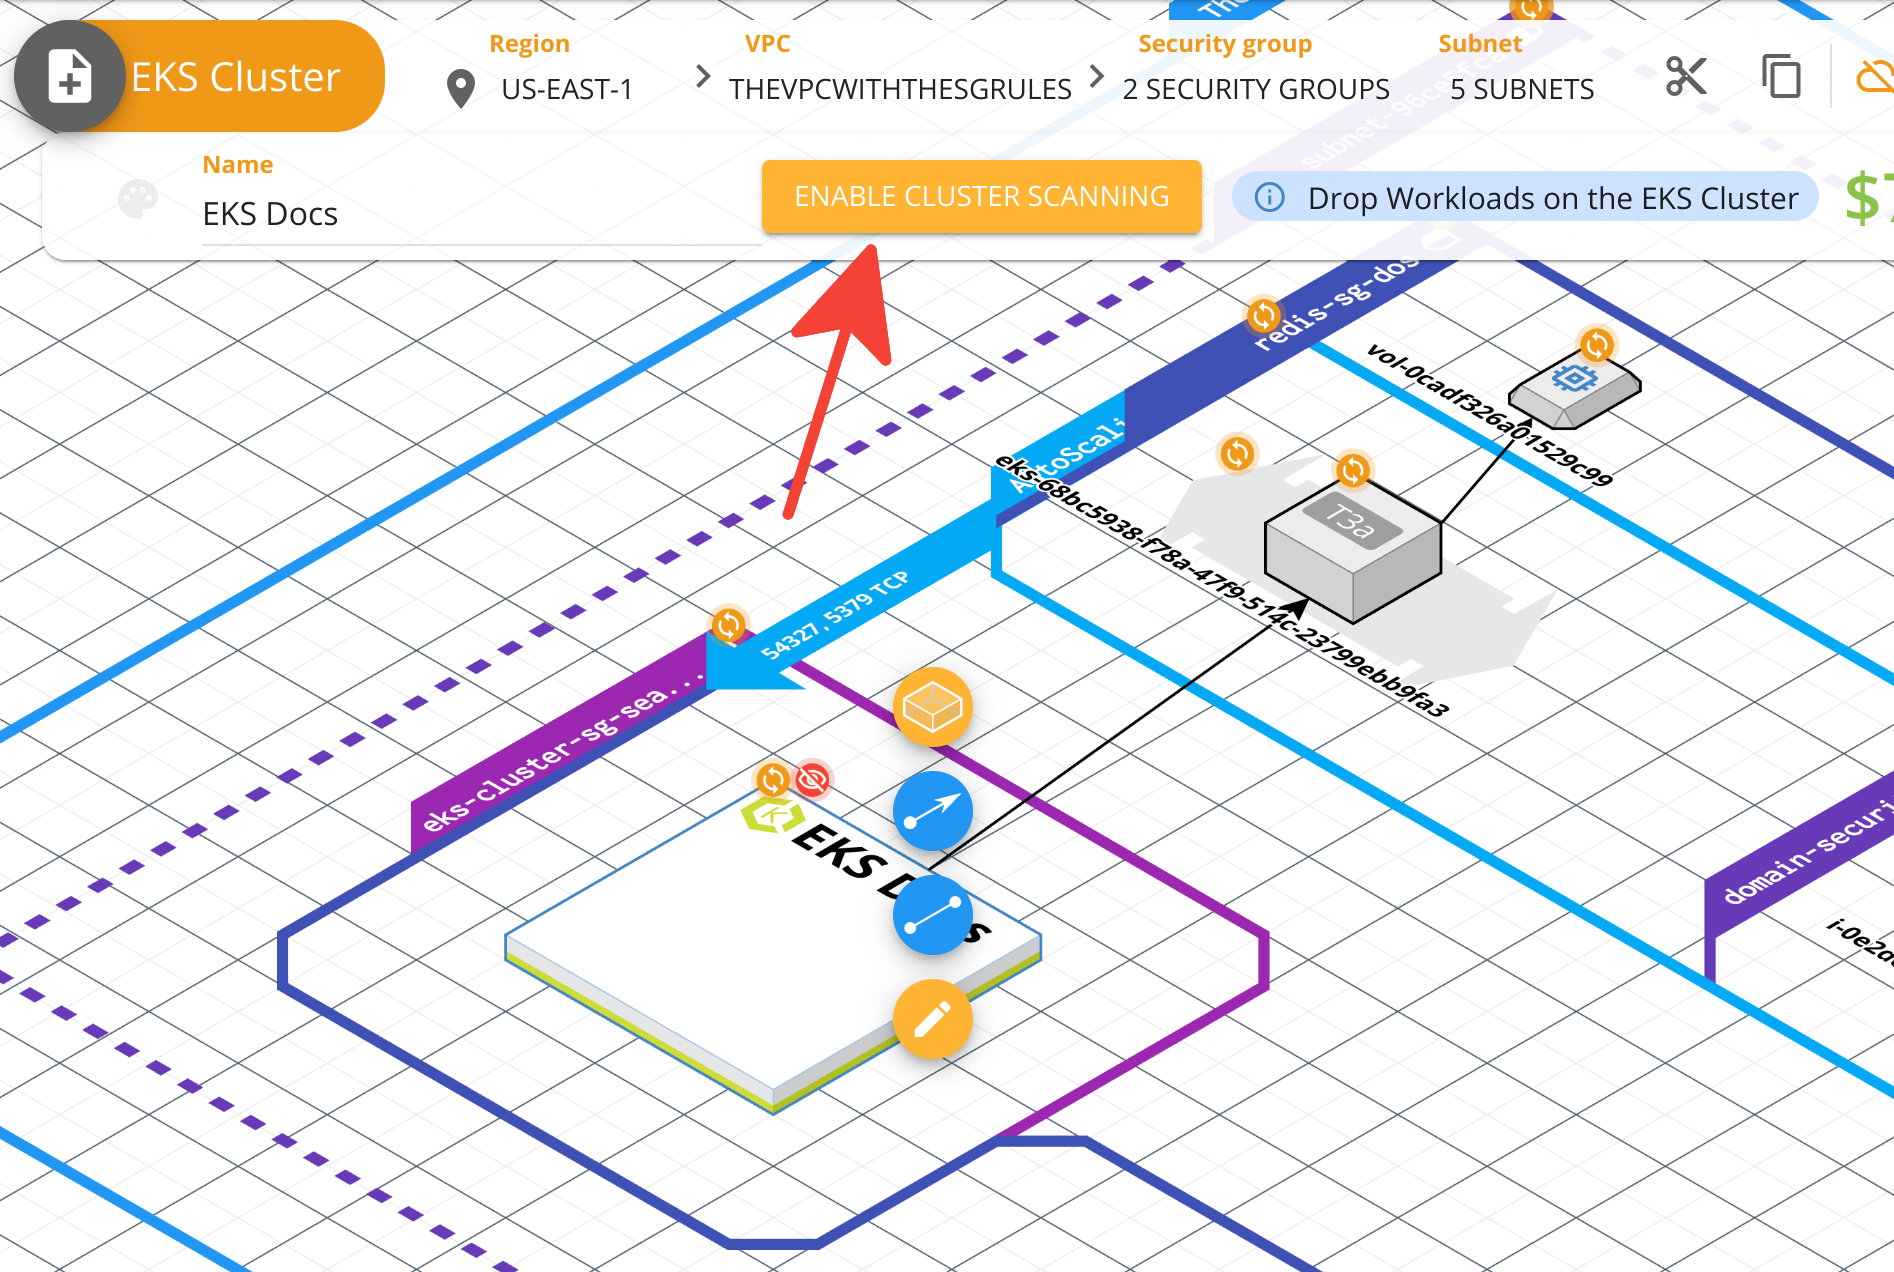
Avec votre environnement AWS mappé dans un blueprint, sélectionnez le cluster Amazon EKS que vous souhaitez analyser et cliquez sur le bouton Enable cluster scanning qui apparaît dans la barre d’outils du composant.
L’écran suivant fournit des commandes détaillées à exécuter dans votre application de terminal préférée.
En tant que créateur du cluster Amazon EKS, ou qu’un utilisateur disposant d’un accès admin, exécutez la commande suivante pour mapper le rôle IAM Cloudcraft au groupe Kubernetes cloudcraft-view-only :
aws eks create-access-entry \
  --cluster-name ${EKS_CLUSTER_NAME} \
  --principal-arn ${CLOUDCRAFT_IAM_ROLE_ARN} \
  --kubernetes-groups 'cloudcraft-view-only'
Accorder un accès en lecture seule au rôle IAM Cloudcraft
Utilisez ensuite ClusterRoleBinding pour lier le rôle IAM à un rôle Kubernetes.
La liaison ClusterRoleBinding accorde les autorisations définies dans un rôle à un utilisateur, ou à un ensemble d’utilisateurs, dans tous les espaces de nommage d’un cluster. Kubernetes définit certains rôles par défaut pour les utilisateurs. Pour Cloudcraft, utilisez le rôle prédéfini « view », qui permet d’accorder un accès en lecture seule à la plupart des objets d’un espace de nommage.
Saisissez la commande multiligne suivante pour créer le ClusterRoleBinding et accorder l’autorisation de lecture seule aux utilisateurs du groupe cloudcraft-view-only.
cat << EOF | kubectl apply -f -
apiVersion: rbac.authorization.k8s.io/v1
kind: ClusterRoleBinding
metadata:
  name: cloudcraft-view-only
subjects:
  - kind: Group
    name: cloudcraft-view-only
    apiGroup: rbac.authorization.k8s.io
roleRef:
  kind: ClusterRole
  name: view
  apiGroup: rbac.authorization.k8s.io
EOF
Tester l’accès au cluster
Pour tester si Cloudcraft peut accéder au cluster, cliquez sur Test cluster access en bas de l’écran Enable Kubernetes Cluster Scanning.
Pour analyser d’autres clusters, répétez ce processus autant de fois que nécessaire.


