Este producto no es compatible con el sitio Datadog seleccionado. ().
Esta página aún no está disponible en español. Estamos trabajando en su traducción. Si tienes alguna pregunta o comentario sobre nuestro actual proyecto de traducción, no dudes en ponerte en contacto con nosotros.
Setting up Code Coverage involves the following steps:
See Data Collected for details on what data is collected from your source code provider.
Data access permissions
If you are using custom roles rather than Datadog-managed roles, be sure to enable the Code Coverage Read permission for the roles that need to view code coverage data.
Navigate to Roles settings, click Edit on the role you need, add the Code Coverage Read permission to the role, and save the changes.
PR Gates
If you wish to gate on PR coverage, you can configure PR Gates rules in one of two ways:
Datadog UI: Navigate to PR Gates rule creation and configure a rule to gate on total or patch coverage.
YAML configuration file: Define gates in your code-coverage.datadog.yml file. This allows you to manage gates as code alongside your repository.
Rules from both sources are evaluated when a pull request is opened or updated. See Configuration for YAML gate syntax and examples.
Upload code coverage reports
Update your CI pipeline to upload code coverage report files to Datadog. This involves installing and running the datadog-ci CLI in your CI environment.
See Data Collected for details on what data is collected during code coverage report upload.
Supported coverage report formats
Datadog supports the following coverage data formats—expand for examples:
If you use GitHub Actions, you can skip this installation step. The GitHub Actions upload method below uses a dedicated action that handles datadog-ci installation automatically.
If installing Node.js in the CI is an issue, standalone binaries are provided with Datadog CI releases. Only linux-x64, linux-arm64, darwin-x64, darwin-arm64 (MacOS) and win-x64 (Windows) are supported. To install, run the following from your terminal:
Alternatively, you can update your CI job to run in a container based on the Datadog CI Docker image.
The image comes with datadog-ci preinstalled and ready to use.
Uploading coverage reports
Datadog automatically aggregates all reports for the same commit on the backend. You don't need to merge coverage reports before uploading them.
To upload your code coverage reports to Datadog, run the following command. Provide a valid Datadog API key (DD_API_KEY), and one or more file paths to either the coverage report files directly or directories containing them:
Use the Datadog Code Coverage Upload GitHub Action. This action automatically installs and runs datadog-ci, so no additional setup is required:
test:
  stage: test
  script:
    - ... # run your tests and generate coverage reports
    - datadog-ci coverage upload . # make sure to add the DD_API_KEY CI/CD variable
The command recursively searches the specified directories for supported coverage report files, so specifying the current directory (.) is usually sufficient.
See the datadog-ci documentation for more details on the datadog-ci coverage upload command.
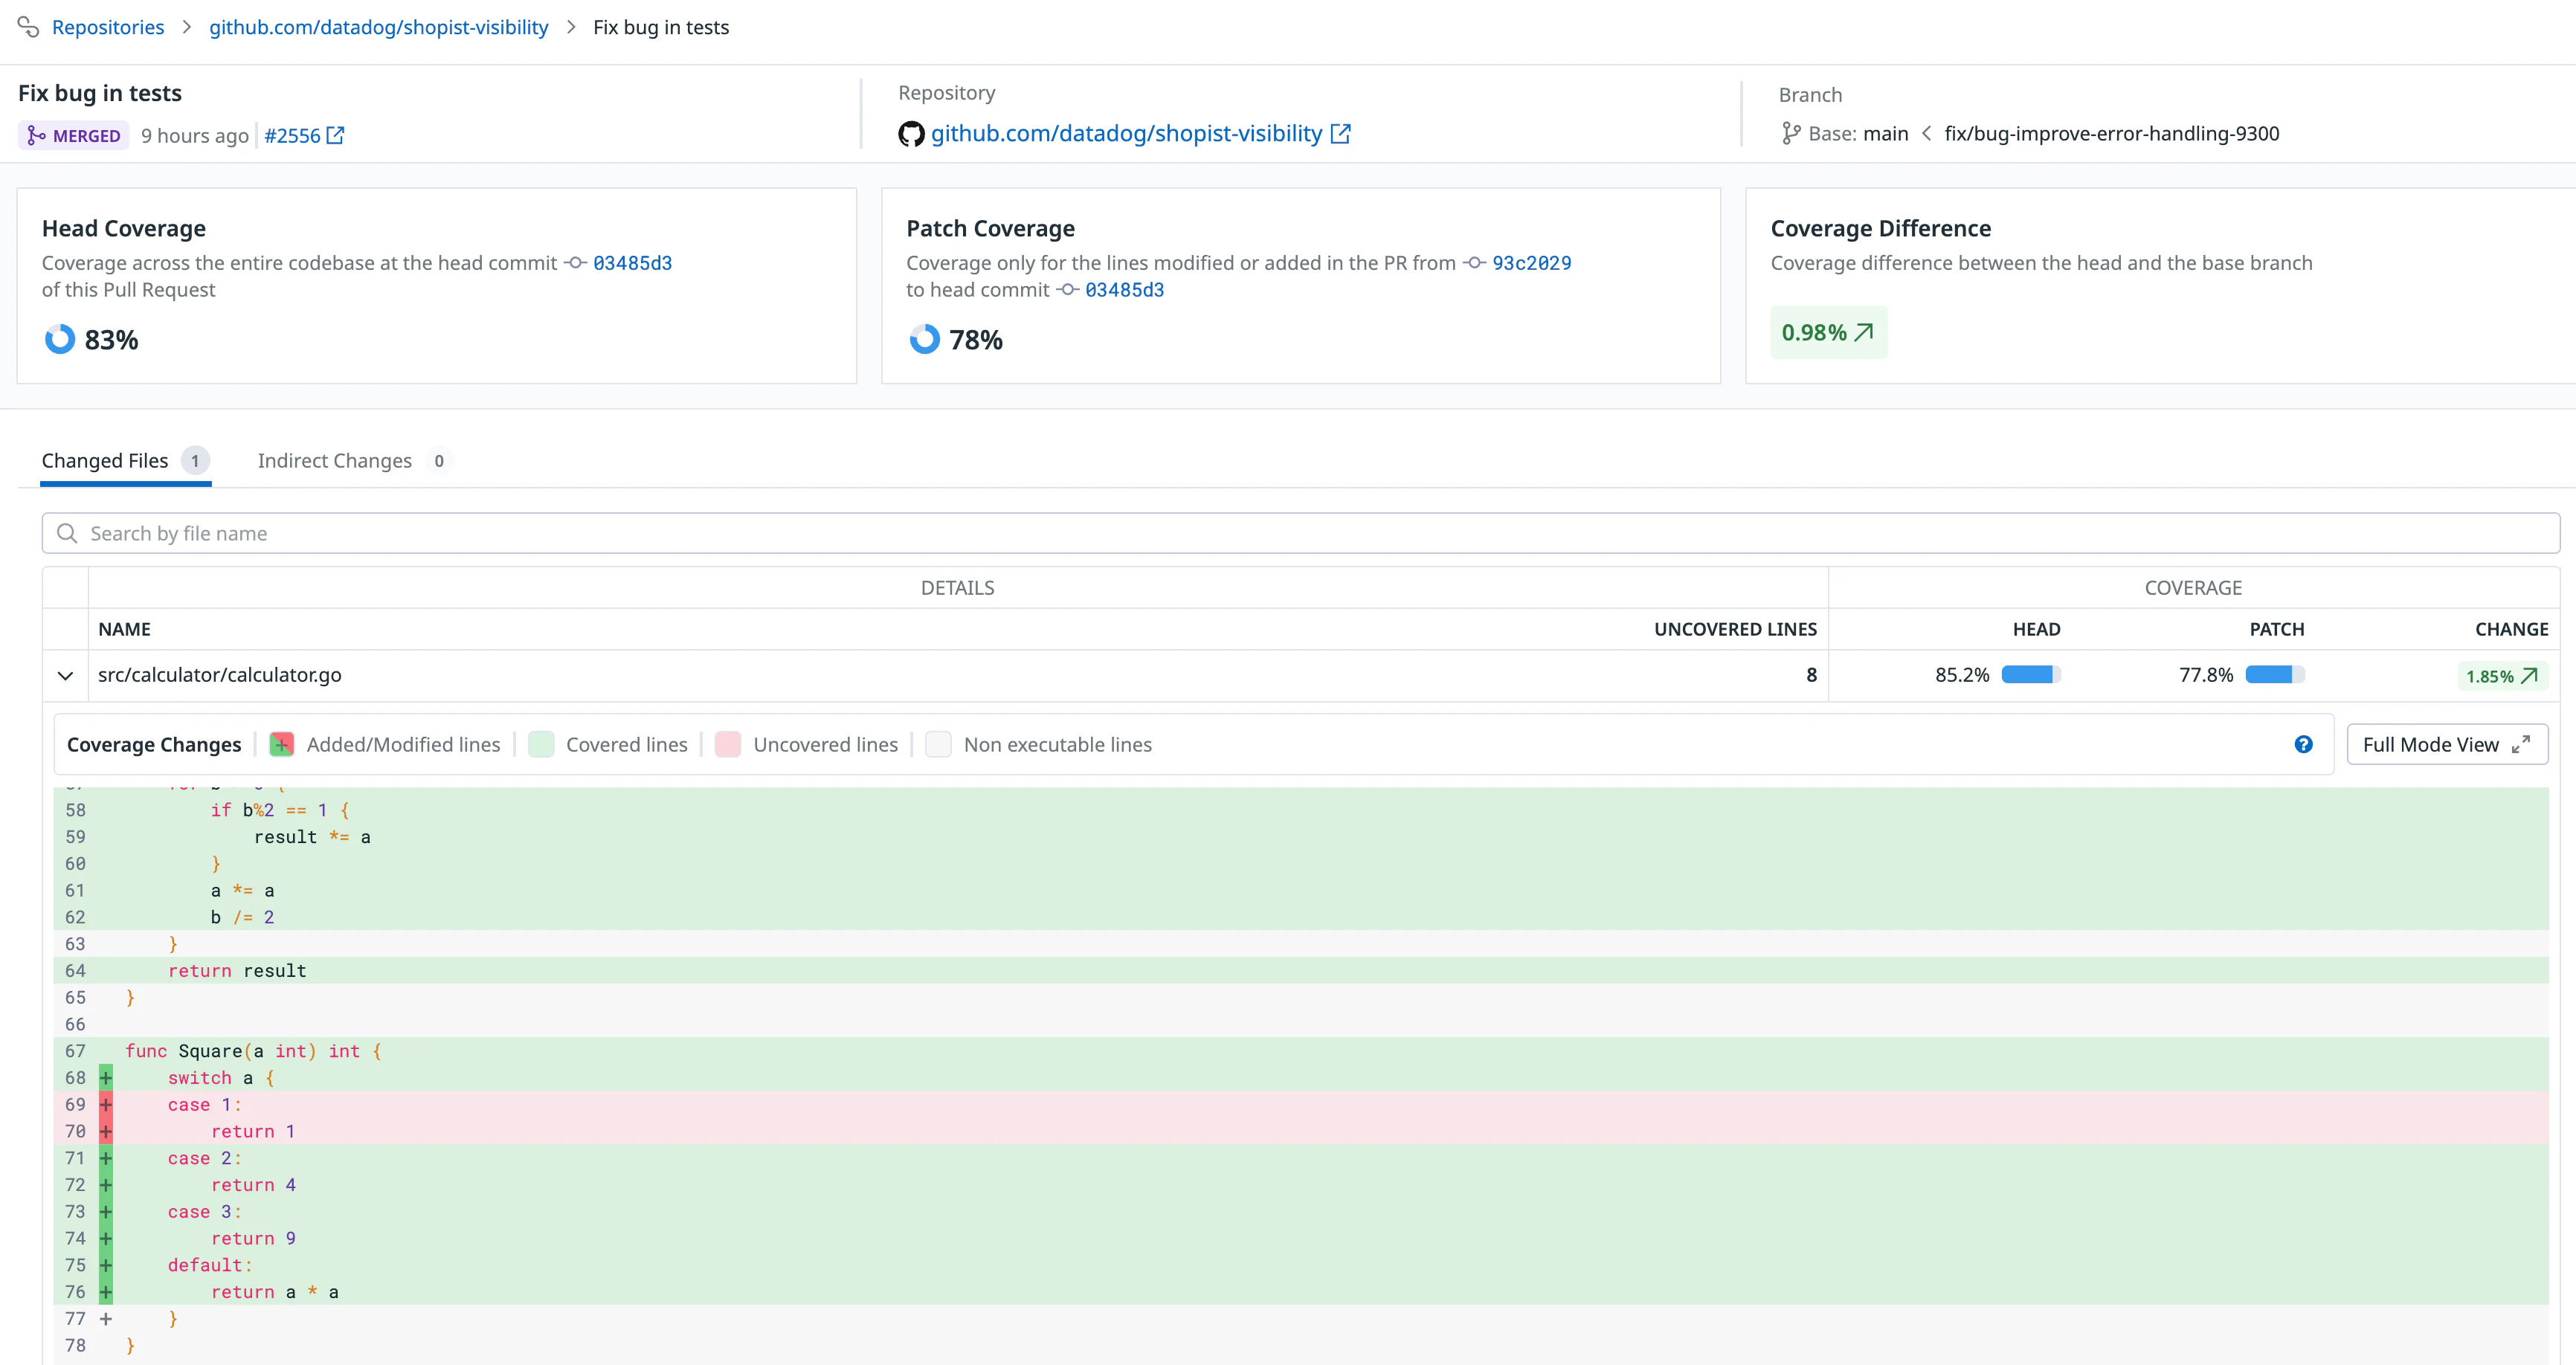
Shortly after the code coverage report upload is finished, Datadog adds a PR comment with code coverage percentage values.
You can also view your coverage data aggregated by pull request in the Code Coverage page in Datadog, with the ability to examine individual files and lines of code.
Troubleshooting
Coverage upload command does not detect coverage report files
The datadog-ci coverage upload command automatically detects supported coverage report files in the specified directories using heuristics, such as file names and extensions.
If your coverage report files do not match expected patterns, the command might not detect them automatically. In this case, specify the report format and provide the file paths as positional arguments. For example:
Coverage upload fails with “Format could not be detected” error
The datadog-ci coverage upload command automatically detects the format of the coverage report files based on their content and file extension.
If the command fails with the following error:
Invalid coverage report file [...]: format could not be detected
specify the format explicitly using the --format option, like this:
Coverage upload outputs “Could not sync git metadata” error
Git metadata upload is only required if you can’t integrate your CI provider directly with Datadog.
If you are using a source code provider integration, such as Datadog GitHub app or Gitlab integration, you can disable the git metadata upload by passing the --skip-git-metadata-upload=1 flag to the datadog-ci coverage upload command, like this:
Datadog UI does not show changed files in the PR view
By default, the “Changed files” table only contains executable source code files that are present in the uploaded coverage reports.
Select Non-executable files or All in the table header to display all files that were changed in the PR, regardless of whether they are executable or not.
If a source code file is mistakenly marked as non-executable, it is probably missing from your uploaded coverage reports.
Make sure that you are uploading all of your relevant reports, and double-check your coverage tool configuration to verify that coverage data is collected for all applicable files.
Test sources are not considered executable files as they are not part of the production codebase being measured for coverage.
Datadog UI shows incorrect file paths
Code Coverage relies on the file paths in coverage reports to be either absolute or relative to the repository root.
If the paths in your report are relative to a different directory in your repository, specify the correct base path (relative to the repo root) with the --base-path option when running the datadog-ci coverage upload command, like this:
Some coverage tools include non-executable lines (such as comments, blank lines, and closing brackets) in their reports, counting them as uncovered. This can lower your coverage percentages and produce false negatives for lines that can never be executed.
During upload, the CLI automatically scans your source files to identify these non-executable lines so they can be excluded from coverage calculations.
File fixes support the following languages: Go, Kotlin, C/C++, Swift, Objective-C, and PHP.
You can control this behavior with the following options:
--file-fixes-search-path <dir>: Override the root directory used to scan source files. By default, the repository root is used. This is useful in monorepos or when your coverage reports only cover a subset of the codebase, as it speeds up the scan by limiting the directory tree traversed.
Discrepancy between Datadog UI and coverage report values
Datadog automatically merges coverage reports for the same commit.
As a result, the coverage percentage displayed in the Datadog UI may differ from the values in your individual coverage reports, especially if those reports contain overlapping or duplicate source code file entries.
If you use an external tool (such as ReportGenerator) to merge coverage reports before uploading to Datadog,
ensure your merged reports do not contain duplicate source code file entries.
Datadog deduplicates overlapping files across reports, which can result in differences between your original coverage values and the merged values displayed in the Datadog UI.