- Essentials
- Getting Started
- Agent
- API
- APM Tracing
- Containers
- Dashboards
- Database Monitoring
- Datadog
- Datadog Site
- DevSecOps
- Incident Management
- Integrations
- Internal Developer Portal
- Logs
- Monitors
- Notebooks
- OpenTelemetry
- Profiler
- Search
- Session Replay
- Security
- Serverless for AWS Lambda
- Software Delivery
- Synthetic Monitoring and Testing
- Tags
- Workflow Automation
- Learning Center
- Support
- Glossary
- Standard Attributes
- Guides
- Agent
- Integrations
- Developers
- Authorization
- DogStatsD
- Custom Checks
- Integrations
- Build an Integration with Datadog
- Create an Agent-based Integration
- Create an API-based Integration
- Create a Log Pipeline
- Integration Assets Reference
- Build a Marketplace Offering
- Create an Integration Dashboard
- Create a Monitor Template
- Create a Cloud SIEM Detection Rule
- Install Agent Integration Developer Tool
- Service Checks
- IDE Plugins
- Community
- Guides
- OpenTelemetry
- Administrator's Guide
- API
- Partners
- Datadog Mobile App
- DDSQL Reference
- CoScreen
- CoTerm
- Remote Configuration
- Cloudcraft (Standalone)
- In The App
- Dashboards
- Notebooks
- DDSQL Editor
- Reference Tables
- Sheets
- Monitors and Alerting
- Service Level Objectives
- Metrics
- Watchdog
- Bits AI
- Internal Developer Portal
- Error Tracking
- Change Tracking
- Event Management
- Incident Response
- Actions & Remediations
- Infrastructure
- Cloudcraft
- Resource Catalog
- Universal Service Monitoring
- End User Device Monitoring
- Hosts
- Containers
- Processes
- Serverless
- Network Monitoring
- Storage Management
- Cloud Cost
- Application Performance
- APM
- Continuous Profiler
- Database Monitoring
- Agent Integration Overhead
- Setup Architectures
- Setting Up Postgres
- Setting Up MySQL
- Setting Up SQL Server
- Setting Up Oracle
- Setting Up Amazon DocumentDB
- Setting Up MongoDB
- Connecting DBM and Traces
- Data Collected
- Exploring Database Hosts
- Exploring Query Metrics
- Exploring Query Samples
- Exploring Database Schemas
- Exploring Recommendations
- Troubleshooting
- Guides
- Data Streams Monitoring
- Data Observability
- Digital Experience
- Real User Monitoring
- Synthetic Testing and Monitoring
- Continuous Testing
- Product Analytics
- Session Replay
- Software Delivery
- CI Visibility
- CD Visibility
- Deployment Gates
- Test Optimization
- Code Coverage
- PR Gates
- DORA Metrics
- Feature Flags
- Security
- Security Overview
- Cloud SIEM
- Code Security
- Cloud Security
- App and API Protection
- AI Guard
- Workload Protection
- Sensitive Data Scanner
- AI Observability
- Log Management
- Observability Pipelines
- Configuration
- Sources
- Processors
- Destinations
- Packs
- Akamai CDN
- Amazon CloudFront
- Amazon VPC Flow Logs
- AWS Application Load Balancer Logs
- AWS CloudTrail
- AWS Elastic Load Balancer Logs
- AWS Network Load Balancer Logs
- Cisco ASA
- Cloudflare
- F5
- Fastly
- Fortinet Firewall
- HAProxy Ingress
- Istio Proxy
- Juniper SRX Firewall Traffic Logs
- Netskope
- NGINX
- Okta
- Palo Alto Firewall
- Windows XML
- ZScaler ZIA DNS
- Zscaler ZIA Firewall
- Zscaler ZIA Tunnel
- Zscaler ZIA Web Logs
- Search Syntax
- Scaling and Performance
- Monitoring and Troubleshooting
- Guides and Resources
- Log Management
- CloudPrem
- Administration
Incident AI
This product is not supported for your selected Datadog site. ().
Overview
Incident AI transforms how your team manages incidents by automating coordination tasks and providing intelligent insights throughout the incident lifecycle. Built into Datadog Incident Management, it works in Slack and the Datadog platform to help you respond faster and learn from every incident.
Key capabilities include:
- Incident summaries: Get context-aware summaries when you join incident channels.
- Related incident detection: Automatic detection of related incidents to identify systemic issues and recurring issues.
- Request information or take action: Declare incidents, update severity and status, search incident history, and more—all through conversational prompts in Slack.
- AI-enhanced notifications: Dynamically populate stakeholder updates with AI-generated summaries of contributing factors, impact, and remediation across email, MS Teams, Slack, and other channels.
- Automated follow-ups: Incident AI collects action items mentioned during incidents and suggests them as follow-up tasks when the incident is resolved.
- Intelligent postmortems: Generate comprehensive first drafts with AI-powered sections covering executive summaries, timelines, customer impact, and lessons learned—giving responders a strong foundation to build on.
Get started with incident coordination
Incident AI helps coordinate incidents—especially those involving multiple teams—by suggesting next steps throughout the incident lifecycle. This streamlines communication and improves overall process management.
- Connect Datadog to Slack.
- In any Slack channel, run the
/dd connectcommand. - Follow the on-screen prompts to complete the connection process.
- In any Slack channel, run the
- Enable the Slack integration in Datadog Incident Management.
- In the Integrations section of the Incidents settings page, find the Slack settings.
- Enable the following toggles:
- Push Slack channel messages to the incident timeline
- Activate Incident AI features in incident Slack channels for your organization
Note: Incident AI’s incident management features can only be activated for one Datadog organization within a single Slack workspace.
- To interact with Incident AI in a Slack channel, invite it by running the
@Datadogcommand.
Customize stakeholder notifications
Incident AI can dynamically populate key details in stakeholder notifications, delivering clearer, faster updates across the tools your team already uses. Notification rules support delivery to a wide variety of destinations, including email, Datadog On-Call, MS Teams, Slack, and more, ensuring AI-enhanced updates reach the right people, on the right platform, at the right time.
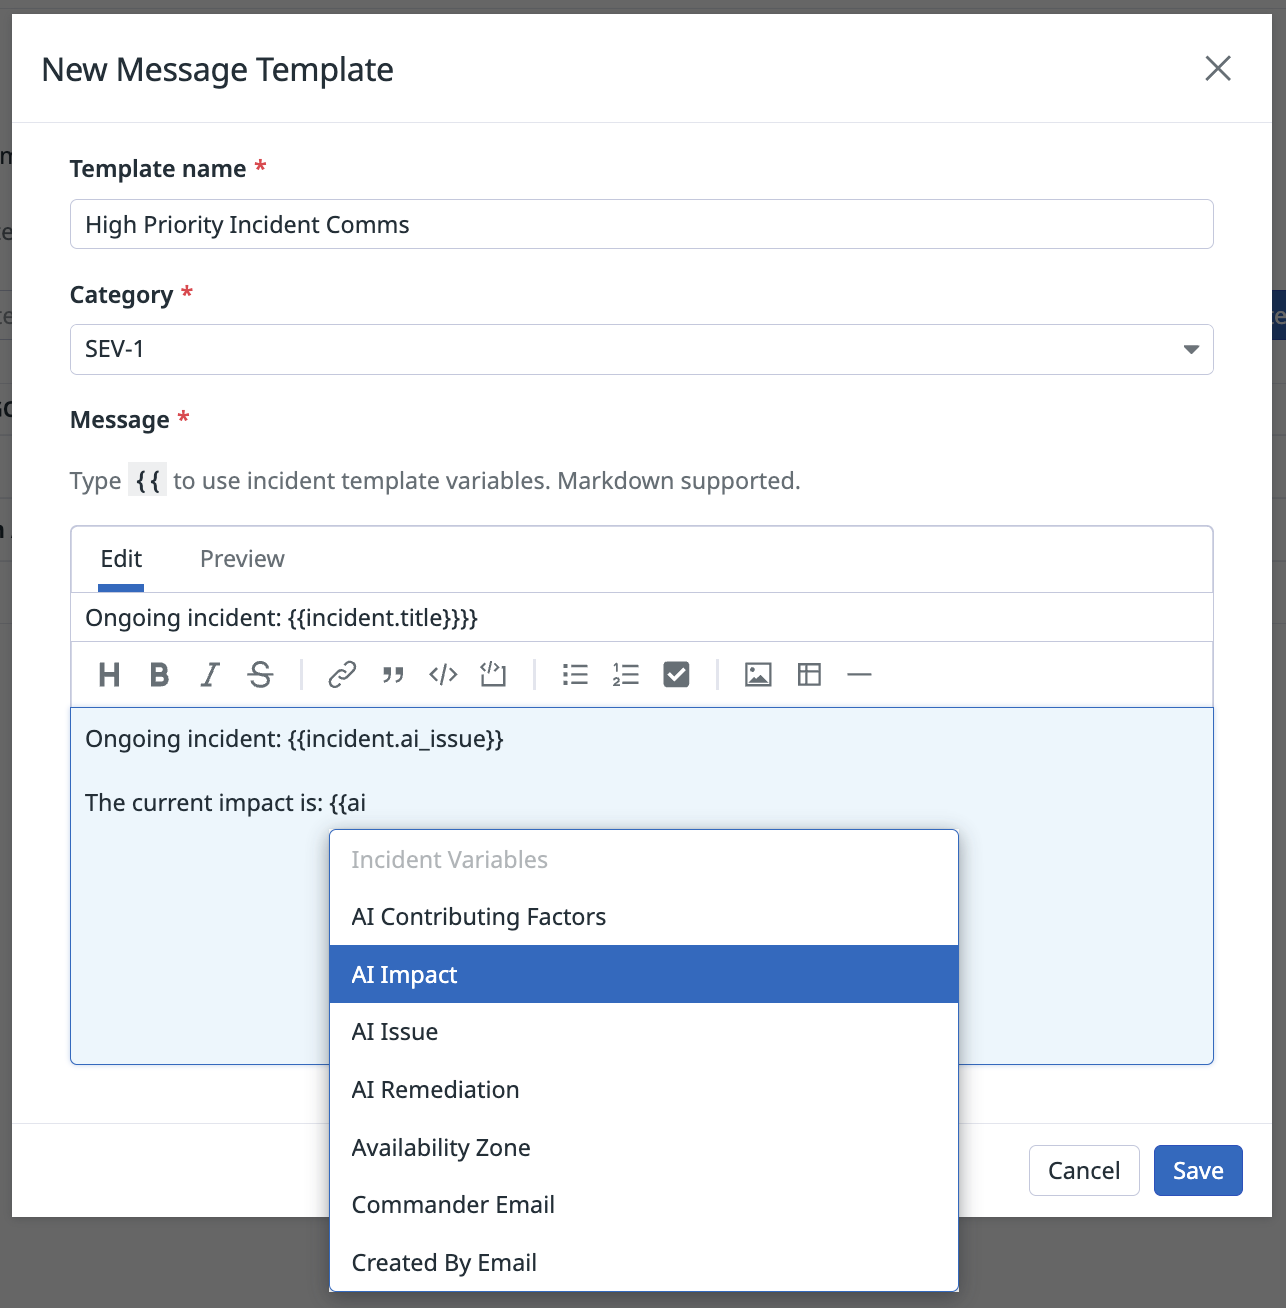
- In your Incidents settings, go to Notification Templates.
- Create a new template or edit an existing one.
- In the message body, insert any of the following AI variables:
Field Variable AI Contributing Factors {{incident.ai_contributing_factors}}AI Impact {{incident.ai_impact}}AI Issue {{incident.ai_issue}}AI Remediation {{incident.ai_remediation}} - Click Save to save the template.
- Go to your incident Notification Rules.
- Click New Rule.
- Under With template…, select the message template you just created.
- Click Save to save the notification rule.
Proactive incident summaries
When you join an incident channel in Slack (connected to Datadog Incident Management), Incident AI automatically posts a summary containing key information about the incident such as the contributing factors, impact, issue, and remediation. This can also be requested ad-hoc using /dd incident summary. This summary is only visible to you.
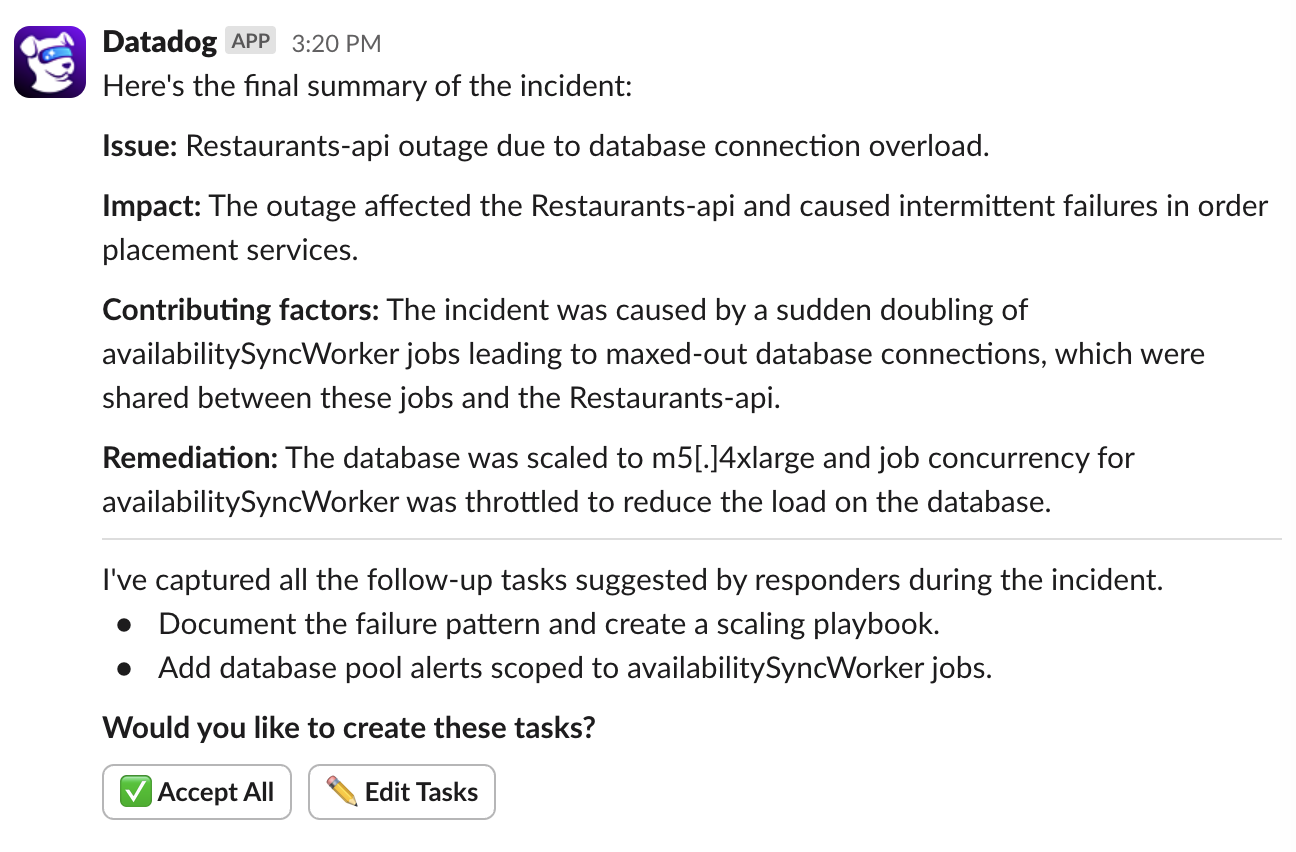
When an incident is changed to resolved, Incident AI posts a final summary. This is visible to everyone in the channel.
Proactive follow-up task suggestion
After an incident is resolved, Incident AI collects any follow-up tasks responders mentioned during the incident. It then prompts you to review and create them with a single click. These tasks are saved as Incident Follow-Ups in Datadog Incident Management. For more information, see Incident Follow-ups.
To view suggested follow-up tasks:
- Navigate to the relevant incident in Datadog.
- Open the Post-Incident tab to view a list of all follow-up tasks you’ve saved from Slack.
Related incident detection
Incident AI automatically flags related incidents if they are declared within 20 minutes of each other, helping you identify broader systemic issues.
Chat with Incident AI
Use natural language prompts to request information or take action from Slack:
| Functionality | Example prompt |
|---|---|
| Declare an incident | @Datadog Declare an incident |
| Change severity | @Datadog Update this incident to SEV-3 |
| Change status | @Datadog Mark this incident as stable@Datadog Resolve this incident |
| Request new summary | @Datadog Give me a summary of this incident@Datadog Summarize incident-262Note: Private incidents are not summarized. |
| Search incident history | @Datadog How many incidents are currently ongoing?@Datadog Show me all Sev-1 incidents that occurred in the past week. |
| Dive into specific incidents | @Datadog What was the root cause of incident-123?@Datadog What remediation actions did the responders take in incident-123? |
| Find related incidents | @Datadog Are there any related incidents?@Datadog Find me incidents related to DDoS attacks from the past month |
| Early detection inquiry | @Datadog A customer is unable to check out. Is there an incident?@Datadog Are there any incidents now impacting the payments service? |
Customize postmortem templates with AI incident variables
- In Datadog, navigate to your incident Postmortem Templates.
- Click New Postmortem Template.
- Customize your template using the following AI variables for dynamic AI-generated content:
Description Variable Executive summary {{incident.ai_summary}}System context and dependencies {{incident.ai_system_overview}}Key event timeline {{incident.ai_key_timeline}}Summary of customer impact {{incident.ai_customer_impact}}Follow-up actions {{incident.ai_action_items}}Key takeaways for future prevention {{incident.ai_lessons_learned}}Note: AI variables must be preceded by a section header.
- Click Save. Your new template appears as a template option during postmortem generation.
Generate a first draft of the incident postmortem
To generate an AI-assisted postmortem draft:
- In Datadog, navigate to the resolved incident you’d like to generate a postmortem for.
- Ensure the incident timeline contains at least 10 messages.
- Click Generate Postmortem.
- Under Choose Template, select either the out-of-the-box General incident with AI content template, or a custom template that you’ve created.
- Click Generate. Allow up to one minute for the postmortem to be generated. Do not close the tab during this time.
- Review the AI-generated postmortem draft. It serves as a starting point for your incident responders. Datadog recommends reviewing and refining the draft before sharing it.
Further reading
Additional helpful documentation, links, and articles:


